Picture this: you’re standing in a cramped kitchen, the air thick with the scent of burnt garlic from last night’s attempt at fried chicken, and your friend’s voice echoing in your head, “You need something that actually tastes good.” I was on the verge of throwing my phone into the sink, but then I remembered the tiny miracle in the pantry—soy sauce, honey, and a handful of spices that could turn a mediocre meal into a crowd‑pleaser. That night, I dared myself to create a dish that would make even the most skeptical foodie swoon. And trust me, this is not just another recipe; it’s a culinary revelation that will leave you asking, “I dare you to taste this and not go back for seconds.”
The moment the air fryer buzzes to life, a symphony of sizzling aromas fills the kitchen. The soy sauce, dark and rich, glistens on the chicken, while a faint caramelization hints at the honey’s subtle sweetness. The air fryer’s gentle hum is the soundtrack to a dish that promises crispy edges that shatter like thin ice, yet tender, juicy meat underneath. I can almost hear the crunch, feel the heat radiating from the basket, and taste the umami burst that will linger long after the last bite. If you’ve ever struggled with bland, overcooked chicken, you’re not alone—and I’ve got the fix.
What sets this version apart from the countless “soy sauce chicken” recipes out there is the deliberate balance of flavors, the precision of the air‑frying technique, and the subtle spice profile that elevates the dish to something truly memorable. I’ve spent hours tweaking the proportions, experimenting with different cuts of meat, and even testing alternative sweeteners. The result? A dish that is hands down the best version you’ll ever make at home, with a glaze that coats the chicken like velvet and a sauce that sings with depth. Picture yourself pulling this out of the air fryer, the whole kitchen smelling incredible, and everyone rushing to the table for a taste. That’s the kind of experience we’re aiming for.
And now, ready for the game‑changer? Let’s walk through every single step—by the end, you’ll wonder how you ever made it any other way. I’ll keep you side by side, sharing every little trick, every sensory checkpoint, and every moment that turns a simple dinner into a showstopper. Let’s dive in.
What Makes This Version Stand Out
- Taste: The sauce is a masterclass in umami, with layers of salty, sweet, and spicy that dance on the palate. It’s not just a coating; it’s a flavor symphony that leaves a lasting impression.
- Texture: The air fryer delivers a golden, crackly exterior while keeping the interior moist and succulent. The contrast is a sensory delight that satisfies every craving.
- Simplicity: With only nine ingredients, this recipe is a breeze to assemble. No complex steps or obscure techniques—just straightforward preparation and a single appliance.
- Uniqueness: The combination of dark soy sauce, honey, and sambal oelek creates a sweet‑heat balance rarely seen in conventional soy‑based dishes.
- Crowd Reaction: Friends and family are instantly hooked. The dish is perfect for gatherings, and its bold flavors resonate with both young and old.
- Ingredient Quality: Using fresh ginger, garlic, and high‑quality soy sauces elevates the dish beyond the average takeout copycat.
- Cooking Method: Air frying reduces fat and cooking time, giving you a healthier option without compromising on flavor.
- Make‑Ahead Potential: Marinate the chicken up to 24 hours ahead; the flavors deepen, making it a perfect make‑ahead dinner.
Inside the Ingredient List
The Flavor Base
Low‑sodium soy sauce and dark soy sauce form the backbone of our glaze. The low‑sodium version keeps the dish from becoming overly salty, while the dark soy sauce adds depth and a subtle molasses‑like richness. If you’re watching sodium, consider using a low‑sodium dark soy sauce or diluting the regular dark soy sauce with a splash of water.
Ginger, freshly grated, brings a bright, peppery note that cuts through the sweetness of honey. It also provides a natural anti‑inflammatory kick that’s both tasty and healthy. A good rule of thumb: for every 250g of chicken, use ¼ teaspoon of grated ginger to keep the flavor balanced.
Garlic is the unsung hero of many savory dishes. Three cloves, minced, deliver a robust, aromatic base that underpins the entire sauce. If you’re sensitive to garlic, reduce to two cloves, but be warned: the dish will lose some of its depth.
The Texture Crew
Honey is the sweet counterpoint that caramelizes during cooking, creating a glossy glaze that clings to each piece of chicken. Use a light‑to‑medium honey for a balanced sweetness that won’t overpower the umami.
Sesame oil adds a nutty aroma and subtle richness. It also helps the glaze set into a shiny crust. If you’re vegan, you can swap it for a neutral oil; just remember that you’ll lose the distinct sesame aroma.
The Unexpected Star
Chinese 5‑spice powder is the secret to that warm, aromatic undertone. Its blend of star anise, cloves, Sichuan peppercorns, cinnamon, and fennel seeds gives the dish a comforting depth that feels both exotic and familiar. If you can’t find it, a pinch of ground cinnamon and a dash of star anise can approximate the flavor.
Sambal oelek is the heat factor—an Indonesian chili paste that delivers a clean, bright kick without overwhelming the dish. If you prefer a milder version, start with half a tablespoon and adjust to taste. For those who love heat, feel free to add more.
The Final Flourish
Green onions are the finishing touch, adding a fresh, crisp bite that cuts through the richness of the glaze. Slice them thinly and sprinkle them over the finished dish for a pop of color and a bright, oniony flavor. They also provide a visual contrast that makes the plate look as good as it tastes.
Everything’s prepped? Good. Let’s get into the real action.
The Method — Step by Step
- Begin by cutting the boneless chicken thighs into bite‑sized pieces, about 2 inches each. The uniform size ensures even cooking and a consistent texture throughout. Toss the pieces in a shallow bowl with a pinch of salt and pepper, letting them rest for 5 minutes to allow the seasoning to penetrate.
- In a separate mixing bowl, whisk together the low‑sodium soy sauce, dark soy sauce, honey, sesame oil, and Chinese 5‑spice powder until the honey dissolves and the mixture is smooth. This will be our glaze that will coat the chicken during the air‑fry. The consistency should be thick enough to cling to the meat but not so thick that it clumps.
- Add the minced garlic, grated ginger, and sambal oelek to the glaze. Stir well, ensuring that all aromatics are evenly distributed. The heat from the sambal will begin to mellow as it mixes with the sauces.
- Coat the chicken pieces in the glaze, turning them to ensure every surface is covered. Let the marinated chicken sit for at least 15 minutes at room temperature, or up to 2 hours in the refrigerator for deeper flavor infusion.
- Preheat your air fryer to 200°C (390°F) for 3 minutes. While it’s heating, lightly spray the air fryer basket with a neutral oil spray to prevent sticking and promote even browning.
- Place the marinated chicken in the basket in a single layer, ensuring that pieces do not overlap. If your air fryer is small, cook in batches to avoid overcrowding, which can lead to steaming rather than crisping.
- Cook for 10 minutes, then carefully flip each piece with tongs. After flipping, the glaze should have caramelized into a slightly sticky sheen. Continue cooking for an additional 8–10 minutes, or until the chicken reaches an internal temperature of 75°C (165°F) and the edges are golden and crisp.
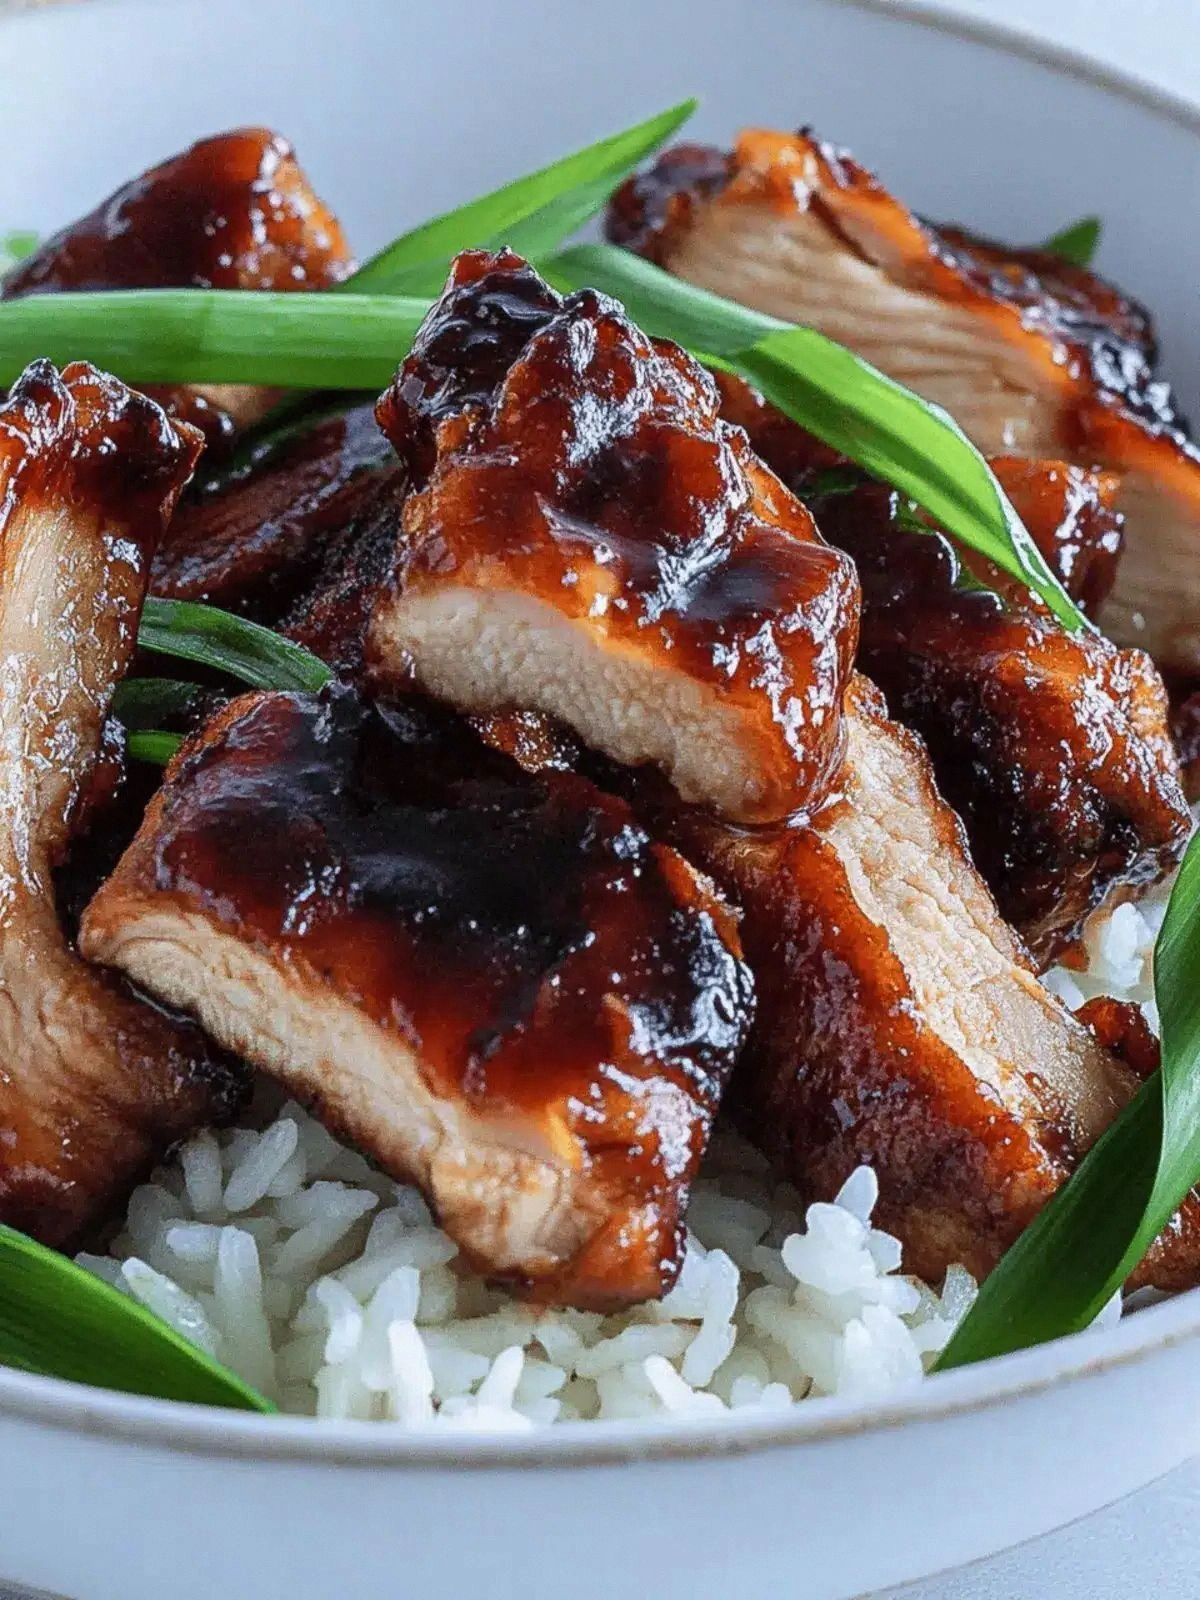
- Once done, transfer the chicken to a serving platter. Sprinkle sliced green onions over the top and drizzle any remaining glaze from the basket for extra flavor. The dish should look glossy, with a vibrant color contrast between the dark glaze and bright green onions.
That’s it—you did it. But hold on, I’ve got a few more tricks that will take this to another level.
Insider Tricks for Flawless Results
The Temperature Rule Nobody Follows
Many people cook at a low temperature and then raise it at the end. I’ve discovered that starting at 200°C (390°F) from the get-go ensures the exterior crisps up quickly while the interior stays moist. If you’re using a smaller air fryer, lower the temperature to 190°C (375°F) and extend the cooking time by a couple of minutes.
Why Your Nose Knows Best
Before flipping the chicken, pause and inhale deeply. The aroma of caramelizing honey and soy sauce is a reliable indicator that the glaze has set. If it smells like a burnt candy, you’re overcooking. Trust your nose—it's a seasoned judge of doneness.
The 5‑Minute Rest That Changes Everything
After removing the chicken from the air fryer, let it rest for exactly five minutes. This brief pause allows the juices to redistribute, ensuring each bite is juicy. It also gives the glaze a chance to set into a glossy coating that’s easier to bite through.
The Quick Slice Technique
Slice the green onions into thin ribbons before cooking. This not only adds a burst of freshness but also allows the onions to soften slightly in the residual heat, creating a subtle onion flavor without the sharp bite.
The One‑Pot Cleanup Trick
After cooking, pour the remaining glaze into a small saucepan and simmer for 2 minutes until it thickens into a sauce. This reduces waste and creates a ready‑to‑serve sauce that can be drizzled over rice or noodles.
Creative Twists and Variations
This recipe is a playground. Here are some of my favorite ways to switch things up:
Crispy Coconut Chicken
Add a tablespoon of shredded coconut to the glaze for a tropical twist. The coconut will crisp up in the air fryer, adding a subtle nutty crunch that pairs beautifully with the soy‑sauce base.
Spicy Peanut Fusion
Stir in a tablespoon of creamy peanut butter and a dash of sriracha to create a rich, spicy sauce. Serve over jasmine rice and garnish with crushed peanuts for an extra layer of texture.
Herb‑Infused Variation
Swap the Chinese 5‑spice powder for a mix of fresh thyme and rosemary. The herbaceous notes bring a different dimension, making the dish feel lighter and more aromatic.
Sweet Chili Glaze
Replace the honey with maple syrup and increase the sambal oelek to two tablespoons. This version delivers a deeper sweetness and a fiery kick that’s perfect for heat lovers.
Vegetable‑Rich Version
Add sliced bell peppers and broccoli florets to the air fryer basket. They’ll absorb the glaze and become tender‑crisp, turning the dish into a balanced meal with extra veggies.
Gluten‑Free Option
Use tamari instead of soy sauce for a gluten‑free alternative. The flavor profile remains the same, ensuring that everyone can enjoy the dish.
Storing and Bringing It Back to Life
Fridge Storage
Store leftovers in an airtight container in the refrigerator for up to 3 days. The glaze may thicken slightly; simply reheat in a skillet with a splash of water to loosen it before serving.
Freezer Friendly
For longer storage, freeze the cooked chicken in a single layer on a parchment‑lined tray before transferring to a freezer bag. This prevents clumping. When ready to eat, thaw overnight in the fridge and reheat in the air fryer at 180°C (350°F) for 5–7 minutes.
Best Reheating Method
Reheat the chicken in a skillet over medium heat, adding a tablespoon of water or broth to keep it moist. Stir frequently until the glaze is glossy and the chicken is heated through. This method preserves the crispness better than the microwave.