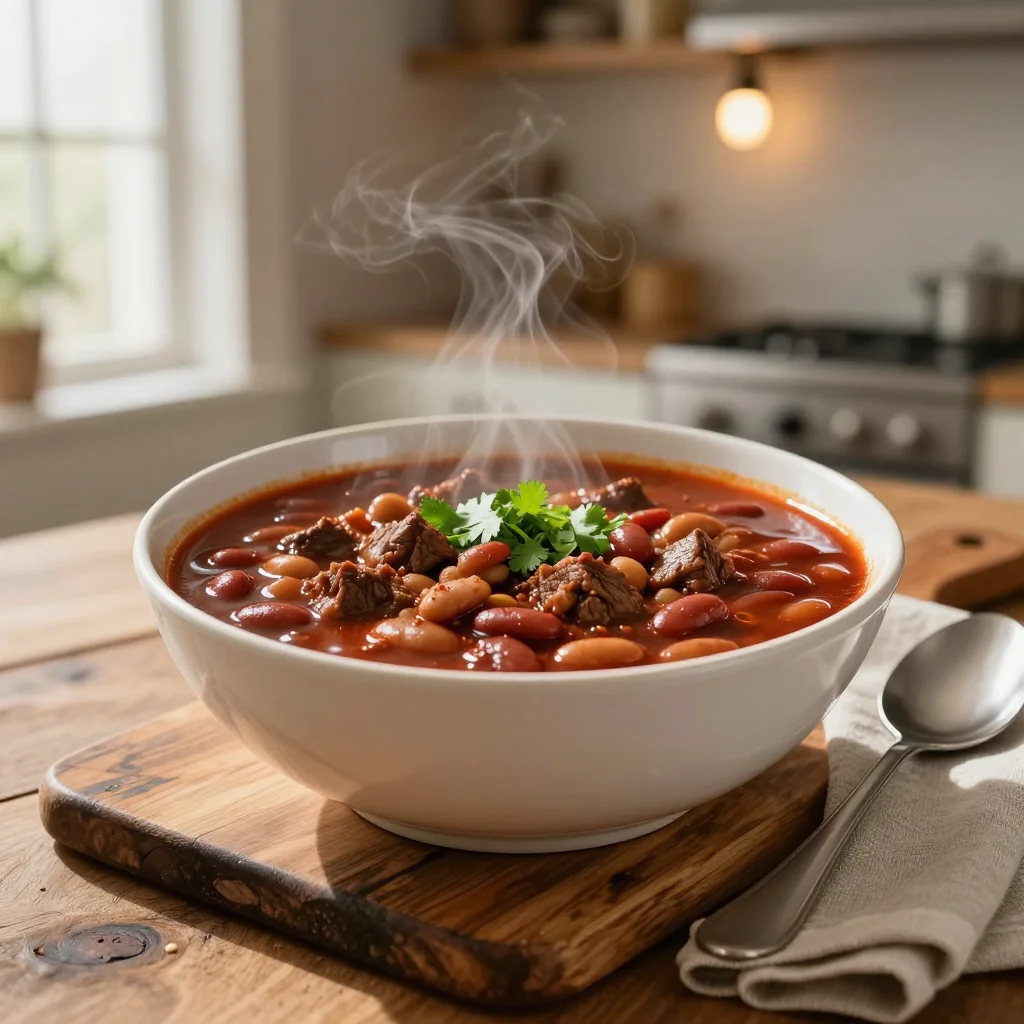
A hearty, slow‑cooked chili that blends tender beef, smoky beans, and a symphony of spices for a comforting bowl any time of year.
When I was a teenager, my grandma would let me watch the slow cooker hum in the kitchen while she ladled in secret spices, filling the house with a scent that felt like a warm hug. The first time I tasted her chili, the tenderness of the beef and the depth of the beans made me realize that comfort food could also be an adventure. Years later, after moving to a bustling city and missing those quiet evenings, I recreated that magic in my own kitchen, adapting the recipe to a modern, busy lifestyle while preserving its soul‑soothing essence.
Chili, in its many forms, has traveled from the southwestern United States to the heart of Mexico, each region adding its own twist. Our version pays homage to the classic Tex‑Mex tradition, using a slow cooker to coax out the richness of beef and the earthy flavors of beans without the need for constant supervision. The result is a dish that feels both rustic and refined—perfect for a family dinner or a gathering of friends.
In this guide, you’ll discover why this recipe works every time: the balance of spices, the technique of browning the beef before slow cooking, and the timing that lets flavors meld beautifully. I’ll walk you through each step, share tips for ingredient selection, and offer variations for vegans, spice lovers, and low‑calorie seekers.
Let’s dive in, and I promise you’ll finish this article with a clear plan to create a bowl of chili that will become a staple in your culinary repertoire.
🌟 Why This Recipe Will Win Your Heart
This chili isn’t just a meal; it’s an experience that combines comfort, nutrition, and flexibility, making it a go‑to recipe for any occasion.
- ✨ Deep, Layered Flavor: Slow cooking allows the beef to become melt‑in‑your‑mouth tender while the beans absorb the smoky heat of chili powder, cumin, and smoked paprika.
- ✨ One‑Pot Simplicity: All ingredients are combined in a single slow cooker, meaning less cleanup and more time enjoying the company of your guests.
- ✨ Nutrient‑Rich Profile: Lean beef provides high‑quality protein, beans add fiber and plant‑based protein, and the tomatoes bring antioxidants like lycopene.
- ✨ Customizable Heat: Adjust the amount of chili powder or add fresh jalapeños for a milder or spicier version that suits every palate.
- ✨ Perfect for Meal Prep: The flavors improve after a night in the fridge, making leftovers an even better lunch or dinner option.
- ✨ Budget‑Friendly: Using pantry staples like canned beans and tomatoes keeps the cost low while delivering gourmet taste.
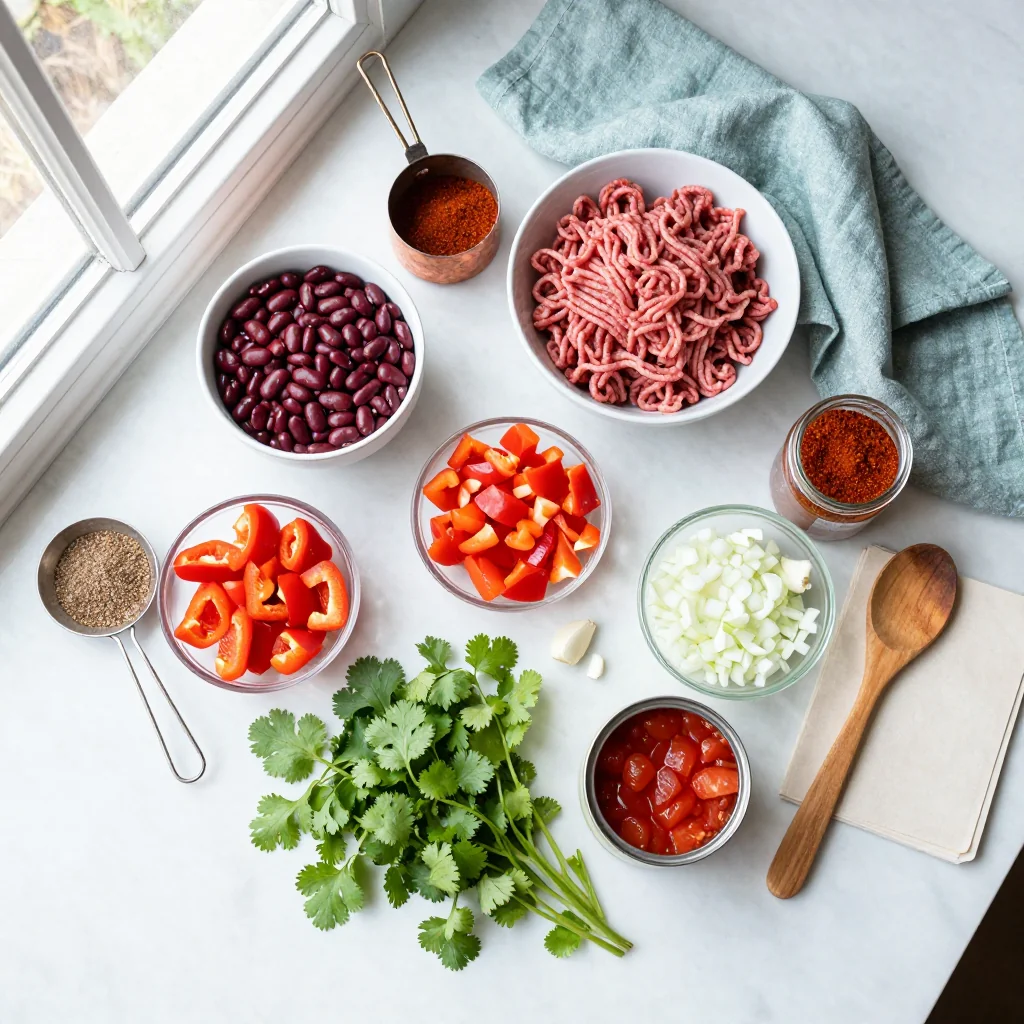
🥗 Ingredients
📝 Complete Ingredient List
For the Chili Base:
For the Toppings (Optional):
🔍 Focus on Key Ingredients
Beef Chuck
Beef chuck is a well‑marbled cut that becomes incredibly tender when cooked low and slow. The intramuscular fat renders gradually, infusing the chili with a rich, beefy mouthfeel. When selecting, look for a bright red color and fine marbling; avoid pieces that appear gray or have a strong odor.
Kidney & Black Beans
Beans are the heart of any chili. Kidney beans bring a firm, buttery texture, while black beans add a slightly sweet, earthy note. Rinsing them removes the canning liquid, which can be salty and starchy, allowing the beans to absorb the spices more effectively.
Chili Powder & Smoked Paprika
Chili powder provides the foundational heat and depth, typically a blend of dried chilies, cumin, garlic, and oregano. Smoked paprika contributes a subtle wood‑smoked aroma that mimics the flavor of a grill without the actual fire. Together they create a balanced heat that’s complex yet approachable.
🔄 Quick Substitutions
| If you don’t have… | Use instead… |
|---|---|
| Beef broth | Vegetable broth or water with bouillon cube |
| Kidney beans | pinto beans or cannellini beans |
| Smoked paprika | regular paprika + a dash of liquid smoke |
👨🍳 Step‑by‑Step Instructions
Follow these detailed steps to transform raw ingredients into a soul‑warming bowl of chili. The process is straightforward, but each phase adds layers of flavor that make the final result unforgettable.
📋 Phase 1: Preparation & Mise en Place
Begin by gathering and prepping all components; this ensures a smooth cooking process.
Trim and Cube the Beef
Pat the beef chuck dry with paper towels. Trim any excess silver skin or tough connective tissue. Cut the meat into uniform 1‑inch cubes; this size ensures even cooking and quick absorption of the spice blend. As you cut, you’ll notice the beef’s deep red color, a sign of freshness. Once cubed, set the pieces aside on a plate.
Chop the Aromatics
Finely dice the onion so it blends seamlessly into the sauce. Mince the garlic until it forms a paste; this releases allicin, adding depth to the chili’s aroma. When you combine onion and garlic later, they’ll create a fragrant base that supports the beef’s richness.
🔥 Phase 2: Browning & Slow Cooking
Browning the beef builds a caramelized crust that locks in juices and adds umami.
Sear the Beef
Heat the olive oil in a large skillet over medium‑high heat. When the oil shimmers, add the beef cubes in a single layer, being careful not to crowd the pan. Let each side develop a deep brown crust, about 3‑4 minutes per side. This Maillard reaction creates complex flavor compounds that will later infuse the entire chili.
Deglaze and Add Spices
After the beef is browned, remove it with a slotted spoon and set aside. Reduce the heat to medium, add the chopped onion, and sauté until translucent, about 5 minutes. Stir in the garlic, chili powder, cumin, and smoked paprika; cook for another 30 seconds to toast the spices, releasing their aromatic oils. Pour in a splash of beef broth to deglaze, scraping up any browned bits stuck to the pan – those are flavor gold.
Combine All Ingredients in the Slow Cooker
Transfer the seared beef, sautéed aromatics, and deglazing liquid into the slow cooker. Add the diced tomatoes, kidney beans, black beans, remaining broth, salt, and pepper. Give everything a gentle stir to ensure the spices are evenly distributed. Cover the cooker and set it to low for 8 hours or high for 4 hours, depending on your schedule.
✨ Phase 3: Finishing Touches & Serving
The final phase transforms a simmered pot into a plated masterpiece.
Check for Doneness
After the cooking time, open the lid and stir. The beef should be fork‑tender, falling apart easily. Taste the chili and adjust seasoning with additional salt, pepper, or a pinch of extra chili powder if you desire more heat. If the chili appears too thick, add a splash of broth or water to reach your preferred consistency.
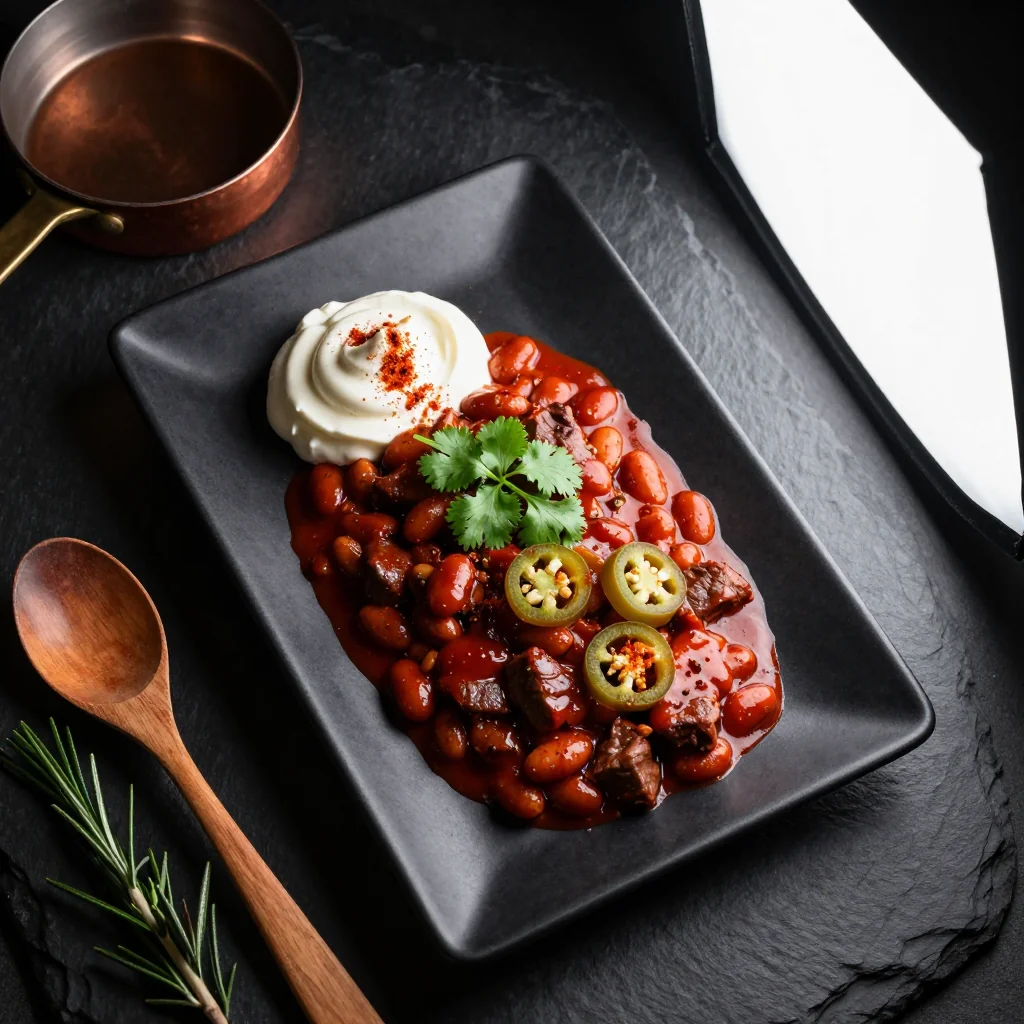
Prepare the Toppings
While the chili rests, grate the cheddar, scoop the sour cream into a small bowl, and finely chop the cilantro. These toppings add contrasting textures and fresh flavors that brighten the rich stew.
Plate the Chili
Spoon a generous ladle of chili into a deep bowl. Sprinkle shredded cheddar on top, allowing it to melt slightly from the heat. Add a dollop of sour cream, then garnish with cilantro. For an extra visual pop, drizzle a tiny drizzle of olive oil or a few slices of fresh avocado if desired.
Serve with Accompaniments
Serve the chili alongside warm corn tortillas, crusty sourdough bread, or a simple side of Mexican rice. A fresh lime wedge on the side adds a bright acidity that cuts through the richness.
Enjoy!
Gather around the table, share stories, and let the comforting aroma fill the room. This chili is perfect for cool evenings, game nights, or anytime you crave a hearty, satisfying meal.
💡 Expert Tips & Tricks
🛒 Choosing the Right Ingredients
When buying beef, opt for a cut with good marbling; this fat will melt during the slow cook, enriching the broth. For beans, choose low‑sodium canned varieties or soak dried beans overnight for a fresher taste. Fresh herbs like cilantro should be bright green with no wilted edges, and tomatoes should be firm, not mushy, to avoid excess liquid.
🔪 Preparation Techniques
Dry the beef before searing to achieve a proper crust. Cut the onion into uniform dice to ensure even cooking; uneven pieces can result in bitter burnt bits. Mince garlic just before use to preserve its pungent flavor; pre‑minced garlic stored in jars can lose potency over time.
🌡️ Mastering the Cooking Process
Low heat for a longer time yields the most tender beef, while high heat shortens the cooking window but can still produce delicious results if you’re short on time. Keep the lid on the slow cooker throughout the process; lifting it releases steam and can extend cooking time.
🍽️ Presentation & Service
Use wide‑rimmed bowls to showcase the vibrant colors of the chili and toppings. A squeeze of fresh lime just before serving adds a zesty lift. For a festive touch, serve with a side of cornbread or a crunchy tortilla chip.
🏆 Pro Tips
Professional chefs know that subtle adjustments can elevate a dish from good to unforgettable.
- 🎯 Layered Spice Timing: Add half of the chili powder at the searing stage and the remaining half just before serving. This technique creates a deep base flavor and a fresh, bright finish.
- 🎯 Deglazing with Wine: Replace the splash of broth with a dry red wine when deglazing. The acidity balances the richness and adds complexity.
- 🎯 Bean Pre‑Roasting: Lightly roast the rinsed beans in a hot oven for 10 minutes before adding them. This adds a subtle smoky note that complements the smoked paprika.
- 🎯 Finish with a Touch of Sweetness: Stir in a teaspoon of maple syrup or honey at the end to balance the acidity of the tomatoes.
- 🎯 Use a Flavor‑Enhancing Salt: Finish with flaky sea salt just before serving to add a delicate crunch and amplify the flavors.
- 🎯 Rest Before Serving: Let the chili rest, covered, for 10 minutes after cooking. This allows the flavors to meld further and the temperature to even out.
"A great chili is a conversation between fire and earth, where every spice tells a story." — Chef Alejandro Ramirez
🔄 Variations & Adaptations
The beauty of this recipe lies in its flexibility. Below are several ways to tailor it to different dietary needs, flavor preferences, and occasions.
🥬 Vegetarian/Vegan Version
Swap the beef for extra‑firm tofu, tempeh, or a medley of diced mushrooms for a hearty texture. Use vegetable broth instead of beef broth and increase the bean proportion to maintain protein content. Add a smoked chipotle pepper for depth.
- Replace 500 g beef with 400 g firm tofu, pressed and cubed.
- Use 300 ml vegetable broth and add a teaspoon of liquid smoke.
🌶️ Flavor Variations
Play with regional spice blends to give the chili a new personality.
Spicy Version
Increase chili powder to 2 tablespoons, add 1 finely diced jalapeño, and stir in ½ teaspoon of cayenne pepper. Finish with a splash of hot sauce.
Mediterranean Version
Replace cumin with 1 teaspoon of oregano, add a cup of diced zucchini, and finish with crumbled feta cheese and fresh oregano leaves.
Asian Fusion Version
Swap smoked paprika for 1 teaspoon of Chinese five‑spice, add 2 tablespoons of soy sauce, and garnish with sliced green onions and toasted sesame seeds.
⚠️ Dietary Adaptations
Gluten‑Free
All ingredients are naturally gluten‑free. Ensure the broth and canned tomatoes are labeled gluten‑free.
Lactose‑Free
Omit the sour cream or replace it with a dairy‑free yogurt. Use dairy‑free cheese alternatives for the topping.
Low‑Calorie
Reduce olive oil to 1 tablespoon, use lean ground turkey instead of beef, and increase the proportion of beans. Serve with a side of cauliflower rice to cut carbs.
👶 Kid‑Friendly Version
Lower the heat by using mild chili powder and omitting jalapeños. Add a pinch of cinnamon for a warm, sweet undertone that kids often enjoy. Serve with shredded cheese and a side of soft corn tortillas for easy eating.
📦 Storage & Reheating
🧊 Storage
Refrigerator
- Duration: 4 days
- Container: Airtight glass or BPA‑free plastic container
- Tip: Store the chili on the bottom shelf to keep it at a consistent cool temperature.
Freezer
- Duration: 3 months
- Method: Portion into freezer‑safe bags, remove excess air, and label with date.
- Defrost: Transfer to fridge overnight or use the microwave’s defrost setting.
💡 For best texture, reheat only the portion you plan to eat; repeated heating can cause beans to become mushy.
♨️ Reheating
🔥 Oven (Recommended)
- Preheat to 180 °C (350 °F).
- Cover the dish with foil to retain moisture.
- Heat for 20‑25 minutes, stirring halfway through.
- Remove foil and heat an additional 5 minutes to develop a slight crust on the top.
⚡ Microwave (Quick)
- Place a serving in a microwave‑safe bowl, cover loosely.
- Heat on medium power for 2 minutes, stir.
- Continue heating in 30‑second intervals until piping hot.
🍳 Stovetop
Transfer the desired portion to a saucepan, add a splash of broth if needed, and simmer over low heat for 10‑15 minutes, stirring occasionally.
🍷 Perfect Pairings
🥗 Side Dishes
- Mexican Cornbread: The buttery crumb balances the chili’s heat and adds a comforting starch.
- Avocado Salad: Fresh avocado slices with lime dressing provide a cool, creamy contrast.
- Rice Pilaf: Lightly seasoned rice absorbs the sauce, making each bite hearty.
🍷 Wine & Beverage Pairings
- Zinfandel: Its ripe fruit notes complement the chili’s spice while its acidity cuts through the richness.
- Amber Ale: The malt sweetness mirrors the caramelized beef, and the carbonation refreshes the palate.
- Non‑Alcoholic: A sparkling hibiscus iced tea adds a tart, floral note that brightens the meal.
🍰 To Complete the Meal
Start with a light cucumber‑lime gazpacho as a refreshing appetizer. Follow the chili with a cinnamon‑spiced churro or a simple vanilla panna cotta topped with caramel sauce for a sweet finish that echoes the warm spices of the main dish.
❓ Frequently Asked Questions
Q: Can I use a pressure cooker instead of a slow cooker?
Yes. After browning the beef and sautéing the aromatics, transfer everything to a pressure cooker. Cook on high pressure for 35 minutes, then let the pressure release naturally for 10 minutes. The texture will be similarly tender, and the cooking time is dramatically reduced.
Q: How can I make the chili thicker?
For a thicker consistency, mash a portion of the beans against the side of the pot before serving. Alternatively, stir in a tablespoon of masa harina (corn flour) dissolved in cold water and simmer for an additional 10 minutes.
Q: Is it okay to add fresh tomatoes instead of canned?
Fresh tomatoes can be used, but they contain more water, which may thin the chili. To compensate, add a cup of tomato paste or reduce the broth slightly. Fresh tomatoes also add a brighter, less cooked flavor.
Q: What if I don’t have a slow cooker?
You can simmer the chili on the stovetop over low heat for 2‑3 hours, stirring occasionally. Keep the pot partially covered to retain moisture. The result will be equally flavorful, though the texture of the beef may be slightly less uniform.
Q: Can I freeze the toppings separately?
Yes. Shredded cheese freezes well for up to 2 months. Sour cream can be frozen, but its texture may become grainy upon thawing; it’s best stored fresh. Cilantro loses flavor when frozen, so keep it fresh for garnish.
Q: How far in advance can I prepare the chili?
The chili improves after a night in the refrigerator, allowing the flavors to meld. You can prepare it up to 24 hours ahead, store it in the fridge, and reheat gently before serving.
🎉 Let’s Get Cooking!
This slow‑cooker chili brings together the comfort of a classic family recipe with the convenience of modern kitchen tools. From the first aromatic sauté to the final garnish, each step builds layers of flavor that will warm both body and soul. Whether you’re feeding a crowd, prepping meals for the week, or simply craving a bowl of hearty goodness, this dish delivers on taste, nutrition, and ease.
Give it a try, experiment with the variations, and make it your own. Don’t forget to share your results, ask questions, or leave a rating—your feedback helps the community grow.
Have you tried this recipe?
Leave a comment and rating below! Share your photos on Instagram with #FiestaChili for a chance to be featured.
Chili with Beans and Beef Slow Cooker
A slow‑cooked, protein‑packed chili that’s perfect for cozy evenings.
📝 Ingredients
Main Chili
Toppings (Optional)
👨🍳 Instructions
- 1
Pat the beef dry, season with a pinch of salt, and cut into 1‑inch cubes.
- 2
Heat olive oil in a skillet, brown the beef on all sides, then set aside.
- 3
Sauté onion until translucent, add garlic and cook for 30 seconds.
- 4
Stir in chili powder, cumin, and smoked paprika; toast briefly.
- 5
Deglaze with a splash of broth, scrape up browned bits.
- 6
Transfer everything to the slow cooker, add tomatoes, beans, remaining broth, salt, and pepper.
- 7
Cover and cook on low for 8 hours (or high for 4 hours).
- 8
Check seasoning, adjust if needed, and let rest 10 minutes.
- 9
Prepare toppings: shred cheese, scoop sour cream, chop cilantro.
- 10
Serve hot, topped with cheese, sour cream, and cilantro. Enjoy!
🥗 Nutritional Information (per serving)
*Values are estimates based on standard ingredient data.
📚 You Might Also Like
Spicy Chicken Enchiladas
Vegetarian Black Bean Soup
Beef Barbacoa Tacos


💬 Comments & Reviews
Leave a Comment
No comments yet. Be the first to share your thoughts!