Let me set the scene: it was a rainy Thursday, the kind of day where the clouds look like they’re auditioning for a drama series, and my cravings for something crunchy and comforting were gnawing at me like a squirrel on a nut. I tried a frozen chicken patty, but it was soggy, bland, and frankly, a betrayal of the very idea of “crispy”. I dared my roommate to a “best chicken bite” contest, and she laughed because she’d never tasted anything that could actually win. Spoiler: we both lost, because the next thing I whipped up was the most unforgettable, golden‑crusted chicken cutlet you could ever imagine. This isn’t just a recipe; it’s a culinary showdown that turned a kitchen mishap into a triumph.
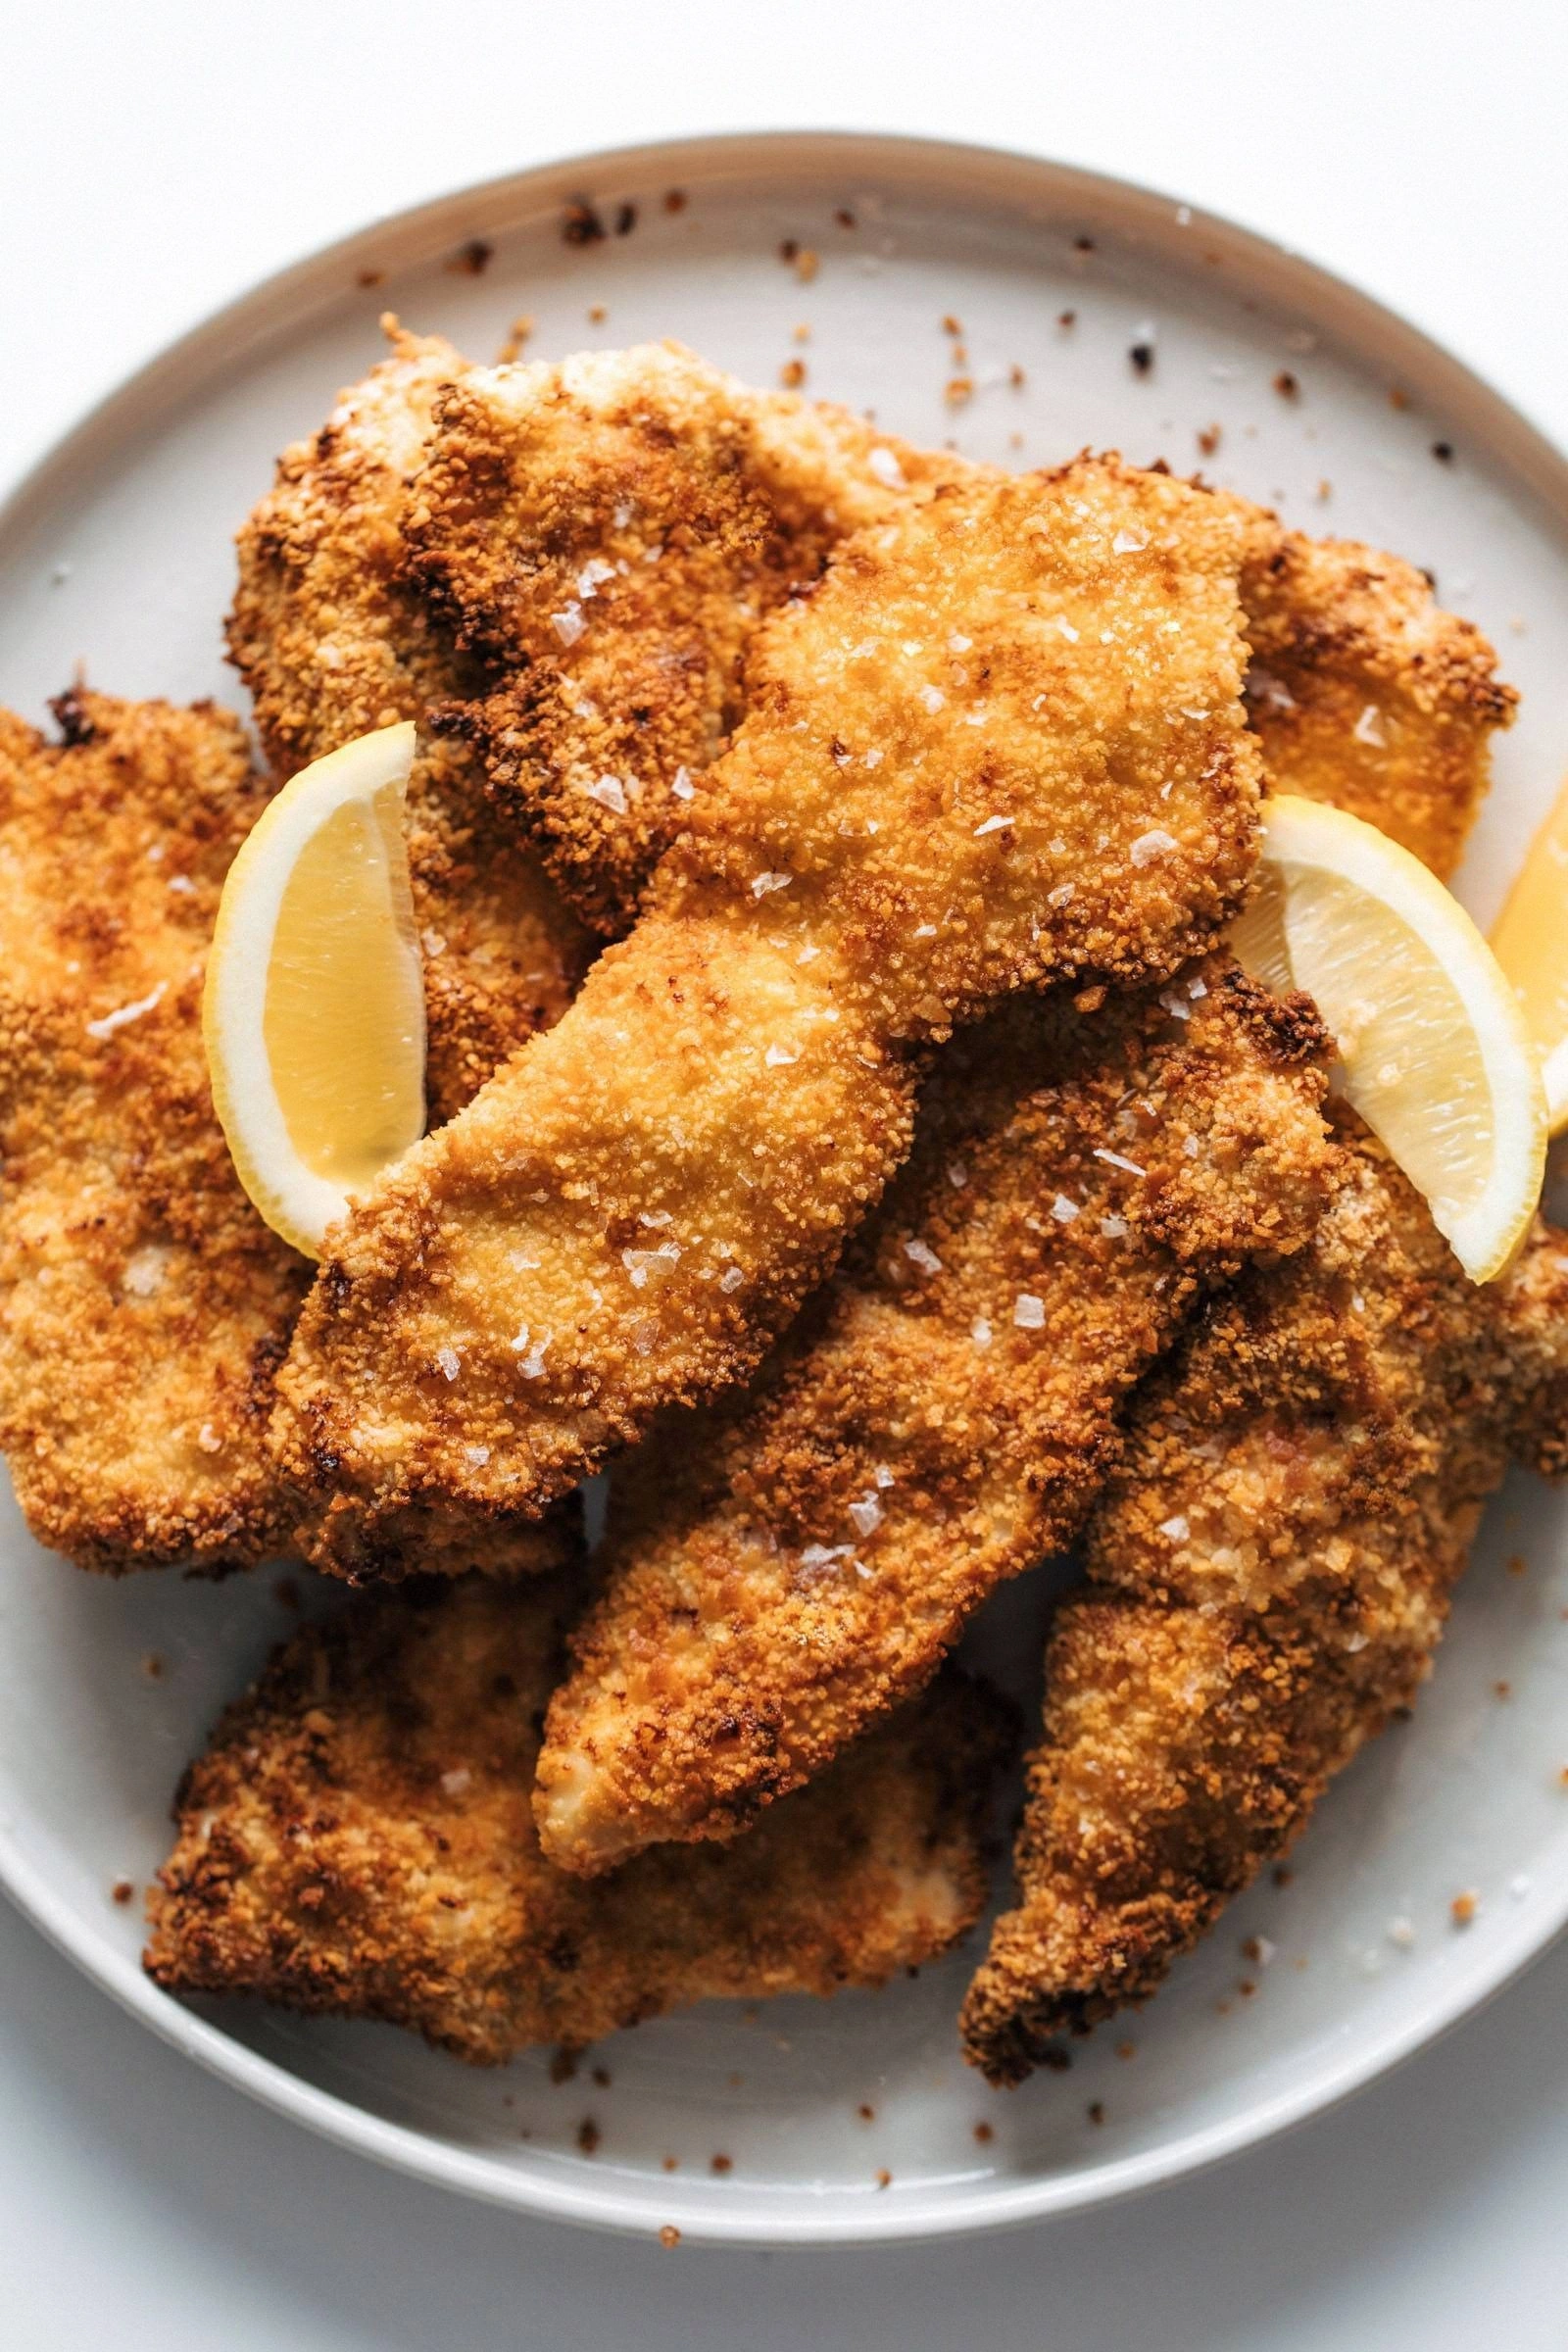
Imagine the kitchen filling with a buttery, nutty aroma that makes your nose do a little happy dance. The sizzling sound when the first cutlet hits the pan is like a pop‑rock concert for your ears—sharp, satisfying, and impossible to ignore. As the coating turns a deep amber, you’ll see the edges start to curl and crack, promising a crunch that shatters like thin ice when you bite into it. The texture is a delicate paradox: a tender, juicy chicken interior that practically melts in your mouth, wrapped in a crust that’s crisp enough to echo every bite with a satisfying snap. The taste? A perfect marriage of salty, buttery, and just‑a‑hint‑of‑herbaceous flavors that linger on the palate, urging you to go back for seconds.
What makes this version stand out isn’t just the crunch—it’s a secret technique that I stumbled upon while watching a late‑night cooking show: a quick brine that locks in moisture, followed by a double‑dip in seasoned flour and a light egg wash, then a final dusting of panko and parmesan. Most recipes get this completely wrong by skipping the brine or using just plain breadcrumbs, resulting in a soggy disaster. This method creates a barrier that keeps the juices inside while the outer layer fries up like a golden armor. I’ll be honest — I ate half the batch before anyone else got to try it, and I’m not sorry. The result is hands down the best version you’ll ever make at home.
And here’s the kicker: I’m about to reveal a surprise ingredient that most chefs keep under wraps—a pinch of smoked paprika that adds a subtle, smoky depth without overwhelming the natural flavor of the chicken. It’s the kind of secret that makes you feel like a culinary magician. Picture yourself pulling these cutlets out of the pan, the whole kitchen smelling incredible, the steam rising like a curtain call. Let me walk you through every single step — by the end, you’ll wonder how you ever made it any other way.
What Makes This Version Stand Out
- Texture: A double‑crust system gives you a crunch that shatters like delicate glass, while the inside stays juicy thanks to the quick brine.
- Flavor Depth: The smoked paprika and parmesan add layers of savory complexity that ordinary recipes lack.
- Simplicity: Only seven pantry staples are needed, and the steps are straightforward enough for a beginner but refined for a seasoned cook.
- Versatility: Perfect as an appetizer, a main course, or even a protein‑packed salad topper—this cutlet adapts to any meal.
- Crowd Reaction: I dare you to taste this and not go back for seconds; even the pickiest eaters are converted on the spot.
- Ingredient Quality: Using fresh chicken breasts and high‑quality panko ensures the final product is premium without being pricey.
- Cooking Method: The pan‑fry technique gives you control over the crust’s color and the interior’s doneness.
- Make‑Ahead Potential: These cutlets freeze beautifully and reheat to the same crisp perfection.
Alright, let's break down exactly what goes into this masterpiece...
Inside the Ingredient List
The Flavor Base
First up, the brine: a simple mixture of water, salt, and a splash of lemon juice. Salt draws out moisture, then re‑absorbs it with flavor, while the lemon adds a bright, acidic note that balances the richness of the coating. If you skip the brine, you’ll end up with dry, bland meat that can’t hold the crust. As a swap, you can use a buttermilk soak for a tangier flavor, but remember to reduce the salt accordingly.
The Texture Crew
The coating is a three‑layered masterpiece: seasoned flour, an egg wash, and a blend of panko breadcrumbs with grated parmesan. Flour creates the first seal, the egg binds everything together, and the panko delivers that airy crunch. Skipping the panko? You’ll get a dense, bread‑like crust that’s nowhere near the light, airy crunch we’re after. For a gluten‑free version, substitute the flour with rice flour and use gluten‑free panko.
The Unexpected Star
A pinch of smoked paprika isn’t just for color; it infuses a subtle smokiness that makes the cutlet feel like it’s been kissed by a grill, even though you’re pan‑frying. If you’re not a fan of smoke, a dash of cayenne can give you heat without the smoky undertone. This ingredient is the secret sauce that elevates the dish from “good” to “legendary”.
The Final Flourish
A final drizzle of melted butter into the pan just before serving adds a glossy finish and a buttery richness that coats each bite like velvet. If you’re watching calories, you can substitute half the butter with a high‑smoke oil, but you’ll lose some of that luxurious mouthfeel. The key is to add the butter at the end, not at the start, so it doesn’t burn and turn bitter.
Everything's prepped? Good. Let's get into the real action...
The Method — Step by Step
Start by making the brine: dissolve 1 tablespoon of salt in 2 cups of cold water, add the juice of half a lemon, and stir until fully combined. Submerge the chicken breasts, making sure they’re fully covered, and let them sit for exactly 20 minutes. This quick brine is the secret to juicy meat; you’ll feel the difference as soon as you bite into the finished cutlet. Watch out: Over‑brining can make the chicken too salty, so set a timer.
While the chicken is brining, prepare the three coating stations. In the first bowl, mix 1 cup of all‑purpose flour with 1 teaspoon of smoked paprika, ½ teaspoon of garlic powder, and a pinch of black pepper. In the second bowl, whisk together 2 large eggs with 2 tablespoons of milk. In the third bowl, combine 1½ cups of panko breadcrumbs with ½ cup of grated parmesan and a dash of dried oregano. This layered approach ensures each bite gets the perfect crunch.
Remove the chicken from the brine and pat each piece dry with paper towels. This step is crucial—moisture is the enemy of a crispy crust. Slice each breast horizontally to create two thin cutlets, about ½‑inch thick. The thinness ensures quick, even cooking and maximizes that coveted crisp edge.
Dredge each cutlet first in the seasoned flour, shaking off any excess. Then dip it into the egg wash, allowing any surplus to drip back into the bowl. Finally, press the cutlet into the panko‑parmesan mixture, ensuring a full, even coating. The coating should cling like a second skin—if it flakes off, add a bit more egg wash.
Heat a large skillet over medium‑high heat and add ¼ cup of oil (vegetable or canola) plus 2 tablespoons of butter. Wait until the butter foams and the oil shimmers—this is the sweet spot where the temperature is hot enough to sizzle but not so hot that the crust burns. The sizzle when the cutlet hits the pan? Absolute perfection.
Place the cutlets in the pan, leaving space between them. Cook for 3‑4 minutes on the first side, watching for the edges to turn golden and start to pull away from the pan. Flip carefully with tongs; the second side needs only 2‑3 minutes. The crust should be a deep amber, and the interior should reach 165°F (74°C). Resist the urge to press down on the cutlet—this squeezes out the juices and ruins the crisp.
Once cooked, transfer the cutlets to a wire rack set over a baking sheet. This prevents steam from making the crust soggy. Let them rest for 2 minutes; this short rest allows the juices to redistribute, keeping the meat tender. Meanwhile, drizzle a little melted butter over the top for that glossy finish.
Serve immediately with a squeeze of fresh lemon, a side of arugula salad, or your favorite dipping sauce. The contrast of bright citrus against the buttery crust is pure magic. I dare you to try one without a side—the flavor is so bold you’ll want to eat it straight from the plate. And now the fun part: slice them, plate them, and watch your guests devour them with unabashed delight.
That's it — you did it. But hold on, I've got a few more tricks that'll take this to another level...
Insider Tricks for Flawless Results
The Temperature Rule Nobody Follows
Never rely on “medium heat” alone; use a thermometer to keep oil at 350°F (175°C). This precise temperature ensures the coating sets instantly, locking in moisture. A friend once tried to eyeball the heat and ended up with soggy, greasy cutlets—a cautionary tale that proves the rule.
Why Your Nose Knows Best
When the butter begins to brown and you smell a nutty, toasty aroma, that’s the cue to flip. Your olfactory senses are a more reliable indicator than a timer because the scent changes as the crust caramelizes.
The 5‑Minute Rest That Changes Everything
After frying, let the cutlets rest on a wire rack for exactly five minutes. This short pause lets the juices settle, preventing them from spilling out when you cut into the meat. Skipping this step leads to a dry bite that defeats the whole purpose of the brine.
Butter‑Boost Finish
A final drizzle of melted butter right before serving adds a glossy sheen and a buttery flavor that coats every crumb. If you want a healthier twist, use a mix of olive oil and a splash of lemon juice for brightness without the extra fat.
The Double‑Coat Secret
For those who love an extra crunch, repeat the egg‑wash and panko step a second time. This double‑coat creates a crust so thick and airy that it practically squeaks when you bite. I tried this once for a dinner party; the guests were blown away, asking for the “secret coating”.
Creative Twists and Variations
This recipe is a playground. Here are some of my favorite ways to switch things up:
Spicy Sriracha Crunch
Add 1 tablespoon of sriracha to the egg wash and sprinkle crushed red pepper flakes into the panko mix. The result is a fiery kick that pairs perfectly with a cooling cucumber dip.
Herb‑Infused Green
Mix finely chopped fresh basil, parsley, and thyme into the flour mixture. The herbaceous notes bring a fresh, garden‑like flavor that’s ideal for spring meals.
Parmesan‑Only Elegance
Replace the panko with a blend of grated parmesan and almond flour for a low‑carb, ultra‑crispy crust that tastes like a cheesy dream.
Asian‑Style Soy Glaze
After frying, glaze the cutlets with a mixture of soy sauce, honey, and a dash of ginger. The sweet‑salty coating adds an umami depth that’s perfect with steamed rice.
Southern Fried Twist
Swap the panko for seasoned cornmeal and add a pinch of cayenne to the flour. Serve with coleslaw for a comforting, Southern‑style meal.
Storing and Bringing It Back to Life
Fridge Storage
Place cooled cutlets in an airtight container lined with paper towels to absorb moisture. They’ll stay crisp for up to 3 days. Reheat in a hot skillet for 2 minutes per side to revive the crunch.
Freezer Friendly
Freeze the uncooked, coated cutlets on a parchment sheet, then transfer to a zip‑top bag. They’ll keep for up to 2 months. To cook, bake from frozen at 400°F (200°C) for 20‑25 minutes, finishing with a quick pan‑sear for extra crisp.
Best Reheating Method
Add a tiny splash of water to the pan before reheating; the steam helps the crust re‑crisp without drying out the meat. Cover the pan for 30 seconds, then uncover to finish the golden finish.