Picture this: a Sunday afternoon, the kitchen humming with the clatter of pans, and a stubborn gluten‑free loaf that refuses to rise. I had just finished a marathon of cookie dough, the batter thick as molasses, and my friend dared me to make a lemon loaf that would make even the most skeptical gluten‑free baker swoon. The kitchen smelled of citrus zest, butter, and a faint hint of vanilla, while the sound of the mixer whirring filled the air like a low‑key jazz beat. The sight of my batter—smooth, golden‑yellow, and promising—made my stomach growl in anticipation. I was ready to prove that gluten‑free baking could be as luscious as any traditional treat.
I’ve spent months testing and tweaking gluten‑free leavening blends, but this lemon loaf is the culmination of a decade of experimentation. The secret? A harmonious balance of a 1:1 gluten‑free flour blend, a dash of baking soda for lift, and an explosion of lemon that cuts through the richness like a bright knife. I was skeptical at first, but the moment the loaf emerged from the oven, the aroma was intoxicating—like a sun‑kissed citrus orchard mixed with buttery caramel. The texture was airy, yet moist, and the crust crackled just enough to give a satisfying snap. I could almost hear the gentle pop as the first slice slid out, revealing a soft interior that looked like a cloud of sunshine. The flavor was bright, tart, and sweet in the perfect equilibrium, and I knew I had stumbled upon something special.
Let me walk you through every single step—by the end, you’ll wonder how you ever made it any other way. This loaf is not just a recipe; it’s an experience that engages all five senses. The sight of the batter glistening, the sound of the oven timer counting down, the scent of lemon and butter, the touch of a warm loaf on your fingers, and the burst of citrus on your tongue all combine into a symphony of delight. I dare you to taste this and not go back for seconds. The anticipation is almost tangible, and the payoff is a loaf that feels like a warm hug wrapped in citrus.
Most gluten‑free recipes get this completely wrong, relying on heavy binders and artificial flavors that mask the natural fruit. What sets this loaf apart is the simplicity of the ingredients, the natural leavening, and a technique that ensures a tender crumb without compromising on flavor. I’ll be honest—I ate half the batch before anyone else got to try it. The rest of the loaf is still sitting on my counter, a testament to how irresistible it is. If you’ve ever struggled with gluten‑free baking, you’re not alone—and I’ve got the fix. Picture yourself pulling this out of the oven, the whole kitchen smelling incredible, and the anticipation building for that first bite. The moment the loaf cools, the lemon aroma lingers, teasing your senses and making the wait feel worth every second.
What Makes This Version Stand Out
- Flavor: The bright lemon zest and fresh juice cut through the richness, creating a balanced citrus profile that isn’t overpowering.
- Texture: A light, airy crumb paired with a crisp, buttery crust delivers a mouthfeel that feels like a cloud meeting a caramelized crunch.
- Simplicity: Only thirteen ingredients, all pantry staples, mean you can whip up a loaf in under 45 minutes.
- Gluten‑Free Integrity: The 1:1 flour blend provides the structure you need without the need for xanthan gum or other binders.
- Versatility: The base recipe can be transformed into sweet or savory variations, making it a staple for any kitchen.
- Make‑Ahead Potential: The loaf can be prepared the night before, chilled, and baked fresh in the morning for a quick breakfast treat.
- Audience Appeal: Even those who love traditional cakes will be won over by the bright, refreshing finish.
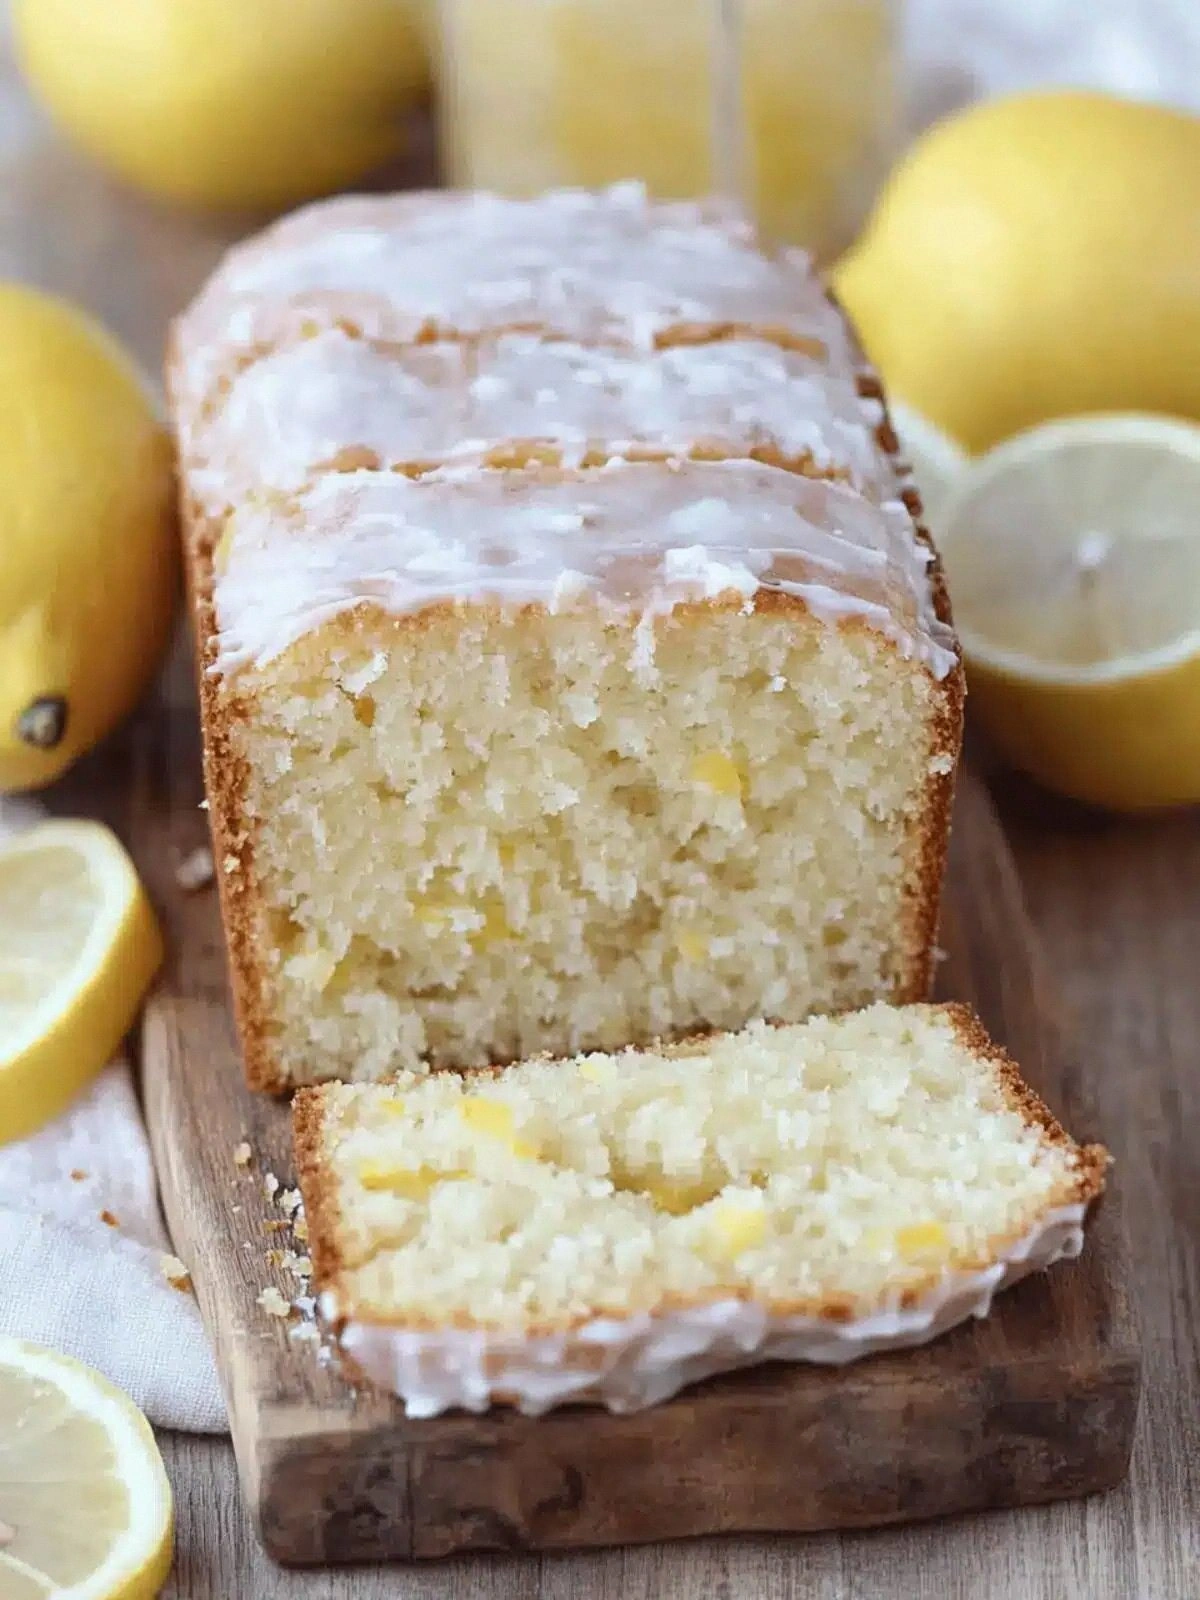
- Visual Appeal: The golden crust and vibrant lemon glaze make for Instagram‑ready slices that look as good as they taste.
Alright, let's break down exactly what goes into this masterpiece…
Inside the Ingredient List
The Flavor Base
Gluten‑Free 1:1 Flour (2 cups): This blend is the backbone of the loaf, providing structure while remaining neutral so the lemon shines. If you’re on a keto or low‑carb diet, you can replace half the flour with coconut flour, but adjust the liquid accordingly. Skipping the flour will result in a dense, crumbly mess—think of it as the skeleton of the cake.
Sugar (1 cup): The sugar caramelizes during baking, giving that golden crust. For a lighter version, substitute half the sugar with honey or maple syrup, but expect a slightly different texture. Too little sugar will make the loaf dry and less sweet, so keep the ratio in check.
Sour Cream (1/2 cup): Sour cream adds moisture and a subtle tang that balances the sweetness. If you’re vegan, replace it with Greek yogurt or a dairy‑free yogurt; just be sure it’s not too watery. Skipping it will leave the loaf dry and less cohesive.
The Texture Crew
Eggs (3 large): Eggs bind the batter and provide lift. Use a fresh, high‑quality egg for the best rise; a cracked shell can ruin the texture. If you’re egg‑free, try aquafaba—three tablespoons per egg—to maintain the structure.
Butter (1/2 cup, melted): Butter contributes richness and flavor. For a lower‑fat option, replace half with coconut oil or a butter substitute. The melted butter ensures even distribution; cold butter will create a greasy crumb.
Vegetable Oil (1/4 cup): Oil keeps the loaf moist and adds a silky texture. You can swap it for canola or grapeseed oil for a neutral taste, but avoid flavored oils that might overpower the lemon.
The Unexpected Star
Lemon Olive Oil (1/4 cup) and Lemon Zest (2 tbsp): This duo is the heart of the loaf, infusing it with a bright, citrusy aroma that lingers even after the first bite. If you can’t find lemon olive oil, a splash of lemon‑infused olive oil or a drizzle of lemon‑infused vinegar works as a substitute. Skipping the zest will dull the flavor profile, making the loaf feel flat.
The Final Flourish
Powdered Sugar (2 cups) and Heavy Cream (1/4 cup): These ingredients create a luscious glaze that coats the loaf like velvet. If you’re looking for a low‑sugar option, reduce the powdered sugar by a quarter and add a splash of almond milk to maintain consistency. Skipping the glaze will leave the loaf dry and less appealing.
Everything's prepped? Good. Let's get into the real action…
The Method — Step by Step
- Preheat the oven to 350°F (175°C) and grease a 9×5 inch loaf pan. The pan should be lined with parchment to prevent sticking. While the oven heats, gather all the ingredients for a smooth workflow. The heat will be the silent partner that brings everything together. If the oven is too hot, the crust might burn before the center is cooked.
- In a large bowl, whisk together the gluten‑free flour, baking powder, baking soda, and salt. This dry mix ensures even distribution of leavening agents. The salt also balances the sweetness of the sugar. If you forget the baking soda, the loaf will be flat and dense. Whisking for 30 seconds creates a light, airy batter.
- In a separate bowl, beat the eggs, melted butter, vegetable oil, sour cream, and vanilla extract until smooth. The liquid mixture should be glossy and free of lumps. This step is crucial for moisture; the eggs provide structure, while the butter adds flavor. If the batter looks too thick, add a splash of milk or water to thin it.
- Stir in the lemon olive oil, zest, and fresh lemon juice. The citrus juices should be measured accurately; too much acidity can hinder rise. The lemon oil adds a subtle depth that plain lemon juice can't achieve. A tiny pinch of salt at this stage helps the flavors meld.
- Fold the dry ingredients into the wet mixture, mixing until just combined. The batter should be thick but pourable. The edges of the loaf will start to pull away from the pan as you finish, signaling that the batter is ready to bake. This is the moment of truth—watch the batter settle.
- Pour the batter into the prepared loaf pan, smoothing the top with a spatula. Tap the pan lightly on the counter to release any air bubbles. The batter should fill the pan to the top, ensuring a uniform rise. This step also helps the loaf set into the pan’s shape.
- Bake for 30–35 minutes, or until a toothpick inserted into the center comes out clean. The loaf should have a golden brown crust and a slightly firm texture. The aroma of lemon and butter will fill the kitchen, making the wait worth it. Once done, let it cool in the pan for 10 minutes before transferring to a wire rack.
- While the loaf cools, prepare the glaze. In a small bowl, whisk the powdered sugar, heavy cream, and a tablespoon of fresh lemon juice until smooth. The glaze should be pourable but thick enough to coat the loaf. This glaze is the final flourish that turns a simple loaf into a showstopper.
- Drizzle the glaze over the cooled loaf, letting it drip down the sides. The glaze should set into a glossy sheen within a few minutes. The lemon glaze adds a sweet tang that complements the loaf’s citrus notes. Slice and serve with a dusting of powdered sugar for extra flair.
That's it — you did it. But hold on, I've got a few more tricks that'll take this to another level…
Insider Tricks for Flawless Results
The Temperature Rule Nobody Follows
Baking at the exact temperature is critical. Many people set the oven to 350°F but the actual temperature can fluctuate. Use an oven thermometer to confirm the heat; this ensures the loaf rises evenly. If the oven is too hot, the crust will form too quickly, trapping steam and causing a dense center.
Why Your Nose Knows Best
Trust your nose during the baking process. When the loaf begins to emit a sweet, buttery aroma with hints of citrus, you’re close to perfection. A burnt smell means you should lower the heat or reduce the baking time. The scent is a reliable indicator of doneness.
The 5-Minute Rest That Changes Everything
After removing the loaf from the oven, let it rest in the pan for exactly five minutes. This resting period allows the crumb to set, preventing it from cracking when you transfer it to a wire rack. A rushed transfer can cause the loaf to crumble and lose its shape.
Avoid Overmixing the Batter
Mixing the batter until just combined preserves the gluten‑free flour’s delicate structure. Overmixing introduces too much air, leading to a tough, rubbery texture. Use a spatula and gentle folding motions to keep the batter light.
Cool the Loaf Before Glazing
Applying the glaze to a hot loaf can cause the glaze to run and the loaf to become soggy. Allow the loaf to cool completely before drizzling. This ensures a crisp, glossy finish that holds its shape.
The Secret to a Perfect Crust
If you want a crispier crust, place a small pan of water in the oven during the last ten minutes of baking. The steam will keep the surface moist, preventing it from drying out while still allowing the edges to brown.
Creative Twists and Variations
This recipe is a playground. Here are some of my favorite ways to switch things up:
Honey‑Lemon Loaf
Replace half the sugar with honey and add a splash of almond milk for moisture. The result is a subtly sweet loaf with a floral undertone that pairs well with tea.
Chocolate‑Covered Lemon Loaf
After glazing, dip the loaf in melted dark chocolate and sprinkle with sea salt. The bitterness of chocolate contrasts beautifully with the citrus, creating a decadent dessert.
Savory Herb Loaf
Omit the sugar and add chopped fresh rosemary, thyme, and a pinch of cracked pepper. The loaf becomes a savory bread that’s perfect for sandwiches or as a side to soups.
Coconut‑Lemon Loaf
Swap half the flour for shredded coconut and add a tablespoon of shredded coconut to the glaze. The tropical flavor elevates the lemon notes for a beach‑inspired treat.
Berry‑Lemon Loaf
Fold in a cup of fresh blueberries or raspberries before baking. The berries burst with juice, adding a burst of color and flavor that makes every slice a surprise.
Almond‑Lemon Loaf
Replace the butter with almond butter and add ground almonds to the dry mix. The nutty flavor complements the citrus, creating a wholesome, protein‑rich loaf.
Storing and Bringing It Back to Life
Fridge Storage
Wrap the cooled loaf tightly in plastic wrap and store in the refrigerator for up to five days. The glaze will slightly soften, but the loaf remains moist. If you want to keep the glaze intact, reheat each slice in the microwave for 10 seconds before serving.
Freezer Friendly
Slice the loaf and wrap each slice individually in parchment before placing them in a freezer bag. Freeze for up to three months. Thaw at room temperature for 30 minutes before reheating.
Best Reheating Method
Reheat in a preheated oven at 300°F (150°C) for 10–12 minutes. Add a tiny splash of water to the bottom of the pan to create steam; this helps the loaf regain its moisture and prevents drying out. The glaze will re‑soften, giving you that glossy finish again.