It was a Thursday night, the kind of night that starts with a pizza and ends with a kitchen that smells like a disaster. I had just finished a marathon of my favorite anime, and the only thing that could salvage the evening was something that tasted like home without the effort. I stared at the pantry, the shelves a chaotic mosaic of spices, canned goods, and that one packet of dried hijiki seaweed that had been sitting there since last spring. My friend dared me to make a side dish that would make the entire house smell like the ocean and the garden rolled into one. I laughed, because I knew the challenge was about to become the highlight of my culinary week.
The first thing I did was open the packet of hijiki and let its earthy, slightly sweet aroma mingle with the faint scent of carrot and soy. As soon as I saw the deep green strands, I knew this wasn’t going to be a run-of-the-mill salad. The texture of hijiki when it’s rehydrated is almost like a silky, chewy ribbon that clings to every bite. I could almost hear the subtle crunch of aburaage as it sizzles in the pan. The moment the oil hits the pan, there’s a satisfying sizzle that promises flavor. And that first bite? It’s a burst of umami that coats your palate like velvet, leaving a whisper of sea and earth.
I’m not going to lie – I almost ate the whole batch before anyone else even saw it. That’s the thing about hijiki; once you taste it, you want more. I dared you to taste this and not go back for seconds. The best part? It’s not just a side dish; it’s a conversation starter. Picture yourself pulling this out of the pan, the whole kitchen smelling incredible, and your guests asking for the recipe. And when they do, you can tell them it’s hands down the best version you’ll ever make at home.
Most recipes get this completely wrong. They either overcook the seaweed, under-season the sauce, or forget the crunch factor. Here’s what actually works: a quick sauté of aburaage, a balanced sauce that ties everything together, and a final touch of fresh carrot that adds brightness. I’ve spent months tweaking this recipe, and the result is a dish that feels like a hug in a bowl. It’s simple, it’s fresh, and it’s ready in under 45 minutes. The best part? You can make it a few days ahead, and it just gets better.
If you’ve ever struggled with making a side dish that feels special, you’re not alone. The trick is to focus on a few core elements: the seaweed, the sauce, the crunch, and the finish. And that’s exactly what I’m about to walk you through. By the end, you’ll wonder how you ever made it any other way.
I’ll be honest – the first time I tried this recipe, I thought the hijiki would taste like nothing. But after the first bite, I realized that the seaweed’s natural umami was the secret weapon. It’s a game-changer, and it’s a game that you can win in a single pan. So grab your skillet, and let’s dive into the details that make this dish a standout.
What Makes This Version Stand Out
- Flavor: The sauce is a harmonious blend of mirin, soy sauce, and dashi powder, creating a depth that feels both comforting and exotic. The sweet, savory notes dance on the tongue, leaving a lingering finish that invites another bite.
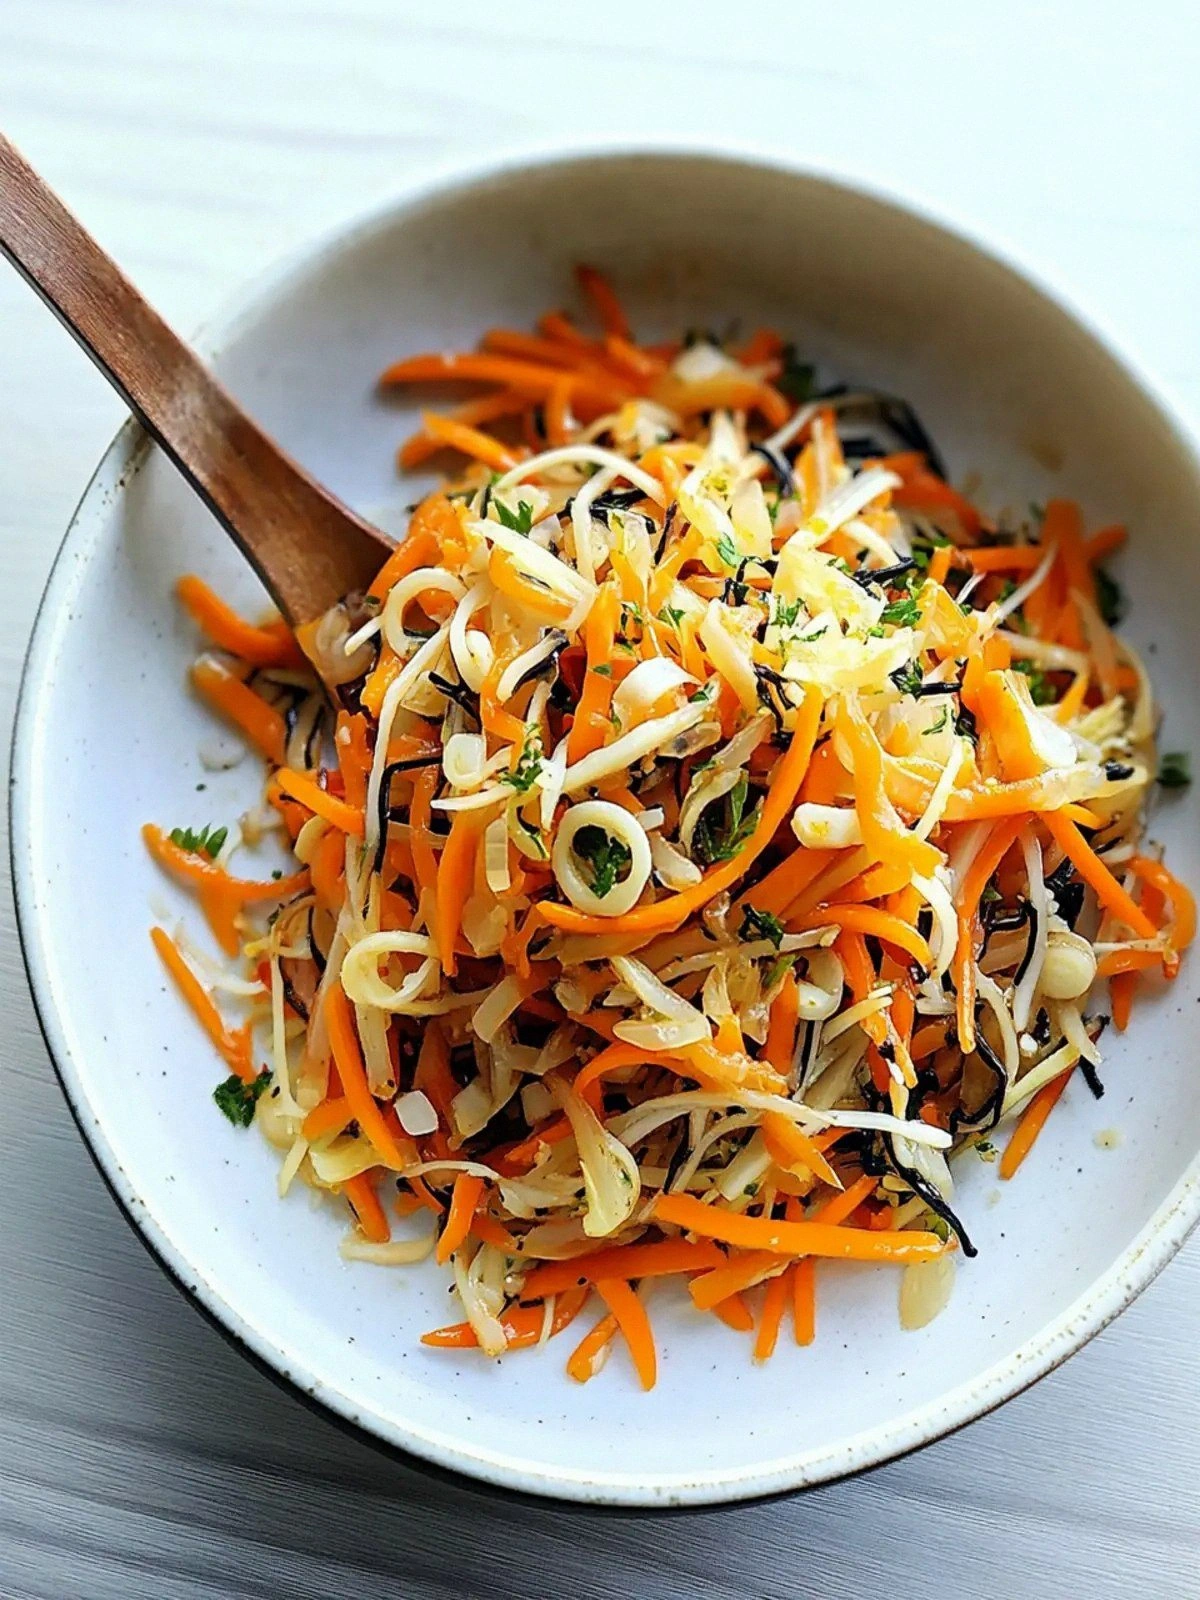
- Texture: Hijiki’s chewy strands contrast beautifully with the crisp carrot ribbons and the subtle crunch of fried aburaage. The balance of soft and firm textures keeps every forkful interesting.
- Simplicity: With just nine ingredients and a single pan, the recipe is accessible even for novice cooks. No complicated steps, just a few quick motions and a lot of flavor.
- Uniqueness: The use of aburaage adds a smoky, savory element that isn’t common in most seaweed salads. It elevates the dish from simple side to a memorable centerpiece.
- Crowd Reaction: Guests who try this salad often comment on how it feels like a restaurant dish, yet it’s homemade. The vibrant green color and the aroma alone make it a conversation piece.
- Ingredient Quality: Using high‑grade dried hijiki and fresh carrot ensures that each bite is packed with nutrients and flavor. The quality of the seaweed is crucial; it’s the heart of the dish.
- Cooking Method: The quick sauté of aburaage locks in flavor and texture, while the gentle simmer of the sauce allows the hijiki to absorb the umami without becoming soggy.
- Make‑Ahead Potential: This salad keeps its integrity for up to two days in the fridge, and a quick splash of water can revive its texture when reheated.
Inside the Ingredient List
The Flavor Base
The sauce is the soul of this salad. 2 tablespoons of mirin add a gentle sweetness that balances the saltiness of soy sauce. 2 tablespoons of soy sauce bring depth and a savory backbone, while 1 teaspoon of dashi powder infuses an oceanic umami that elevates the seaweed. If you’re vegan, you can replace dashi powder with a splash of mushroom broth for a similar depth.
The Texture Crew
Hijiki seaweed is the star; it’s dried and needs to be rehydrated to reveal its tender yet chewy strands. 2 tablespoons of dried hijiki are enough to coat a handful of greens without overwhelming the dish. ½ cup of boiled soybeans adds a subtle earthiness and a protein boost. If you’re looking for a protein alternative, try edamame or chickpeas for a different twist.
The Unexpected Star
Aburaage, or deep‑fried tofu pockets, brings a smoky, slightly crispy edge that contrasts the smoothness of the seaweed. Two pieces are enough to create a satisfying crunch without dominating the flavor. If you can’t find aburaage, extra firm tofu cut into thin slices and pan‑fried until golden works as a great substitute.
The Final Flourish
Carrot adds a bright, sweet crunch that cuts through the rich sauce. One carrot, julienned into thin ribbons, provides a fresh pop of color and a subtle sweetness that balances the umami. A splash of ½ cup water helps the sauce coat the ingredients evenly, ensuring each bite is flavorful.
Everything’s prepped? Good. Let’s get into the real action.
The Method — Step by Step
- Step 1: Rehydrate the Hijiki. Place the 2 tablespoons of dried hijiki in a small bowl and pour ½ cup of warm water over it. Let it soak for 10 minutes until it expands and becomes tender. This quick soak preserves the seaweed’s chewy texture and reduces the risk of overcooking. The aroma that begins to release is already a promise of what’s to come.
- Step 2: Prepare the Carrot. While the hijiki soaks, peel and julienne one carrot into thin ribbons. The carrot’s natural sweetness will balance the savory sauce and add a crisp bite. If you prefer a milder flavor, you can blanch the ribbons in hot water for 30 seconds and then shock them in ice water.
- Step 3: Fry the Aburaage. Heat 1 tablespoon of vegetable oil in a non‑stick skillet over medium heat. Add the two pieces of aburaage, cut side down, and fry until golden brown and slightly crispy. Flip them once and let the other side crisp as well. The oil should shimmer, indicating the right temperature for a crisp finish.
- Step 4: Make the Sauce. In a small bowl, whisk together 2 tablespoons of mirin, 2 tablespoons of soy sauce, and 1 teaspoon of dashi powder. Add the ½ cup of boiled soybeans to the mixture. The dashi powder will dissolve and release a subtle oceanic umami that permeates the entire dish. Keep the mixture at room temperature; it’s ready to use as soon as the aburaage is done.
- Step 5: Combine Hijiki and Sauce. Drain the soaked hijiki, reserving the soaking water. Add the hijiki to the sauce and stir until every strand is coated. If the sauce seems thick, add a splash of the reserved water to reach your desired consistency. This step ensures that the seaweed absorbs the umami without becoming soggy.
- Step 6: Toss in the Carrot. Add the julienned carrot ribbons to the pan. Toss gently, allowing the carrot to mingle with the sauce and hijiki. The carrot’s bright color will contrast beautifully with the deep green of the seaweed. The heat from the pan will slightly soften the carrot, giving it a pleasant bite.
- Step 7: Finish with Aburaage. Slice the fried aburaage into bite‑size pieces and fold them into the salad. The aburaage’s smoky flavor will marry with the sauce, creating a layered taste experience. Make sure the pieces are evenly distributed so every forkful has a crunch.
- Step 8: Plate and Serve. Transfer the salad to a serving bowl or individual plates. The dish is best served warm, but it can also be enjoyed at room temperature. Garnish with a sprinkle of sesame seeds or a drizzle of sesame oil if you want an extra burst of aroma.
- Step 9: Optional Garnish. For a pop of color and extra texture, scatter a few thinly sliced green onions or a pinch of crushed red pepper over the top. This final touch not only enhances the visual appeal but also adds a subtle heat that complements the umami.
- Step 10: Enjoy. Take a bite, let the flavors unfold, and savor the harmony of sea, earth, and a hint of sweetness. If you’re feeling adventurous, pair this salad with a light miso soup or a simple rice bowl for a complete meal.
Insider Tricks for Flawless Results
The Temperature Rule Nobody Follows
The key to a crisp aburaage is the oil temperature. If it’s too hot, the exterior will burn before the interior cooks; too cool, and it will absorb excess oil. Aim for a steady medium heat and watch for a faint smoke at the edges. This simple adjustment saves you from a soggy side dish.
Why Your Nose Knows Best
Before you stir the sauce, give it a quick sniff. The aroma should be a balanced mix of sweet, salty, and umami. If it leans too sweet, add a pinch of salt; if it’s too salty, a splash of water will cut it down. Your nose is the most reliable judge of flavor balance.
The 5-Minute Rest That Changes Everything
After the aburaage is fried, let it rest for 5 minutes before slicing. This rest period allows the heat to distribute evenly, ensuring each bite is uniformly crispy. It also gives the oil a chance to settle, reducing greasiness.
The Quick Rehydrate Trick
If you’re in a hurry, replace the 10‑minute soak with a 30‑second burst in hot water. The hijiki will still absorb enough moisture to soften, but you’ll preserve its chew. This trick is perfect for last‑minute meal prep.
The Secret Sauce Ingredient
Adding a teaspoon of sesame oil to the sauce before mixing with the hijiki amplifies the depth of flavor. The nutty undertone pairs beautifully with the seaweed’s earthiness. It’s a small addition that makes a big difference.
Creative Twists and Variations
This recipe is a playground. Here are some of my favorite ways to switch things up:
Spicy Hijiki Surprise
Add a pinch of crushed red pepper to the sauce for a subtle heat that cuts through the richness. The spice level can be adjusted to taste, making it family‑friendly or bold. It’s a quick tweak that adds a layer of excitement.
Mediterranean Fusion
Swap the soy sauce for a splash of low‑sodium tomato sauce and add chopped olives. The tangy tomato pairs with the seaweed’s subtle sweetness, creating a Mediterranean‑inspired salad. The olives bring a briny depth that complements the aburaage.
Vegan Protein Boost
Replace the boiled soybeans with a handful of edamame or chickpeas. The beans add a different texture and a protein punch. This variation is perfect for a plant‑based meal.
Citrus Brightness
Finish the dish with a squeeze of fresh lemon or yuzu juice. The citrus zest brightens the umami and adds a refreshing lift. It’s especially good during warmer months.
Crunchy Nut Addition
Toss in a tablespoon of toasted sesame seeds or chopped walnuts for an extra crunch. The nuts bring a nutty flavor that complements the seaweed’s earthiness. This addition makes the dish more substantial.
Gluten‑Free Twist
Use tamari instead of soy sauce to keep the dish gluten‑free. The flavor remains rich and savory, and the color stays deep. This small swap makes the salad accessible to more people.
Storing and Bringing It Back to Life
Fridge Storage
Store the salad in an airtight container in the refrigerator for up to two days. The flavors meld together, making it even tastier the next day. Avoid covering it with plastic wrap directly on the surface to prevent moisture buildup.
Freezer Friendly
Freezing is not recommended because the hijiki can become overly soft. If you must freeze, wrap the salad tightly in plastic wrap and place it in a freezer bag. Thaw overnight in the fridge and give it a quick stir before serving.
Best Reheating Method
Reheat the salad gently in a skillet over low heat, adding a splash of water or broth to keep it moist. Stir frequently to ensure even heating. A quick 3‑minute reheat brings the dish back to its original texture and flavor.