I was standing in my kitchen, staring at a bowl of plain flour, a handful of Greek yogurt, and a single egg that had been on my fridge for weeks. The moment I thought, “I’ll make something quick and protein‑packed,” I pulled out a bag of everything bagel seasoning and the world changed. The aroma that filled the room was a sweet, savory promise of something that would be both comforting and bold. I imagined the sound of the dough hitting the pan, the sizzle that would announce the birth of a bagel, and the texture that would make my taste buds dance. I was ready to turn a simple breakfast into a culinary adventure that would leave my friends begging for the recipe. And that’s exactly what happened when I decided to bake these Greek Yogurt Bagels High Prote.
Picture this: a golden crust that crackles when you bite into it, a soft, chewy center that clings to the back of your teeth, and a subtle tang from the yogurt that lingers long after the last bite. The kitchen fills with the scent of toasted dough and everything bagel seasoning, while the gentle hum of the oven keeps the anticipation high. Each bagel is a bite‑size masterpiece that feels like a hug in the morning, or a satisfying snack at noon. I dare you to taste these bagels and not go back for seconds; the crunch is addictive, and the protein punch keeps you full for hours. This isn’t just another bagel recipe—it’s a game‑changer that will rewrite your breakfast routine. By the end of this post, you’ll know why these bagels are the best version you’ll ever make at home.
I’ve spent months experimenting with dough textures, trying to find that perfect balance between chewy and airy. After countless trials, I discovered that Greek yogurt is the secret weapon that gives this recipe its signature bite. The yogurt not only adds moisture but also introduces a mild acidity that reacts with the baking powder to lift the dough. When combined with a splash of everything bagel seasoning, the flavor profile becomes an explosion of savory notes that dance on the palate. The result? Bagels that are protein‑rich, easy to make, and utterly unforgettable. If you've ever struggled with bland bagels, you're not alone—and I've got the fix.
Most bagel recipes get this completely wrong, focusing on heavy doughs that are tough to bake at home. This version, however, uses a simple, quick‑bake method that keeps the bagels light yet satisfying. The secret lies in the balance of ingredients and the precise timing of each step. You'll notice that the dough never feels sticky or dry, thanks to the yogurt’s moisture. The everything bagel seasoning gives a robust flavor without overpowering the delicate dough. By the time you finish, you'll see why this recipe is a crowd‑pleaser at brunches and potlucks alike. Let me walk you through every single step — by the end, you'll wonder how you ever made it any other way.
What Makes This Version Stand Out
- Flavor: The combination of Greek yogurt and everything bagel seasoning creates a savory, tangy profile that elevates the dough beyond ordinary bagels. The yogurt’s acidity subtly caramelizes the crust, giving a hint of sweetness. The seasoning adds a complex blend of herbs and spices that mimic the classic bagel experience.
- Texture: The dough is chewy yet airy, with a crisp exterior that cracks delightfully when bitten. The yogurt keeps the interior moist, preventing the bagels from becoming dry or crumbly. The result is a satisfying bite that feels like a hug from the inside out.
- Protein Boost: Greek yogurt adds a hefty protein punch, making these bagels a great option for athletes or anyone on a high‑protein diet. Each bagel delivers roughly 6 grams of protein, which helps keep you full longer. This is especially useful for those who need a quick post‑workout snack.
- Speed: From prep to bake, the entire process takes less than 45 minutes. You can have fresh, warm bagels on the table in under an hour, saving you precious morning time. The recipe’s simplicity means you can whip it up even on a busy weekday.
- Versatility: The dough can be topped with anything from sesame seeds to poppy seeds, or even a drizzle of honey after baking. You can also add herbs or spices for a personalized twist. The base remains sturdy enough to hold a variety of toppings without losing its integrity.
- Make‑Ahead Friendly: The dough can be prepared a day ahead, refrigerated, and baked fresh when you’re ready. This makes it perfect for weekend batch‑baking or for those who love to have breakfast ready in advance. The yogurt keeps the dough from drying out, even after refrigeration.
Alright, let's break down exactly what goes into this masterpiece. The secret is in the ingredients and the method that brings them together.
Inside the Ingredient List
The Flavor Base
All‑purpose flour is the backbone of this recipe, providing the structure needed to hold the dough together. It’s a neutral canvas that allows the yogurt and seasoning to shine. If you prefer a slightly denser bagel, you can substitute half of the flour with whole wheat flour for added fiber. However, keep in mind that whole wheat can make the dough a bit tougher to work with. Using a fine‑grade flour ensures a smoother, more cohesive dough. The flour also absorbs the moisture from the yogurt, preventing the bagels from becoming too wet.
Baking powder is the leavening agent that gives the bagels their lift. It reacts with the yogurt’s acidity to create tiny bubbles that expand during baking. If you don’t have baking powder on hand, baking soda can be used, but you’ll need an acid like lemon juice to activate it. The 2 teaspoons of baking powder are calibrated to produce a light, airy texture without a chemical aftertaste. A pinch of baking soda can also be added for a slightly chewier bite, but this is optional. This ingredient is critical for achieving the classic bagel rise without a heavy, doughy center.
The Texture Crew
Greek yogurt is the star that brings moisture, protein, and a subtle tang to the dough. It replaces water or milk, resulting in a richer, creamier texture. The yogurt’s thick consistency keeps the bagels from drying out, especially during the long bake time. If you prefer a lighter taste, you can use non‑fat Greek yogurt, but the dough will be slightly less tender. The yogurt also adds a subtle flavor that pairs wonderfully with the everything bagel seasoning. This ingredient is what sets these bagels apart from the typical chewy, plain bagel.
The large egg acts as a binder and adds richness to the dough. It also helps the bagels develop a golden crust. When whisked into the dough, the egg incorporates air, making the bagels fluffier. Some bakers prefer to use an egg substitute for a vegan version, but the texture will be noticeably different. The egg’s yolk also contributes to a slightly richer flavor profile that complements the yogurt’s tang. It’s a small addition that makes a big difference in both taste and structure.
The Unexpected Star
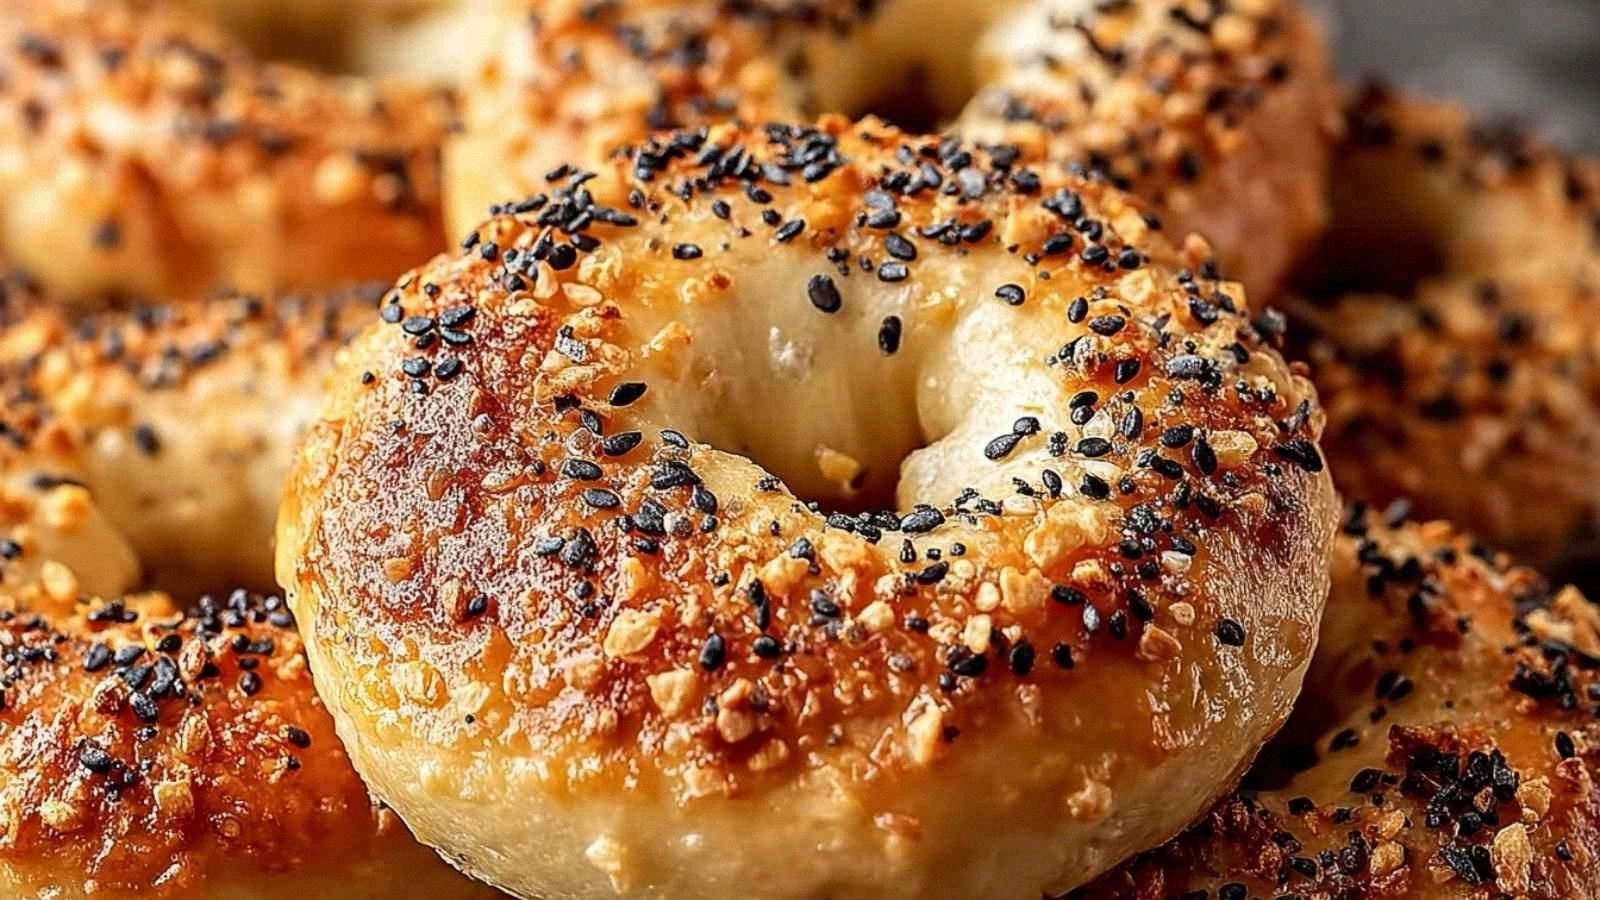
Everything bagel seasoning is the secret sauce that gives these bagels their iconic flavor. It’s a blend of sesame seeds, poppy seeds, onion, garlic, and salt, creating a complex, savory taste that is instantly recognizable. The seasoning not only adds flavor but also contributes to the bagel’s slightly crunchy exterior. If you’re looking to experiment, try adding a pinch of smoked paprika or a dash of cayenne for a spicy kick. The seasoning can also be mixed with a little grated Parmesan for a cheesy twist. It’s the small ingredient that turns a simple dough into a crowd‑pleaser.
The Final Flourish
Salt is the subtle enhancer that balances all the flavors. It brings out the sweetness of the yogurt and the savory notes of the seasoning. A quarter teaspoon is enough to avoid overpowering the other ingredients. If you prefer a saltier bite, you can add a pinch more, but be careful not to make the dough too salty. Salt also helps strengthen the dough’s structure by tightening the gluten network. This tiny addition ensures that each bagel has a well‑rounded, cohesive shape.
Everything's prepped? Good. Let's get into the real action, where the dough comes alive and the kitchen fills with anticipation.
The Method — Step by Step
- Begin by preheating your oven to 425°F (220°C). Line a baking sheet with parchment paper or a silicone mat to prevent sticking. In a small bowl, whisk together the Greek yogurt, egg, and everything bagel seasoning until smooth. This mixture should have a thick, custard‑like consistency. Keep the bowl covered while you prepare the dry ingredients. The aroma of yogurt will start to fill the kitchen, hinting at the deliciousness to come.
- In a separate large bowl, combine the all‑purpose flour, baking powder, and salt. Stir the dry ingredients until evenly distributed, ensuring no clumps remain. Gradually add the wet mixture to the dry ingredients, stirring continuously. The dough should start to form a sticky ball as the yogurt hydrates the flour. Let the dough rest for 5 minutes; this allows the gluten to relax and the baking powder to activate. After resting, the dough will be easier to shape.
- Turn the dough onto a lightly floured surface and knead it gently for 2–3 minutes. The goal is not to develop a strong gluten network, just to bring the dough together into a cohesive ball. If the dough feels too sticky, dust it lightly with flour, but avoid adding too much or it will become dry. Once smooth, divide the dough into 4 equal portions. Shape each portion into a round ball, then use your thumb to create a small hole in the center.
- Place the formed bagels on the prepared baking sheet, spacing them about 2 inches apart. This ensures even baking and prevents the bagels from merging. Preheat the oven for a few minutes before placing the tray inside. The oven’s heat should be hot enough to give the bagels a quick rise. Feel the heat radiating from the oven door as you slide the tray in. This is the moment where anticipation builds.
- Bake for 12 minutes, then flip each bagel over carefully. The first side should develop a golden‑brown crust. Use a spatula to keep the bagels flat and avoid tearing. The second side will bake for another 8–10 minutes. Watch for the edges to pull away slightly from the parchment, indicating a crisp exterior. When the bagels reach a deep amber color, they’re ready.
- After baking, remove the bagels from the oven and let them cool on a wire rack for at least 10 minutes. Cooling allows the steam to escape, preventing sogginess. The bagels should feel firm to the touch but still slightly warm inside. This step is crucial for achieving that perfect bite. If you rush this, the bagels might be gummy in the middle.
- While the bagels are cooling, prepare a simple glaze: whisk 1 tablespoon of honey with 1 teaspoon of lemon juice. This glaze adds a sweet contrast that balances the savory flavor. Drizzle the glaze over the warm bagels, letting it seep into the cracks. The honey will caramelize slightly, adding a glossy finish. The lemon juice cuts through the richness, giving a bright finish. This optional step takes the bagels to the next level.
- Once the bagels have cooled, slice them in half for a classic bagel experience. If you prefer a softer bite, you can toast the halves lightly on a grill pan. The heat will bring out the yogurt’s tang even more. The bagels are now ready to be enjoyed with cream cheese, smoked salmon, or any topping you desire. The possibilities are endless, and the flavor profile remains consistent no matter what you add.
- Serve immediately while they’re warm, or store them in an airtight container for up to 2 days. If you need to keep them longer, freeze the bagels and reheat them in a toaster or oven. The bagels retain their flavor and texture even after freezing. This recipe’s versatility means you can have a fresh bagel at any time of day. And if you’re craving a protein‑rich snack, these bagels are ready to satisfy.
That's it — you did it. But hold on, I've got a few more tricks that'll take this to another level. These insider tips will help you master the dough and avoid common pitfalls. You'll find that the difference between a good bagel and a great bagel is often a single small adjustment. Let’s dive into the details and elevate your bagel game.
Insider Tricks for Flawless Results
The Temperature Rule Nobody Follows
Many bakers think the oven temperature is flexible, but it’s actually a linchpin for bagel success. A slightly lower temperature, around 425°F, gives the bagels a chance to rise fully before the crust forms. If you crank the heat up too high, the exterior will brown too quickly, trapping steam inside and leading to a dense center. The trick is to preheat the oven long enough for the temperature to stabilize, ensuring even baking. You can also use an oven thermometer to double‑check the actual temperature, as some ovens run hotter than labeled. This small tweak can mean the difference between a bagel that’s chewy and one that’s rubbery.
Why Your Nose Knows Best
Your nose is a powerful guide when baking. The moment the bagels start to brown, the scent will tell you they’re almost done. If you notice a faint sweet aroma, the bagels are ready to be flipped. A strong, yeasty smell indicates they need more time. The aroma changes as the proteins in the yogurt caramelize, giving a subtle caramel scent. Trusting your nose can save you from overbaking or underbaking, ensuring a perfect result every time. The next time you bake, pay close attention to the scent—it’s your secret ally.
The 5‑Minute Rest That Changes Everything
After kneading the dough, let it rest for exactly five minutes. This brief pause allows the gluten to relax, making the dough easier to shape. It also lets the baking powder activate fully, ensuring a better rise. If you skip this step, the dough will be tough and the bagels will be dense. Even a short rest can dramatically improve the texture. This is a simple trick that many overlook, but it’s a game‑changer for bagel texture.
Keep the Dough Moist, Not Sticky
Maintaining the right moisture level is critical. Too much moisture and the bagels will spread; too little and they’ll crack. Use a kitchen scale to weigh the yogurt and flour for consistency. If the dough feels dry, add a splash of water, a tablespoon at a time. If it’s too wet, sprinkle a bit more flour, but do so sparingly. The goal is a dough that’s pliable yet not tacky. This balance ensures the bagels hold their shape and rise evenly.
Mind the Oven Rack Position
Place the baking sheet on the middle rack for even heat distribution. If you’re baking multiple trays, rotate them halfway through to avoid uneven baking. The middle rack allows the heat to circulate around the bagels, producing a consistent crust. Some ovens have hot spots; moving the tray can help mitigate this. Keeping the bagels in the same spot ensures they bake the same way every time.
Use a Cooling Rack for Even Crispness
After baking, let the bagels rest on a cooling rack rather than a flat surface. The airflow beneath the bagels prevents moisture from accumulating, keeping the crust crisp. The rack also helps the bagels maintain their shape, preventing them from flattening. If you’re in a hurry, you can cover them loosely with a towel, but avoid airtight wrapping. The cooling rack is a small addition that makes a noticeable difference in texture and appearance.
Creative Twists and Variations
This recipe is a playground. Here are some of my favorite ways to switch things up:
Cheesy Caramelized Onion Bagels
Add a handful of caramelized onions to the dough for a sweet, savory kick. Stir in ½ cup of shredded cheddar cheese for a melty texture. The onions add depth, while the cheese creates a gooey center. Serve with a dollop of Greek yogurt for a creamy contrast. This variation is perfect for brunches where you want a little extra indulgence.
Spicy Chipotle Cream Cheese Bagels
Mix in 1 tablespoon of chipotle in adobo for a smoky heat. After baking, spread a thin layer of chipotle cream cheese on the halves. The heat from the chipotle pairs beautifully with the yogurt’s tang. Pair with a side of avocado for a balanced meal. This version is great for those who love a spicy kick in their breakfast.
Herb‑Infused Lemon Bagels
Add fresh rosemary and thyme to the dough for a fragrant herb profile. Zest one lemon and stir it into the batter for a bright citrus note. The herbs bring a subtle earthiness, while the lemon adds a refreshing bite. Serve with a light lemon ricotta spread for a tangy finish. This variation is ideal for spring or summer mornings.
Berry‑Glazed Bagels
Prepare a simple glaze with 2 tablespoons of powdered sugar and 1 tablespoon of fresh berry puree. Drizzle over the warm bagels after they cool. The glaze gives a sweet finish that balances the savory dough. Pair with a fruit‑filled yogurt for a wholesome snack. This version is great for a quick dessert or a sweet breakfast.
Savory Mushroom & Thyme Bagels
Sauté sliced mushrooms with thyme and garlic until caramelized. Fold them into the dough before shaping. The mushrooms add umami depth, while the thyme brings a warm aroma. Serve with smoked salmon for a sophisticated bite. This variation is perfect for a brunch that feels both hearty and elegant.
Chocolate‑Dipped Bagels for Sweet Tooth
After the bagels cool, dip one side in melted dark chocolate. Let the chocolate set on parchment paper. The chocolate coating gives a rich, decadent finish. Pair with a cup of coffee for a classic breakfast treat. This twist turns the bagel into a sweet, indulgent snack that’s still protein‑rich.
Storing and Bringing It Back to Life
Fridge Storage
Store freshly baked bagels in an airtight container or zip‑lock bag at room temperature for up to 2 days. If you plan to keep them longer, refrigerate them to slow down the staling process. The yogurt in the dough helps maintain moisture, preventing the bagels from drying out quickly. When you’re ready to eat, simply remove them from the fridge and let them sit at room temperature for 10 minutes. This short rest restores their natural softness and flavor.
Freezer Friendly
For longer storage, place the cooled bagels on a baking sheet and freeze them until solid. Transfer the frozen bagels to a freezer bag or airtight container. They can be kept for up to 3 months without losing quality. To reheat, pop them in a toaster or oven at 350°F for 5–7 minutes. The yogurt’s moisture content keeps the bagels from becoming chewy after thawing.
Best Reheating Method
The most effective way to bring bagels back to life is to toast them lightly in a skillet or oven. A quick 2‑minute toast on medium heat restores crispness while keeping the inside soft. If you prefer a softer bagel, warm them in a microwave for 20–30 seconds, then finish with a quick toast. Adding a splash of water to the bagels before reheating creates steam, which re‑hydrates the dough and preserves its tenderness. This method ensures you enjoy the bagels as fresh as the first bite.
I’ve spent countless nights tweaking doughs, and this recipe is my ultimate triumph. The bagels are a testament to the power of simple, high‑protein ingredients combined with a few well‑timed steps. Every bite is a reminder that you don’t need fancy equipment or obscure techniques to create something extraordinary. If you’re looking for a breakfast that’s both filling and flavorful, these Greek Yogurt Bagels High Prote are the answer. They’re quick, protein‑rich, and can be customized to suit any palate. I can’t wait to see how you make them your own.
Remember that the key to greatness lies in the details: the right temperature, the proper resting time, and the subtle balance of flavors. Keep experimenting with toppings, spices, and textures, and you’ll discover a world of possibilities. The best part? You can share these bagels with friends and family, and watch their faces light up with each bite. This recipe is more than a dish—it’s an invitation to create, share, and savor. So grab your ingredients, preheat that oven, and let the adventure begin.
If you’re ready to dive in, the recipe card below has all the details you need. It’s designed to scale, so whether you’re cooking for one or a crowd, you’ll have the exact measurements. The FAQ section will answer any lingering questions, and the storage tips will keep your bagels fresh. Grab a notebook, jot down your notes, and let the kitchen become your laboratory of flavor. Happy baking!