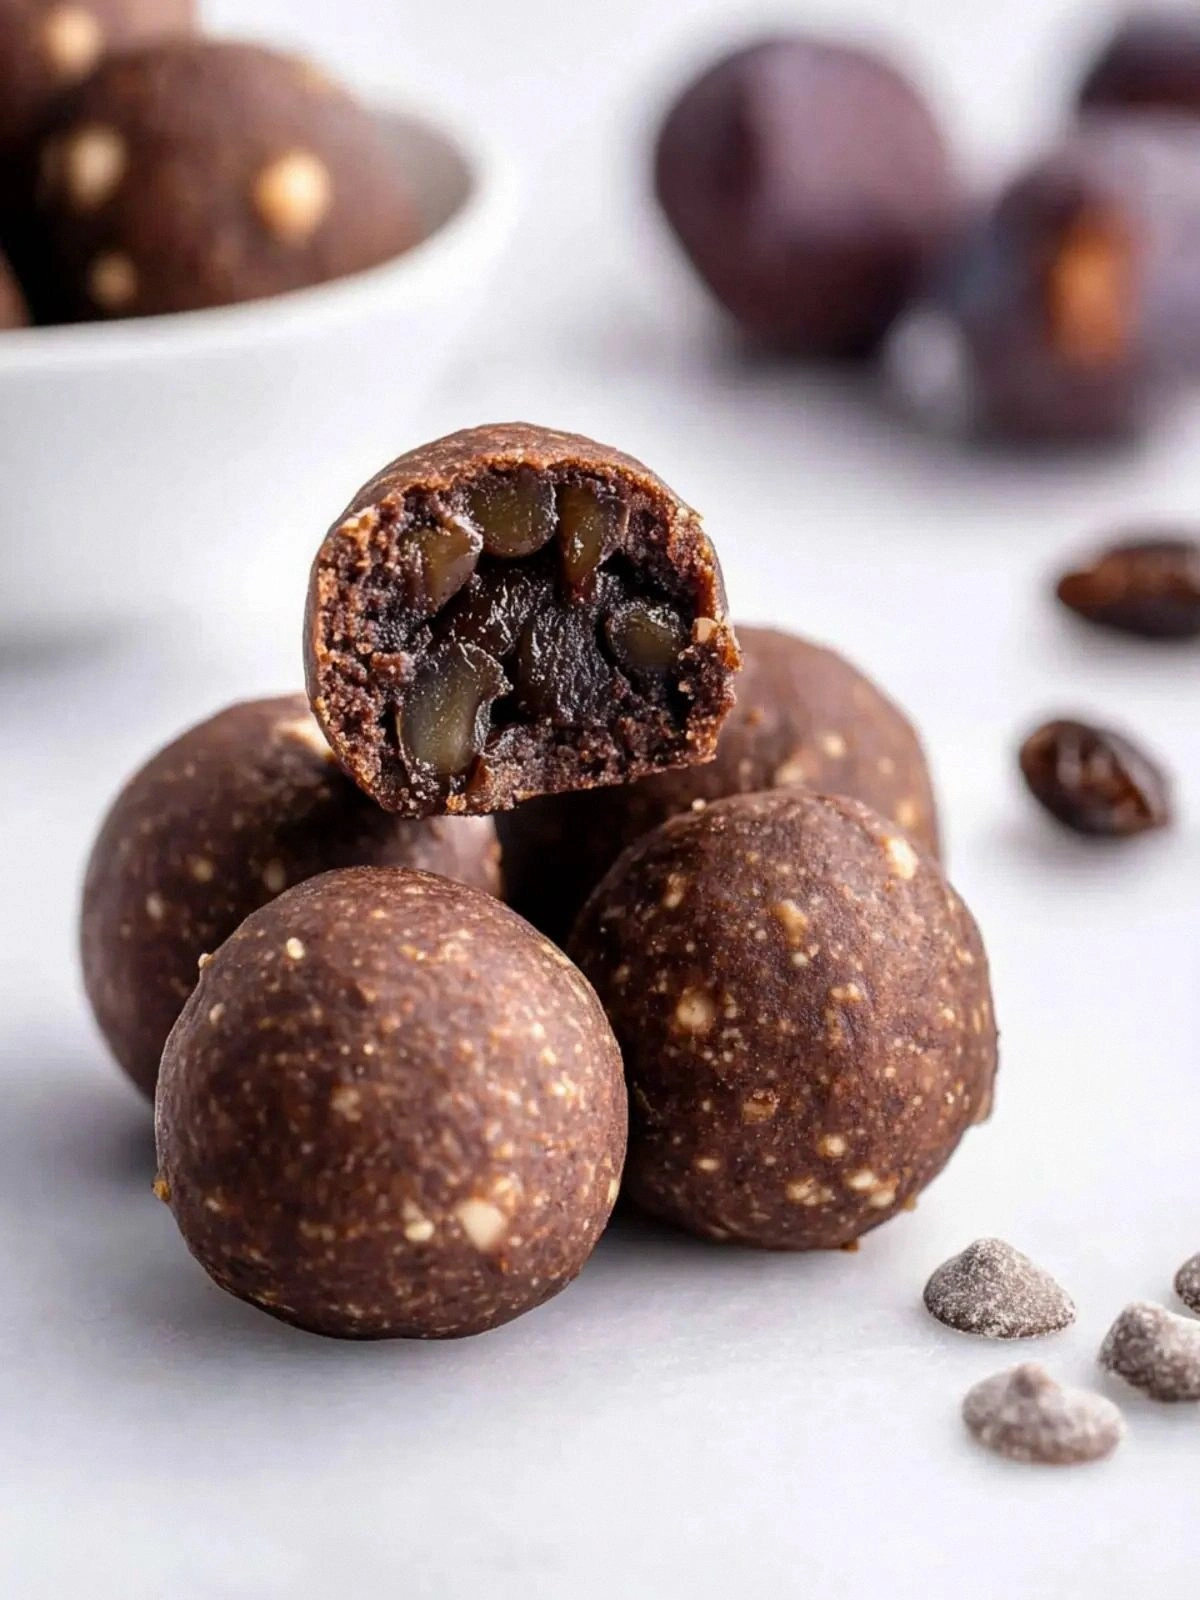
Picture this: you’re standing in a kitchen that smells like chocolate, almonds, and a hint of vanilla, yet you’re not even turning on the oven. That was my moment of culinary epiphany last month when a friend dared me to create a no‑bake dessert that could still command the table like a classic brownie. The result? A batch of bite‑size, chocolate‑rich, guilt‑free brownie bites that melt on the tongue and leave a whisper of sea salt lingering in the air. I’m talking about a dessert that feels indulgent but is actually a power‑packed snack, and I’ve been begging you to taste this and not go back for seconds.
The kitchen was a flurry of activity—raw almonds clinking against the countertop, the sweet aroma of Medjool dates filling the room, and a faint, comforting scent of cocoa powder that seemed to whisper, “You’re about to create something special.” The sound of the blender whirring was a rhythmic backdrop to the anticipation, while the texture of the dates, almost sticky, promised a natural sweetness that would bind everything together. I could almost taste the first bite: a soft, chewy center with a glossy, chocolatey coating that crackles slightly as you press it against your teeth. The sight of the dark cocoa powder swirling into the nut mixture was a visual promise of the deep flavor that was to come.
What makes this version stand out is that it eliminates the need for baking, yet it doesn’t compromise on the classic brownie experience. The combination of raw almonds and cashews creates a creamy base that’s richer than any standard no‑bake recipe. The Medjool dates act as the perfect natural sweetener, cutting down on added sugars while keeping the texture luscious. The unsweetened cocoa powder delivers that authentic chocolate hit, while the vanilla extract adds a subtle depth that elevates the flavor profile. And the sprinkle of sea salt on top? It’s the secret weapon that brings balance and a delightful finish. I’ll be honest—after making the first batch, I ate half before anyone else even had a chance to try it.
I dare you to taste this and not go back for seconds, because once you experience the melt‑in‑your‑mouth texture and the harmony of flavors, you’ll wonder how you ever settled for ordinary brownies. Picture yourself pulling this out of the fridge, the whole kitchen smelling incredible, and handing out these bite‑sized delights at a party. And if you’re thinking about a quick dessert, you’re not alone—this is the fix for anyone who wants a sweet treat that’s both satisfying and healthy. Stay with me here, because I’m about to walk you through every single step, and by the end, you’ll wonder how you ever made it any other way.
What Makes This Version Stand Out
- Flavor: The blend of raw almonds and cashews provides a naturally creamy base that mimics the richness of traditional brownies, while the Medjool dates inject deep, caramel-like sweetness.
- Texture: These bites achieve a chewy center and a slightly crisp edge that shatters like thin ice when you bite into them.
- Simplicity: No oven required—just a blender, a bowl, and a bit of patience. The entire process takes under fifteen minutes.
- Uniqueness: The addition of sea salt on top creates a savory counterpoint that enhances the chocolate flavor without overpowering it.
- Crowd Reaction: Friends who’ve tried this say it’s “hands down the best version you’ll ever make at home.”
- Ingredient Quality: Using raw, unsalted nuts and unsweetened cocoa ensures a pure, clean taste profile.
- Make‑Ahead Potential: These bites keep wonderfully fresh for up to a week in the fridge, making them perfect for meal prep or parties.
- Health Boost: Packed with protein, healthy fats, and fiber, they’re a guilt‑free indulgence that actually feeds your body.
Inside the Ingredient List
The Flavor Base
The unsweetened cocoa powder is the heart of this recipe. It delivers a deep, bitter chocolate profile that balances the natural sweetness of the dates. If you can’t find unsweetened cocoa, a dark chocolate that’s at least 70% cacao works well, though it will introduce a slightly sweeter edge.
The Texture Crew
Raw almonds and raw cashews are the dynamic duo that create the silky, creamy texture. The almonds add a subtle nutty crunch, while the cashews soften the mixture, giving it a smooth mouthfeel. If you’re allergic to nuts, you can replace them with sunflower seed butter or a blend of pumpkin seeds and hemp seeds, but be prepared for a different flavor and texture.
The Unexpected Star
Medjool dates are the unsung hero that brings natural sweetness without the spike in blood sugar. Their sticky, caramel-like flavor binds the nuts together, creating a cohesive bite. If you’re in a pinch, you can use pitted prunes or a handful of raisins, but they’ll alter the flavor profile slightly.
The Final Flourish
The vanilla extract and sea salt are the finishing touches that elevate the overall taste. Vanilla deepens the chocolate notes, while a pinch of sea salt brings out the richness and adds a subtle savory undertone. If you prefer a dairy-free version, make sure your chocolate chips are dairy-free.
Everything’s prepped? Good. Let’s get into the real action—no oven, no fuss, just pure, chocolatey bliss.
The Method — Step by Step
- Start by placing raw almonds and raw cashews in a high‑speed blender. Pulse until the mixture starts to look like coarse crumbs but still has a bit of texture. This step is crucial because it ensures the nuts don’t turn into a fine powder that will make the bites soggy.
- Add the pitted Medjool dates to the blender. Pulse again until the mixture becomes a sticky paste. The dates should be fully incorporated, creating a natural binder that will hold the bites together.
- Now introduce the unsweetened cocoa powder, vanilla extract, and sea salt. Blend until everything is evenly mixed. At this point, the mixture should have a deep chocolate color and a slightly glossy sheen. The aroma of cocoa is going to be irresistible.
- Fold in the chocolate chips gently with a spatula. The chips should be evenly distributed, ensuring each bite has a little extra chocolate. Be careful not to overmix; you want to keep the mixture light.
- Line a parchment‑lined tray with a silicone mat or a piece of parchment paper. Scoop tablespoon‑sized portions of the mixture onto the tray, flattening each into a round shape with the back of a spoon. The uniform size ensures even chill and easy portion control.
- Place the tray in the refrigerator for at least 30 minutes, or until the bites are firm enough to hold their shape. The chilling process allows the flavors to meld and the texture to set.
- Once firm, remove the bites from the tray and store them in an airtight container. They stay fresh for up to a week in the fridge or can be frozen for longer storage.
That’s it—you did it. But hold on, I’ve got a few more tricks that will take this to another level, ensuring every bite is perfect.
Insider Tricks for Flawless Results
The Temperature Rule Nobody Follows
Keep your kitchen at a steady 70°F (21°C). A cooler environment slows down the nuts’ oil release, preventing the mixture from becoming too greasy. If you’re in a warmer climate, place the bowl in a cool spot or add a few ice cubes to the blender to keep the temperature in check.
Why Your Nose Knows Best
Before you shape the bites, give the mixture a quick sniff. A strong cocoa aroma means your blend is rich enough; a faint scent indicates you might need to add a bit more cocoa or vanilla. Trust your nose—it’s your best flavor guide.
The 5-Minute Rest That Changes Everything
After blending, let the mixture rest for 5 minutes. This brief pause allows the nuts to hydrate fully, creating a smoother, more cohesive texture. Skipping this step can lead to uneven bites that crumble when you bite.
The Secret Salt Boost
Use sea salt instead of regular table salt. Its mineral profile enhances the chocolate flavor without a metallic aftertaste. A pinch is all you need; too much salt will dominate the bite.
The Chill Cycle
If you’re preparing a large batch, chill the mixture for 30 minutes before shaping. This makes it easier to scoop and ensures the bites set evenly. It also helps prevent the chocolate chips from melting into the mix.
Creative Twists and Variations
This recipe is a playground. Here are some of my favorite ways to switch things up:
Nutty Espresso Boost
Add a teaspoon of instant espresso powder to the blend. The coffee flavor pairs beautifully with chocolate, creating a mocha‑like bite that’s perfect for coffee lovers.
Coconut Crunch
Replace half of the almonds with shredded coconut. The coconut adds a tropical sweetness and a subtle crunch that contrasts nicely with the chewy center.
Spiced Cinnamon Twist
Sprinkle a pinch of ground cinnamon into the mixture. The warm spice elevates the chocolate flavor and gives the bites a comforting, autumnal feel.
Almond Butter Swirl
Drizzle a small amount of almond butter over each bite before chilling. This adds a silky layer of nutty richness that melts into the chocolate when you bite.
Seaweed Salt Finish
Dark Chocolate Drizzle
Melt a few dark chocolate chips in a double boiler and drizzle over the chilled bites. The glossy finish adds a touch of elegance and a burst of chocolatey intensity.
Berry Surprise
Fold in a handful of frozen blueberries before chilling. The berries pop when you bite, adding a juicy burst that balances the sweetness.
Storing and Bringing It Back to Life
Fridge Storage
Place the bites in an airtight container and refrigerate for up to 7 days. The cool temperature keeps the chocolate firm and prevents the nuts from releasing excess oil.
Freezer Friendly
Wrap each bite individually in parchment paper and place them in a freezer bag. Freeze for up to 3 months. When ready to serve, let them thaw at room temperature for 15 minutes for optimal texture.
Best Reheating Method
To revive a frozen bite, place it on a microwave‑safe plate and heat on low for 10–15 seconds. Add a tiny splash of water before reheating, then let it steam for a minute. This trick restores the melt‑in‑your‑mouth quality without drying the chocolate.