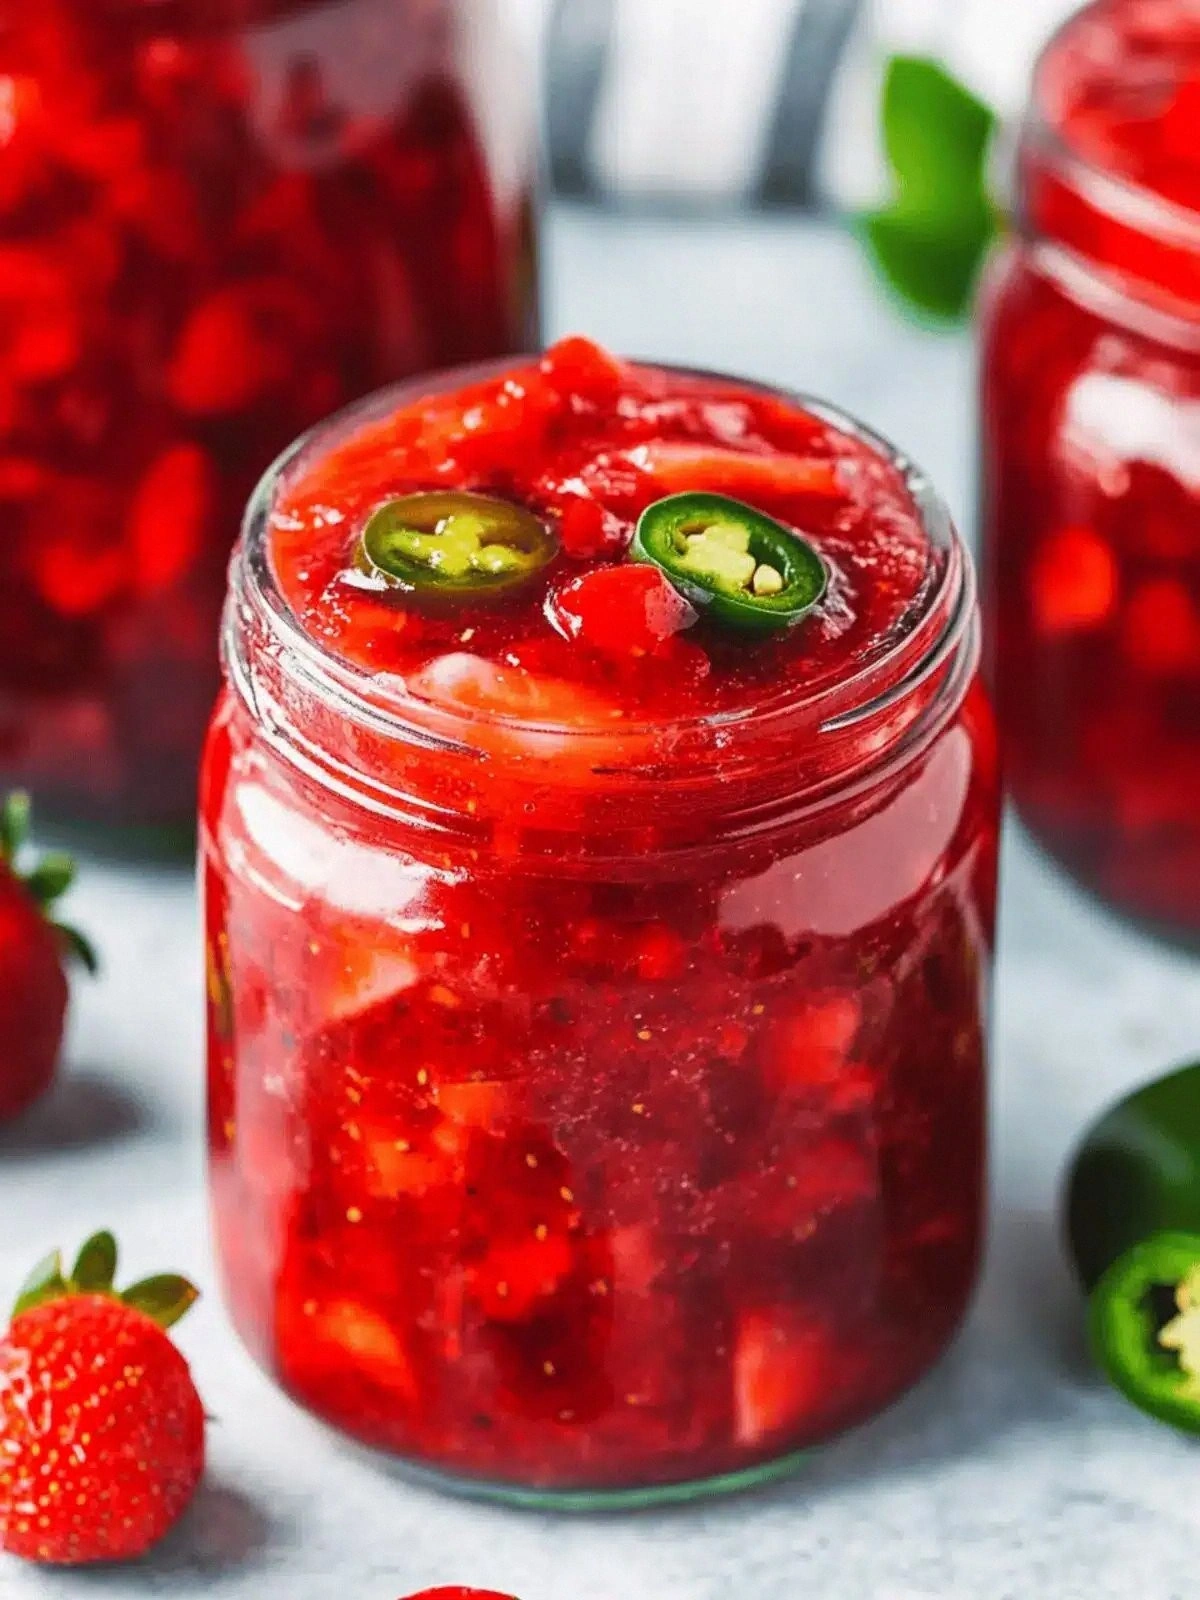
Picture this: a kitchen that smells like a summer picnic, a table draped in red and green, and the kind of sweet‑spicy tension that makes your taste buds do a double‑tap. I was in the middle of a backyard barbecue, watching a group of friends huddle around a grill, when someone dared me to add a little heat to their strawberry jam. I laughed, grabbed a jar of fresh strawberries, a jalapeño, and a few other ingredients, and said, “Let’s make the jam that’s as bold as a salsa‑driven love letter.” That moment sparked a kitchen experiment that would become a staple in my pantry.
The first bite was a revelation. The strawberries burst with a bright, almost citrusy sweetness that was immediately cut by a fiery jalapeño heat that lingered like a secret aftertaste. The texture was silky yet slightly chunky, each strawberry piece a jewel of juiciness. The aroma was a heady mix of ripe fruit and pepper, a scent that made my eyes water just from the air. When the jam slid onto toast, the butter melted into a glossy, golden glaze that carried the jam’s bold flavor across the palate. It was a sensory experience that made me swear that I’d never settle for ordinary strawberry jam again.
What makes this version stand out is not just the heat. It’s the balance of sweet and spicy, the way the jam coats the bread like a velvet ribbon, and the way the jalapeño’s heat is tempered by the bright acidity of lemon juice. The jam’s texture is perfectly jammy, not too runny, yet it pours smoothly when you open the jar. I dare you to taste this and not go back for seconds. And I’ve been honest: I ate half the batch before anyone else got to try it.
If you’ve ever struggled with making jam that isn’t either too sweet or too tangy, you’re not alone. I’ve spent countless evenings tweaking ratios, testing pectin levels, and balancing flavors. The result is a jam that’s hands down the best version you’ll ever make at home. Picture yourself pulling this out of the oven, the whole kitchen smelling incredible, and knowing that every spoonful is a burst of flavor. Let me walk you through every single step — by the end, you’ll wonder how you ever made it any other way.
What Makes This Version Stand Out
- Flavor: The sweet‑heat dance is engineered to keep the jam lively. The strawberries provide a bright, natural sugar that balances the jalapeño’s bite, while lemon juice lifts the overall profile, preventing it from feeling cloyingly sweet.
- Texture: With the right amount of pectin and a careful simmer, the jam thickens to a perfect spreadable consistency—smooth enough to glide over toast, yet chunky enough to give a satisfying bite.
- Ease: All you need is a saucepan, a spoon, and a jar. No fancy gadgets. Even beginners can follow along without feeling lost.
- Uniqueness: Most strawberry jam recipes skip the jalapeño entirely or add it in a way that overwhelms the fruit. Here, the pepper is integrated from the start, ensuring even heat distribution.
- Audience: Whether you’re a kid who loves sweet treats or an adult craving a sophisticated palate, this jam satisfies both ends of the spectrum.
- Ingredient Quality: Fresh, organic strawberries and jalapeños give the jam a depth that canned or frozen produce can’t match.
- Method: The cooking process is a series of deliberate steps that lock in flavor while preventing scorching.
- Make‑ahead: The jam keeps well for months if stored in a sealed jar, making it perfect for gift-giving or for those who like to batch‑cook.
Inside the Ingredient List
The Flavor Base
Fresh strawberries are the heart of this jam. They provide a natural sweetness and a vibrant color that makes the jar pop. Use ripe, firm strawberries for the best flavor; if you’re in a pinch, you can use frozen, but thaw them first to avoid excess water. Skipping strawberries would turn this into a pepper jam, losing the essential fruity backbone that balances the heat.
Jalapeño peppers are the star of the show. They add a sharp, lingering heat that cuts through the sweetness. Slice them thinly to ensure even cooking, and if you prefer a milder kick, remove the seeds and membranes. Removing them entirely would make the jam sweet but bland, lacking that signature spicy edge that makes it memorable.
The Texture Crew
Powdered pectin is the binding agent that turns fruit juice into jam. It’s critical for achieving the right consistency; without it, the jam would be runny and difficult to spread. If you’re allergic to pectin, you can try a natural thickener like chia seeds, but the texture will differ.
Granulated sugar not only sweetens but also helps preserve the jam by lowering the pH. Using white sugar keeps the color bright; brown sugar would add a caramel note but could darken the jam. Cutting sugar by half would compromise the jam’s shelf life and texture.
The Unexpected Star
Lemon juice is the unsung hero that brightens the jam and balances the jalapeño’s heat. It also helps activate the pectin, ensuring a smooth set. If you’re allergic to citrus, you can use lime juice, but it will change the flavor profile slightly.
Water is added to adjust the consistency during cooking. It prevents the jam from scorching on the bottom of the pan and helps the strawberries break down evenly. Too much water will dilute the jam, requiring more sugar to compensate.
The Final Flourish
Butter is the finishing touch that adds richness and a silky mouthfeel. It coats the jam, preventing it from drying out in storage. If you’re vegan, a splash of coconut oil works as a substitute, though it will give a subtle coconut hint.
Everything’s prepped? Good. Let’s get into the real action.
The Method — Step by Step
- Start by washing the strawberries under cold water, then pat them dry with a towel. Remove the stems and cut the berries into quarters—this ensures even cooking. While the berries are chopping, slice the jalapeño into thin rounds, removing seeds if you want a milder heat. The thinner the slices, the quicker they’ll integrate into the jam.
- In a large saucepan, combine the strawberries, jalapeño, and water. Place the pot over medium heat and stir until the mixture starts to bubble. The water helps the fruit release its juices and prevents scorching. Watch the pot; the first bubble is your cue that the mixture is coming to life.
- Add the powdered pectin to the pot, stirring vigorously to dissolve any clumps. The pectin will begin to thicken the mixture almost immediately. If you notice any lumps, a quick whisk will smooth them out. This step is crucial for achieving that perfect jam consistency.
- Stir in the granulated sugar and lemon juice, ensuring the sugar is fully dissolved. Bring the mixture to a gentle boil, then reduce the heat to low and let it simmer for about 15 minutes. The jam should thicken noticeably, and you’ll see small bubbles forming around the edges.
- Watch Out: When the jam reaches the thickening stage, it can quickly over‑cook and become sticky. Keep a close eye on it and stir constantly to prevent scorching. If the jam starts to look too thick, add a splash of water to loosen it.
- Once the jam has thickened to your liking, turn off the heat and stir in the butter. The butter should melt smoothly, giving the jam a glossy finish. Let the mixture sit for a minute so the butter fully integrates.
- Use a ladle to transfer the jam into sterilized jars. Leave about a quarter-inch of headspace to allow for expansion. Seal the jars immediately with lids and rings.
- Let the jars cool to room temperature, then refrigerate. The jam will set fully in about 2 hours. Once set, it’s ready to spread, drizzle, or use in recipes.
That’s it — you did it. But hold on, I’ve got a few more tricks that will take this to another level.
Insider Tricks for Flawless Results
The Temperature Rule Nobody Follows
Many people think a high boil is the key to thickening jam, but it’s actually the simmer that does the heavy lifting. Keep the temperature between 190°F and 200°F; this range allows the pectin to activate without burning the sugars. A high boil can cause the jam to caramelize, resulting in a bitter aftertaste.
Why Your Nose Knows Best
Smelling the jam as it cooks is a reliable way to gauge its readiness. When it’s ready, the aroma should be sweet, fruity, and slightly peppery. If you smell a burnt or metallic scent, the jam is overcooked.
The 5-Minute Rest That Changes Everything
After adding the butter, let the jam rest for five minutes off the heat. This allows the butter to melt fully and distribute evenly, giving the jam a silky, glossy finish. Skipping this step can leave the jam looking dull and uneven.
The “Drop Test” for Perfect Consistency
Drop a small spoonful of jam onto a cold plate. If it spreads slowly and leaves a clear ring, it’s set. If it runs, give it another few minutes. This simple test saves you from a jam that’s too runny or too thick.
The “Cool & Seal” Technique
Letting the jars cool at room temperature before sealing prevents vacuum formation that can cause the lids to warp. If you seal while the jam is still hot, the pressure can push the lid off, making the jar unsafe.
Creative Twists and Variations
This recipe is a playground. Here are some of my favorite ways to switch things up:
Honey‑Spiced Jalapeño Jam
Replace half the sugar with honey for a floral undertone. Add a pinch of cinnamon to deepen the spice. This version pairs wonderfully with goat cheese on crostini.
Chocolate‑Covered Strawberry Heat
After the jam has cooled, roll it in cocoa powder and sprinkle with sea salt. The chocolate masks the heat slightly while still offering a subtle kick. It’s a perfect topping for ice cream.
Citrus Burst Variation
Add a tablespoon of orange zest to the mix for a bright, citrusy twist. The zest complements the lemon juice and adds a fragrant aroma. Great for summer brunch spreads.
Herbal Infusion
Stir in a few fresh thyme leaves during the simmer. The herb adds a savory depth that balances the heat. It’s a delightful accompaniment to roasted chicken.
Smoky Chipotle Jam
Replace the jalapeño with chipotle peppers in adobo sauce. The smoky flavor adds a new dimension, making it ideal for tacos or grilled cheese.
Storing and Bringing It Back to Life
Fridge Storage
Store the jam in a sealed jar in the refrigerator. It will keep for up to 3 weeks. Keep the jar upright to prevent the jam from spilling over the rim.
Freezer Friendly
Transfer the jam to a freezer‑safe container, leaving a little headspace. Freeze for up to 6 months. Thaw overnight in the fridge before use.
Best Reheating Method
Reheat the jam in a saucepan over low heat, adding a splash of water to loosen the consistency. Stir until it’s warm and glossy. This technique brings the jam back to its original mouthfeel.