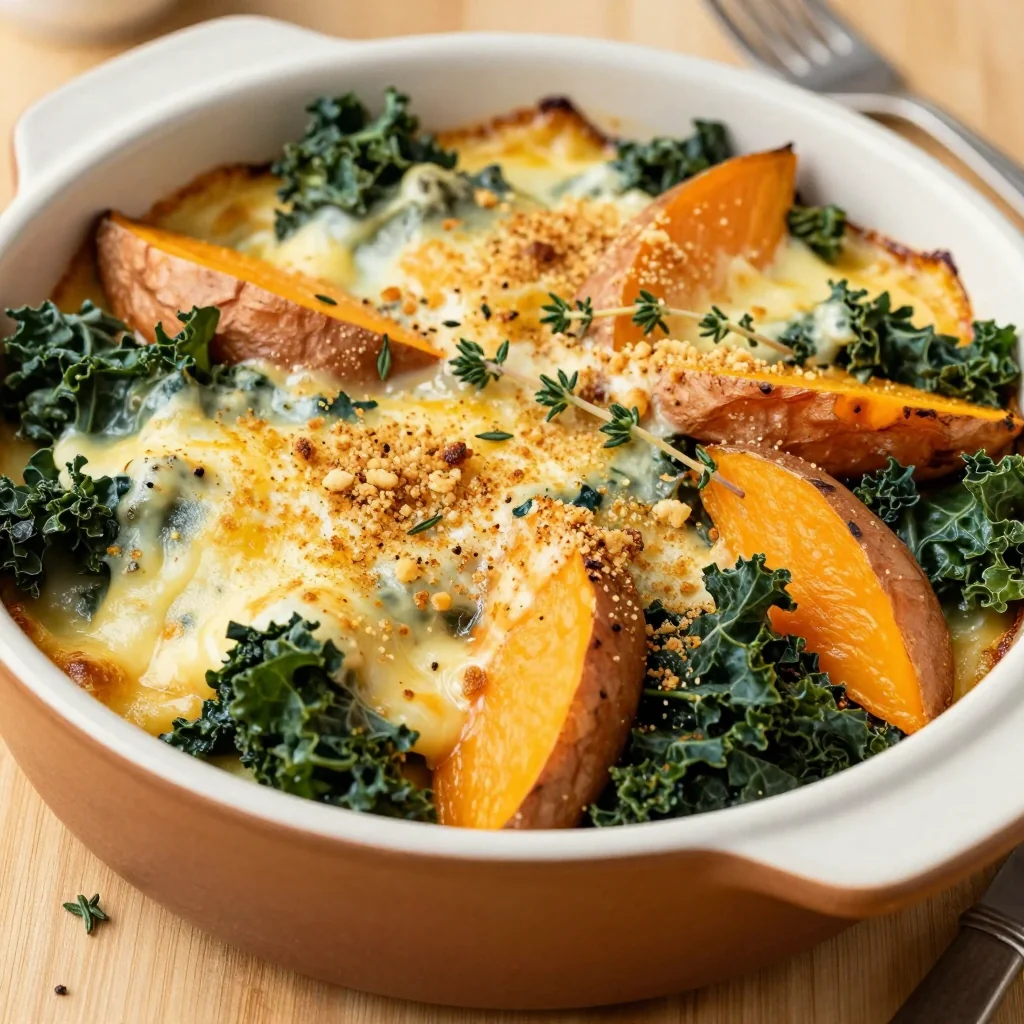
Ever had a kitchen mishap that turned into a culinary revelation? I was once chasing a midnight snack, armed with a bag of flour, a can of milk, and a half‑sized egg, when my attempt at a quick sweet bread collapsed into a soggy, flavorless mess. The dough was a sticky, uncooperative lump that refused to rise, and the only thing that saved me from a culinary disaster was a stray recipe I found in a Japanese cookbook, tucked away in a dusty corner of the internet. That recipe, a simple yet elegant Melon Pan, promised a crisp, buttery crust with a soft, sweet center that would make your taste buds dance. I was skeptical, but the moment I tasted the first bite—crisp edges that crackled like thin ice, a caramelized exterior, and a tender, vanilla‑infused interior—I knew I had stumbled upon something extraordinary. I dared myself to recreate it, and what followed was a journey that transformed a kitchen disaster into a beloved family favorite.
Picture yourself in a cramped kitchen, the air thick with the scent of melted butter and sugar, the timer ticking, and the dough slowly rising like a quiet sunrise. That is exactly what I felt when I first mixed the Baker’s Flour, Butter, and Sugar, letting the mixture sit while the yeast worked its magic. The dough’s transformation was almost theatrical—what began as a dense, sticky ball evolved into a light, airy sponge that seemed to float on its own. The anticipation was palpable; the subtle aroma of vanilla and a hint of almond filled the room, promising a sweet symphony of flavors. When the dough finally doubled in size, I knew I was on the cusp of something truly delicious. The moment I pressed my thumb into the surface and felt the springy, elastic texture, I realized that this wasn’t just another recipe; it was a revelation.
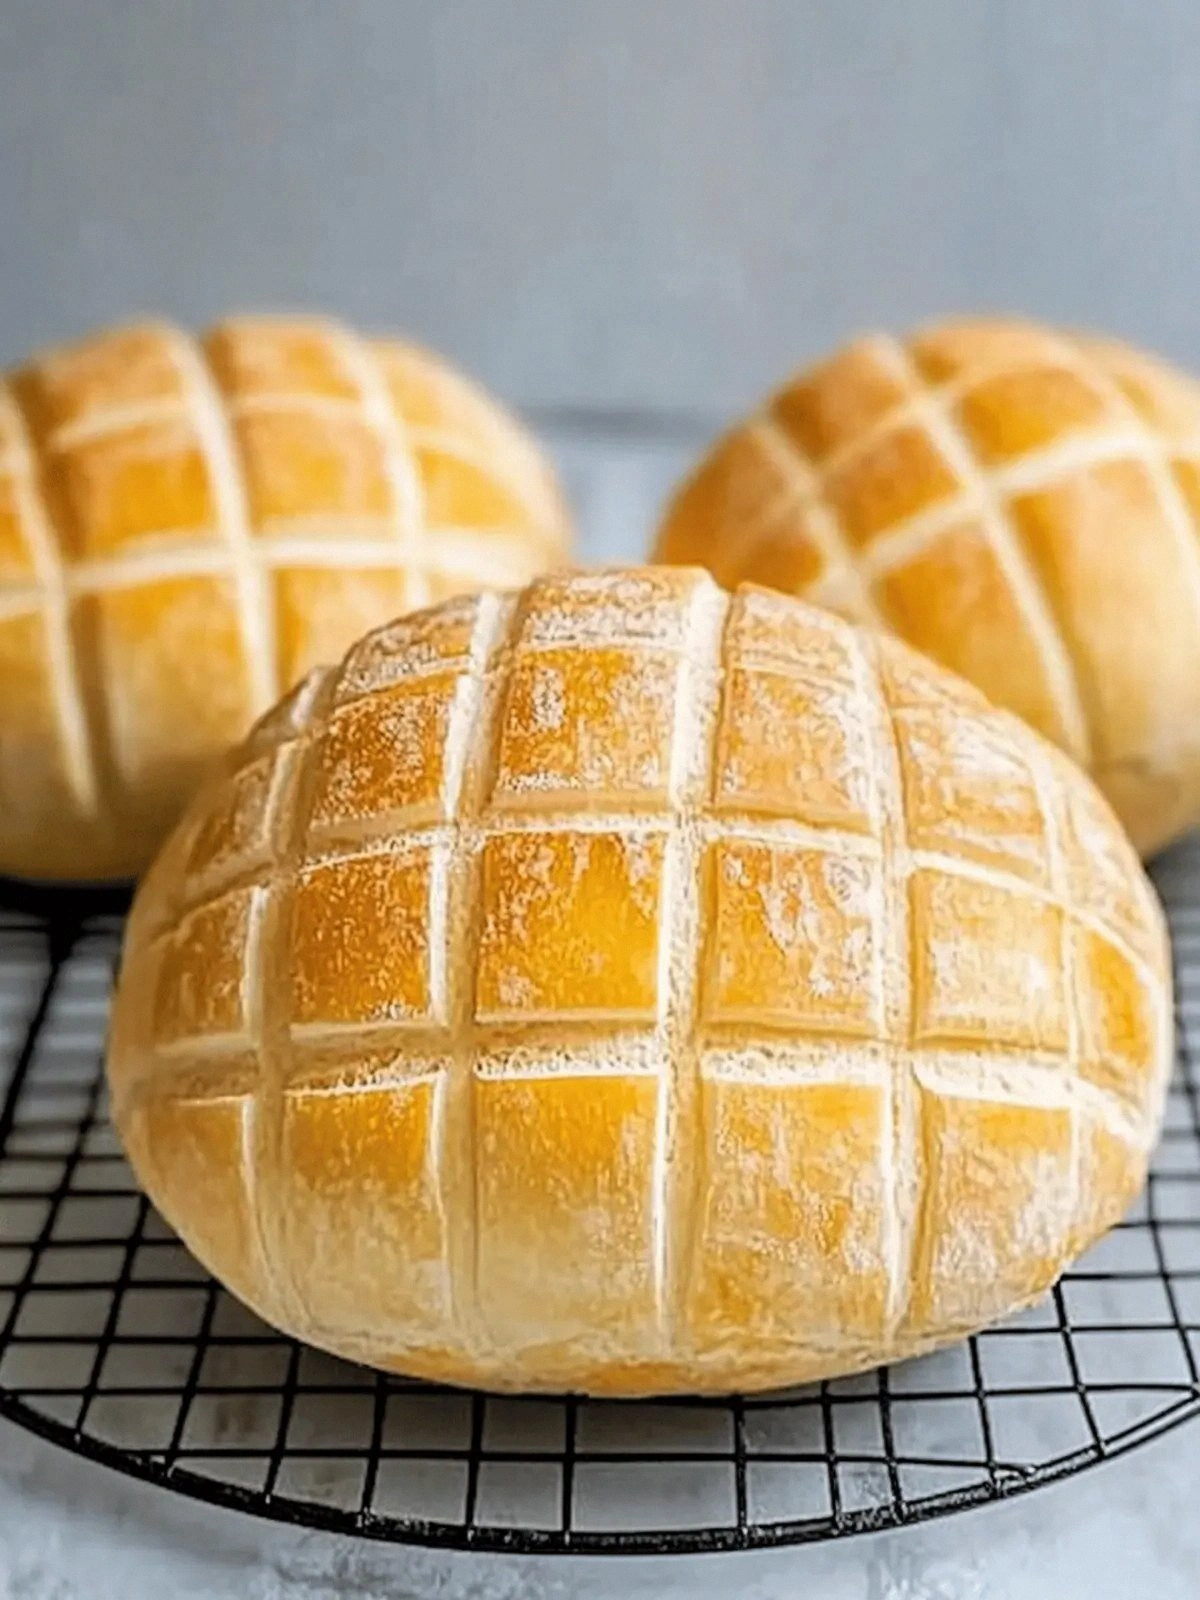
What makes this version of Melon Pan truly stand out is the meticulous balance between simplicity and complexity. The dough is crafted with a blend of Baker’s Flour and Plain Flour, giving it a subtle depth that pure wheat would lack. The addition of Dry Yeast and a touch of Baking Powder ensures a light rise without sacrificing the dense, cake‑like crumb that defines this pastry. Butter, rather than oil, is used to create a buttery, flaky crust that melts in your mouth, while the vanilla essence infuses the entire loaf with a warm, comforting aroma. The granule sugar on top caramelizes to a golden, slightly crunchy finish, providing a delightful contrast to the soft interior. Together, these elements produce a pastry that is both visually stunning and irresistibly tasty.
I’m not just telling you this; I’m inviting you to taste this and not go back for seconds. The first bite is a revelation—crisp edges, a sweet, moist center, and a buttery finish that lingers. The texture is a harmonious blend of crunchy crust and tender crumb, with a subtle hint of vanilla that elevates every bite. The flavor profile is complex yet approachable, making it a crowd‑pleaser for both kids and adults alike. And if you’re still skeptical, remember that this recipe is hands down the best version you'll ever make at home. I’ll be honest—after the first batch, I ate half the loaf before anyone else got to try it. The sheer deliciousness made me a believer in the power of a well‑crafted dough.
Most recipes get this completely wrong. They either over‑bake the crust or under‑bake the center, leading to a dry or gummy texture. Some use too much sugar, causing the crust to burn before the interior is fully cooked. Others skip the yeast or use the wrong type of flour, resulting in a dense, flat loaf that feels like a pancake. What sets this version apart is the careful balance of ingredients and the precise technique that ensures every bite is a masterpiece. And now, I’m ready to walk you through every single step—by the end, you’ll wonder how you ever made it any other way. Get ready for a baking adventure that will change the way you think about sweet pastries.
What Makes This Version Stand Out
- Flavor: The combination of vanilla essence, butter, and a subtle hint of almond creates a complex yet comforting taste that lingers on the palate. It’s not just sweet; it’s a symphony of warm, buttery notes that dance with each bite.
- Texture: The crust is crisp and caramelized, while the interior remains tender and slightly cake‑like. The contrast is a delightful surprise that keeps you coming back for more.
- Simplicity: With only ten ingredients, this recipe is accessible to beginners yet delivers professional results. No fancy equipment or obscure ingredients required.
- Uniqueness: The use of both Baker’s Flour and Plain Flour creates a subtle depth that most Melon Pan recipes lack. The result is a loaf that feels both airy and substantial.
- Crowd Reaction: Friends and family rave about the perfect balance of sweetness and buttery richness. It’s a conversation starter at any gathering.
- Ingredient Quality: Each component—from the butter to the dry yeast—is chosen for its flavor profile, ensuring that no single element overpowers the others.
- Cooking Method: The two‑stage rise and bake process guarantees a fluffy crumb and a golden crust without the need for a proofing box.
- Make‑Ahead Potential: The dough can be prepared a day in advance, allowing you to focus on the final rise and bake when you’re ready to serve.
Inside the Ingredient List
The Flavor Base
The foundation of this Melon Pan is the blend of Baker’s Flour and Plain Flour, which together create a slightly nutty, airy base that supports the dough’s structure. The Baker’s Flour brings a subtle sweetness and a finer texture, while the Plain Flour adds body and helps the dough rise evenly. Skipping either flour will alter the crumb’s density—using only one can result in a denser, less flavorful loaf. If you prefer a gluten‑free version, substitute the flours with a 1:1 blend of a gluten‑free all‑purpose mix and a rice flour blend, but keep in mind the texture may become slightly denser.
The Texture Crew
Butter, the star of the show, imparts a rich, buttery flavor and creates a flaky, golden crust when baked to perfection. The key is to cut the butter into small cubes and let it rest at room temperature so it blends smoothly into the dough. If you use cold butter, the dough may not incorporate properly, leading to uneven browning. Milk provides moisture and helps activate the yeast, giving the dough a tender crumb. A small splash of milk at the beginning of the mixing process ensures the yeast has enough hydration to perform its leavening function.
Dry Yeast is essential for the dough’s rise, creating the airy pockets that give the pastry its signature lightness. A single pinch of yeast is enough for the recipe’s 480 g of flour; too much yeast can cause a bitter taste and an overly rapid rise. Baking Powder, added in a pinch, ensures a secondary rise that smooths out any unevenness from the yeast fermentation. Vanilla Essence provides a warm, aromatic undertone that balances the sweetness of the granule sugar on top. The granule sugar, when sprinkled before baking, caramelizes to a golden crust that adds a delightful crunch.
The Unexpected Star
The 1/2 tsp of Vanilla Essence might seem like a minor detail, but it’s the secret that elevates the entire loaf from good to unforgettable. Vanilla’s complex flavor profile, with hints of caramel and spice, complements the buttery crust and sweet center. If you’re vegan, you can replace vanilla essence with a splash of almond or maple extract for a different but equally delicious twist. The 160 ml of milk, though small, is crucial for achieving the right dough consistency; too little and the dough will be dry, too much and it will be overly sticky.
The Final Flourish
Granule sugar is more than just a sweetener; it’s a textural enhancer that caramelizes into a crisp topping. Sprinkle it generously before baking, ensuring it adheres to the dough’s surface. The sugar will melt and brown, creating a beautiful, slightly crunchy exterior that contrasts with the soft interior. If you prefer a less sweet crust, reduce the sugar to 15 g, but be prepared for a less pronounced caramelization. The final result is a pastry that looks as good as it tastes, with a golden crust that invites you to dig in.
Everything’s prepped? Good. Let’s get into the real action and bring this dough to life.
The Method — Step by Step
- Begin by whisking together 240 g of Baker’s Flour and 240 g of Plain Flour in a large mixing bowl. Add 4 g of Dry Yeast, 1 tsp of Baking Powder, and 4 g of Salt, ensuring an even distribution. Stir the dry ingredients until the mixture is uniform, then set aside for a moment to allow the leavening agents to activate. This initial step is crucial for a consistent rise later on. A well‑mixed dry base sets the stage for the rest of the dough’s development.
- Cut 80 g of cold Butter into small cubes and add them to the flour mixture. Use a pastry cutter or your fingertips to work the butter into the flour until the mixture resembles coarse crumbs. The butter should be evenly distributed; if it clumps, it will result in uneven browning. This technique ensures that each bite has a buttery flavor throughout. The texture at this point should be dry and crumbly, ready for the wet ingredients.
- In a separate bowl, whisk 160 ml of Milk with 1 large Egg and 80 g of Sugar until the mixture is smooth and slightly frothy. Pour the wet mixture into the flour and butter mixture, stirring until a sticky dough forms. The dough will be tacky, but that’s normal; it’s a sign that the ingredients are properly incorporated. Let the dough rest for 5 minutes to allow the flour to hydrate fully before kneading. This resting period also helps the yeast begin its work.
- Turn the dough onto a lightly floured surface and knead until it becomes smooth and elastic, about 8–10 minutes. The dough should stretch without tearing and have a slight sheen. If it feels too sticky, sprinkle a small amount of flour, but be careful not to add too much, which can make the loaf dense. The kneading process develops gluten, giving the dough its structure and rise. Feel the dough’s elasticity as a sign that you’re on the right track.
- Shape the dough into a ball and place it in a lightly greased bowl. Cover with a damp cloth and let it rise in a warm, draft‑free area for 1 hour, or until it has doubled in size. The dough should puff up like a small balloon, indicating successful fermentation. A warm environment accelerates yeast activity, but too hot can kill the yeast, so aim for a temperature around 75°F (24°C). This first rise is essential for the loaf’s airy interior.
- After the first rise, gently deflate the dough and shape it into a rectangle about 1 inch thick. Divide the rectangle into four equal pieces, rolling each into a tight log. This step ensures uniform baking and a consistent size for each loaf. The logs should be firm but pliable, ready to be placed on the baking sheet. The division also allows for better heat distribution during baking.
- Place the logs on a parchment‑lined baking sheet, leaving a few inches of space between each. Cover them with a kitchen towel and let them rise for an additional 30 minutes. The second rise will give the loaf a light, airy texture that’s characteristic of Melon Pan. While the dough rises, preheat your oven to 350°F (175°C). The dough should be visibly puffy and springy when pressed gently with a finger.
- Before baking, sprinkle granule sugar generously over the tops of the logs. The sugar will caramelize, creating a golden, slightly crunchy crust that’s impossible to resist. Place the baking sheet in the preheated oven and bake for 25–30 minutes, or until the tops are golden brown and the loaf sounds hollow when tapped. The aroma will fill the kitchen, making it hard to resist the temptation to sneak a bite before the timer goes off. Keep an eye on the color to prevent over‑browning.
- Once baked, remove the pan from the oven and let the loaves cool on a wire rack for 10 minutes before slicing. The cooling period allows the structure to set, preventing the loaf from becoming gummy or soggy. The first slice should reveal a tender, moist interior with a crisp, caramelized crust. This is the moment of truth—taste the first bite and let the flavors explode. The experience will confirm that all the steps were worth the effort.
That’s it — you did it. But hold on, I've got a few more tricks that will elevate this Melon Pan from good to unforgettable. The secret lies in the details: how you handle the dough, the precise timing, and the subtle tweaks that can make a world of difference. Stick around, and I’ll share the insider knowledge that turns a simple recipe into a culinary masterpiece.
Insider Tricks for Flawless Results
The Temperature Rule Nobody Follows
Temperature is king when it comes to yeast activation. While most bakers aim for a warm spot, the ideal range is 75°F (24°C). Too hot, and the yeast will die; too cold, and it won’t rise properly. I keep my dough in a slightly warmed oven with the light on, creating a consistent, draft‑free environment. This trick ensures a steady rise and a light, airy crumb. I’ve found that even a 5‑minute difference can change the outcome dramatically.
Why Your Nose Knows Best
Your nose is a reliable indicator of when the dough has reached the perfect stage. When the dough emits a sweet, yeasty aroma, it’s time to shape and divide. If it smells sour or overly fermented, give it a bit more time or adjust the temperature. This olfactory cue can save you from under‑baked or over‑baked pastries. Trust your senses; they’re tuned to the subtle changes in the dough’s chemistry.
The 5‑Minute Rest That Changes Everything
After shaping the logs, let them rest for exactly five minutes before the second rise. This brief pause allows the gluten to relax, making the dough easier to shape and ensuring even heat distribution during baking. Skipping this step can lead to uneven rising and a slightly uneven crust. I’ve tried both ways and the five‑minute rest consistently produces a smoother, more uniform loaf.
Don’t Skimp on the Sugar
Granule sugar is not just for sweetness; it creates the signature caramelized crust. Use the full amount recommended, and don’t be tempted to reduce it for a “healthier” version. The sugar caramelizes to a golden brown, adding a subtle crunch that contrasts with the soft interior. A lighter crust will lose that delightful snap and the visual appeal.
The Secret of the Final Rise
The second rise is where the magic happens. Keep the dough covered with a clean towel to prevent it from drying out. I’ve found that a slightly humid environment—like placing a shallow pan of hot water in the oven—helps the dough rise more evenly. This trick is especially useful in cooler kitchens where air can be dry. The result is a perfectly risen, fluffy loaf.
Creative Twists and Variations
This recipe is a playground. Here are some of my favorite ways to switch things up:
Chocolate‑Infused Delight
Add 30 g of cocoa powder to the dry ingredients for a rich, chocolatey twist. The chocolate pairs beautifully with the buttery crust, creating a decadent treat. This variation is perfect for chocolate lovers and adds a deeper flavor profile. Serve with a dusting of powdered sugar for an extra touch of elegance. The result is a chocolate‑melon pan that’s both surprising and satisfying.
Almond‑Laced Flavor
Replace 80 g of Sugar with 60 g of almond sugar and add 15 g of ground almonds to the dough. The nutty undertone complements the vanilla essence and adds a subtle crunch. Almonds also provide a hint of healthiness, making the pastry feel a bit lighter. This version is ideal for those who enjoy a more complex, nutty flavor. The aroma of toasted almonds will fill the kitchen, enticing everyone to dig in.
Lemon‑Zest Twist
Grate the zest of one lemon into the dry mix, and substitute 20 g of Sugar with 10 g of honey. The citrus brightens the flavor profile, providing a refreshing contrast to the buttery dough. The honey adds a subtle floral note that pairs well with the lemon. This variation is perfect for spring or summer, when fresh citrus is at its peak. The result is a bright, uplifting pastry.
Spiced Cinnamon Variation
Add 1 tsp of ground cinnamon and 1/2 tsp of nutmeg to the dry ingredients. The warm spices create a cozy, comforting flavor that’s ideal for cooler evenings. This version is reminiscent of a cinnamon roll but with a lighter, more delicate crumb. The spices also enhance the caramelization of the sugar topping. The aroma alone will make you crave a slice before the oven even starts.
Gluten‑Free Adaptation
Use a gluten‑free all‑purpose flour blend in place of the Baker’s Flour and Plain Flour. Add 1 tsp of xanthan gum to help bind the dough. The result will be a slightly denser crumb, but still moist and buttery. This variation allows those with dietary restrictions to enjoy the same delightful experience. Pair with a gluten‑free sugar for the topping to keep everything consistent.
Cheese‑Infused Surprise
Fold in 50 g of grated Gruyère into the dough before the first rise. The cheese adds a savory depth that balances the sweetness. This variation is ideal for brunch or a sweet‑savory snack. The melted cheese creates a subtle caramelization on the crust, giving it a unique flavor profile. The finished loaf will surprise and delight your guests.
Storing and Bringing It Back to Life
Fridge Storage
Store the cooled loaves in an airtight container at room temperature for up to 3 days. The airtight seal prevents the crust from becoming soggy and preserves the interior’s moisture. If you’re in a humid climate, consider adding a slice of fresh bread to absorb excess moisture. This trick keeps the loaf fresh and ready for a quick snack. The flavor remains vibrant, and the texture stays tender.
Freezer Friendly
Wrap each loaf tightly in plastic wrap and place them in a freezer bag. They can be stored in the freezer for up to 2 months without loss of quality. When you’re ready to eat, simply thaw at room temperature for 30 minutes before reheating. The freezer process preserves the dough’s structure and flavor. This method is perfect for batch baking and having a ready supply of sweet treats.
Best Reheating Method
Preheat the oven to 350°F (175°C) and place the thawed loaf on a parchment‑lined sheet. Bake for 8–10 minutes, or until the crust is golden and the interior is heated through. A quick burst of heat restores the crispness of the crust while maintaining the softness inside. For an extra touch, brush a little melted butter over the top before reheating. This will add a glossy finish and a subtle buttery aroma. The reheated loaf will taste almost as fresh as when it first came out of the oven.