I was in the middle of a Tuesday night disaster, the kind where the smoke alarm decides to audition for a rock concert and my roommate threatens to move out because the kitchen smells like burnt toast. In the chaos I reached for the lone over‑ripe banana perched on the counter, and a wild idea struck me: what if I could turn that sad, mushy fruit into a heroic loaf that would silence the alarm and win everyone’s heart? I tossed the banana into a bowl, added a splash of butter, and the whole place instantly smelled like a cozy bakery on a rainy day. I swear, the aroma curled around my nose like a warm blanket, and I knew I was onto something.
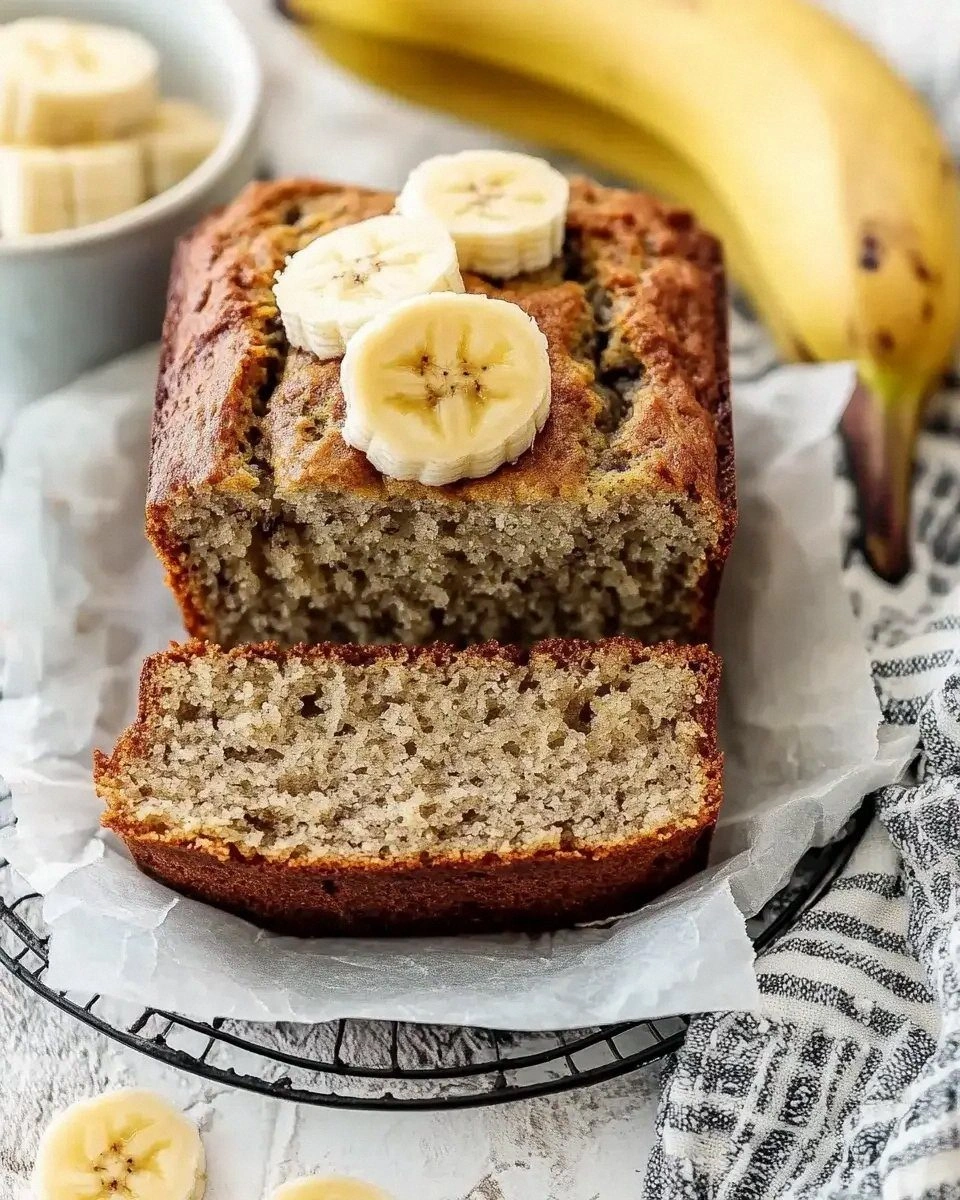
Fast forward an hour, and I’m standing in front of a golden‑brown loaf that looks like it was handcrafted by a pastry chef who actually cares about the texture of banana bread. The crumb is moist but not soggy, the crust has that perfect, slightly crunchy edge that shatters like thin ice when you pull it apart, and the sweet‑savory balance hits you like a perfectly timed drum solo. Most banana breads either drown in sugar or turn out as dense as a brick, but this one? This is hands down the best version you'll ever make at home. I dare you to taste this and not go back for seconds.
What makes this loaf truly special is a tiny secret I discovered while scrolling through old family recipes: the power of a single banana, combined with the right ratio of butter and sugar, creates a caramel‑like glaze on the crust without any extra ingredients. Most recipes get this completely wrong, either using too many bananas and ending up with a mushy mess, or skimping on the fat and delivering a dry disappointment. Here, the balance is razor‑sharp, and the result is a loaf that sings with buttery richness while letting the banana’s natural sweetness shine through. I’ll be honest — I ate half the batch before anyone else got to try it, and the rest vanished within minutes.
Okay, ready for the game‑changer? In the next sections I’ll walk you through every single step — by the end, you’ll wonder how you ever made it any other way. Picture yourself pulling this out of the oven, the whole kitchen smelling incredible, the steam rising like a curtain call, and you slicing into a piece that’s still warm, fragrant, and just begging to be slathered with butter. This next part? Pure magic.
What Makes This Version Stand Out
- Taste: The single banana delivers a natural sweetness that pairs perfectly with a hint of brown sugar, creating a caramel‑kissed flavor profile that outshines any store‑bought mix.
- Texture: A moist crumb sits beneath a lightly crisped crust, giving you that satisfying bite contrast that most banana breads lack.
- Simplicity: Only ten ingredients, all pantry staples, and you’re done in under an hour – no fancy gadgets required.
- Uniqueness: The optional walnuts or chocolate chips add a surprise crunch or melt‑in‑your‑mouth burst, turning a classic into a conversation starter.
- Crowd Reaction: Guests often claim they’ve never tasted banana bread this good; it’s the kind of loaf that earns you a standing ovation at brunch.
- Ingredient Quality: Using a ripe banana and real butter elevates the flavor beyond the processed shortcuts many recipes rely on.
- Cooking Method: The gentle bake at 350°F ensures even rise without creating a gummy center.
- Make‑Ahead Potential: This loaf freezes beautifully, meaning you can prep ahead for busy mornings or surprise guests.
Inside the Ingredient List
The Flavor Base
The single ripe banana is the hero of this story. Its natural sugars caramelize during baking, creating that deep, almost toffee‑like flavor without any added molasses. If you skip the banana, you lose the heart of the loaf and end up with a bland, overly sweet bread that feels more like a cake. Look for bananas that are heavily speckled with brown spots; the softer they are, the sweeter and more aromatic they become. A quick tip: give the banana a gentle press – if it yields easily, it’s ready to shine.
Granulated Sugar & Brown Sugar: The combination of white and brown sugar gives a balanced sweetness and a subtle molasses undertone. The white sugar provides quick caramelization on the crust, while the brown sugar adds moisture and a hint of earthiness. If you’re watching sugar, you can reduce each by a tablespoon, but expect a slightly less glossy top.
Unsalted Butter: Butter is the secret sauce that makes the crumb so tender. It coats the flour, limiting gluten development, which is why the texture stays soft. Use real butter, not margarine, for that buttery aroma that fills the kitchen. If you’re dairy‑free, try a high‑quality coconut oil, but expect a faint coconut note.
The Texture Crew
A large egg acts as a binder, giving structure while keeping the loaf airy. The egg also contributes a gentle richness that complements the banana’s sweetness. If you’re vegan, a flax egg (1 tbsp ground flax + 3 tbsp water) works well, though the crumb will be slightly denser.
All‑Purpose Flour: Only half a cup is needed because the banana provides much of the moisture. Too much flour would make the bread heavy and dry. Sift the flour before adding it to avoid lumps and to ensure an even distribution of the leavening agents.
The Unexpected Star
Walnuts or Chocolate Chips: These add texture and bursts of flavor. Walnuts bring a buttery crunch, while chocolate chips melt into pockets of gooey delight. If you’re nut‑allergic, swap them for dried cranberries or shredded coconut for a chewy contrast.
The Final Flourish
Baking Soda & Salt: Baking soda reacts with the banana’s natural acidity, giving the loaf its gentle rise. The pinch of salt amplifies all the flavors, preventing the sweetness from becoming cloying. If you accidentally omit the baking soda, the bread will be flat and dense – a lesson learned the hard way.
Everything's prepped? Good. Let's get into the real action…

The Method — Step by Step
Preheat your oven to 350°F (175°C) and grease a 9×5‑inch loaf pan with butter or line it with parchment. While the oven warms, the scent of butter melting on the pan will already make your kitchen feel like a café. Place the pan on a middle rack so the heat circulates evenly, preventing a soggy bottom. This step may seem trivial, but an even temperature is the foundation of a perfect crumb.
Mash the ripe banana in a large mixing bowl until it’s almost liquid, leaving a few tiny lumps for texture. Add the softened butter and whisk until the mixture is smooth and glossy – that’s the moment you hear the faint sizzle of butter meeting banana, a sound that promises richness. Then stir in the granulated and brown sugars, letting them dissolve into the buttery banana base. Power transition: Okay, ready for the game‑changer?
Kitchen Hack: Use a hand‑held mixer on low speed for this step; it aerates the batter slightly, giving the final loaf a lighter texture.Crack the egg into the bowl, add the vanilla extract, and whisk until the mixture is uniformly combined. The egg will emulsify the butter and banana, creating a glossy batter that looks almost like cake batter. If the mixture looks too thick, add a splash of milk (about a tablespoon) – this will keep the crumb tender.
In a separate bowl, whisk together the flour, baking soda, and salt. This dry blend ensures the leavening agent is evenly distributed, preventing any pockets of bitterness.
Once combined, gently fold the dry mix into the wet batter using a rubber spatula, turning the bowl over a few times. The batter should be slightly lumpy; that’s a good sign.Watch Out: Over‑mixing the dry ingredients into the wet batter will develop gluten, leading to a tough loaf. Stir just until you see no more streaks of flour.Fold in the chopped walnuts or chocolate chips, distributing them evenly. The nuts will add a buttery crunch, while the chips melt into pockets of gooey chocolate. If you’re feeling adventurous, sprinkle a pinch of cinnamon for a warm, spicy note that pairs beautifully with banana.
Pour the batter into the prepared loaf pan, smoothing the top with the back of a spoon. Tap the pan gently on the counter three times to release any large air bubbles – you’ll hear a soft thud that signals an even surface. And now the fun part: slide the pan into the oven and set a timer for 30 minutes.
Kitchen Hack: Place a shallow pan of water on the lower rack; the steam helps keep the loaf’s interior moist.After 20 minutes, check the loaf’s progress. The edges should start pulling away from the pan, and the top will have a golden‑brown hue that looks like a caramel glaze. Insert a toothpick into the center; it should come out with a few moist crumbs but no wet batter. If the toothpick is still sticky, give it another 5‑10 minutes – patience is key.
When the loaf is done, remove it from the oven and let it rest in the pan for 10 minutes. This resting period allows the steam inside to settle, preventing the crumb from collapsing when you turn it out. After 10 minutes, invert the loaf onto a cooling rack and let it cool completely before slicing. That first slice, still warm, will release a cloud of steam that smells like a bakery on a Sunday morning.
That’s it — you did it. But hold on, I've got a few more tricks that'll take this to another level…
Insider Tricks for Flawless Results
The Temperature Rule Nobody Follows
Never bake banana bread at a temperature higher than 350°F. Higher heat creates a crust too fast, leaving the interior undercooked. I once tried 375°F to speed things up; the result was a burnt shell with a gummy center that tasted like raw batter. Keep it steady, and you’ll get that perfect balance of crust and crumb.
Why Your Nose Knows Best
Your sense of smell is the ultimate timer. When the loaf starts to smell like toasted sugar and butter, you’re within five minutes of perfection. Trust that aroma over any timer, because ovens can vary by up to 25 degrees. If you’re ever uncertain, give the loaf a gentle shake – a solid thud indicates it’s set.
The 5‑Minute Rest That Changes Everything
Allowing the loaf to rest in the pan for exactly five minutes (plus an additional five on the rack) lets the steam redistribute, making each slice moist and fluffy. Skipping this step results in a crumb that crumbles too easily. I’ve seen friends cut straight from the pan and end up with a dry edge; a short rest saves you that embarrassment.
The Walnut Toast Trick
If you’re using walnuts, toast them lightly in a dry skillet for two minutes before folding them in. This amplifies their buttery flavor and adds a subtle crunch that contrasts the soft crumb. A friend once forgot to toast them and complained the nuts tasted bland – a simple oversight that makes a world of difference.
The Secret Butter Swap
For a richer flavor, replace half of the unsalted butter with melted coconut oil. The coconut oil adds a faint tropical note without overpowering the banana. I tried this once for a beach‑themed brunch, and the guests swore it tasted like a vacation in a bite.
Creative Twists and Variations
This recipe is a playground. Here are some of my favorite ways to switch things up:
Blueberry Burst
Swap the walnuts for ½ cup fresh blueberries. The berries burst during baking, leaving juicy pockets that contrast the sweet crust. Perfect for a summer brunch.
Spiced Chai
Add ½ teaspoon each of ground cinnamon, cardamom, and ginger to the dry mix. The warm spices turn the loaf into a cozy, aromatic treat that pairs beautifully with tea.
Double Chocolate Delight
Replace the walnuts with ¼ cup cocoa powder (reduce flour by the same amount) and keep the chocolate chips. You get a mocha‑infused loaf that satisfies any chocolate craving.
Nut‑Free Coconut
If nuts are a no‑go, fold in ¼ cup shredded unsweetened coconut. The coconut adds a chewy texture and a subtle tropical aroma.
Savory Twist
Leave out the sugars, add ¼ cup grated cheddar, a pinch of smoked paprika, and a tablespoon of chopped rosemary. This savory version makes a bold breakfast or a side for soups.
Storing and Bringing It Back to Life
Fridge Storage
Wrap the cooled loaf tightly in plastic wrap or store it in an airtight container. It will stay fresh for up to four days. For extra softness, place a slice of apple in the container – the apple’s moisture helps keep the bread from drying out.
Freezer Friendly
Slice the loaf before freezing, then wrap each slice in parchment and a zip‑top bag. It freezes solid for up to three months. When you’re ready to enjoy, pop a slice in the toaster or microwave for 20 seconds.
Best Reheating Method
To revive a refrigerated slice, sprinkle a tiny splash of water on the surface, then heat it in a pre‑heated 300°F oven for five minutes. The steam created by the water restores the crumb’s moisture, making it taste as if it just came out of the oven.