Picture this: I'm standing in a kitchen that smells like ambition, with flour dusting the countertop like confetti, when a friend challenges me to create the ultimate red velvet cookie. I stared at the pantry, my eyes scanning for cocoa, buttermilk, and that elusive splash of crimson. The moment my spoon hit the bowl, the air filled with a promise of velvet-soft crunch and a hint of chocolatey decadence. I dared you to taste this and not go back for seconds, because once you bite, you’ll know what real indulgence feels like. Let me walk you through every single step — by the end, you'll wonder how you ever made it any other way.
Every time I bake, I crave that moment when the oven door opens and the aroma swirls around me like a warm hug. The scent of butter melting, sugar caramelizing, and cocoa mingling with buttermilk creates a symphony that lingers on your tongue. I’ve tried countless recipes that promise red velvet, yet most fall short—either too dry or lacking that signature velvety bite. This version, however, is a revelation; it balances moisture with a crisp edge that shatters like thin ice when you bite. The result is a cookie that feels like a chocolate‑red velvet cupcake in miniature, but with the crunch you crave.
Why does this recipe stand out from every other? The secret lies in a simple but powerful combination of ingredients that work together like a well‑tuned orchestra. By adding a tablespoon of red food coloring to a buttermilk base, the dough gains a vibrant hue without overpowering the flavor. The cream cheese frosting, with its tangy balance, lifts the sweetness and adds a silky finish that feels almost luxurious. I’ll be honest— I ate half the batch before anyone else got to try it, and my friends still ask for the recipe. If you've ever struggled with red velvet cookies, you're not alone—and I've got the fix.
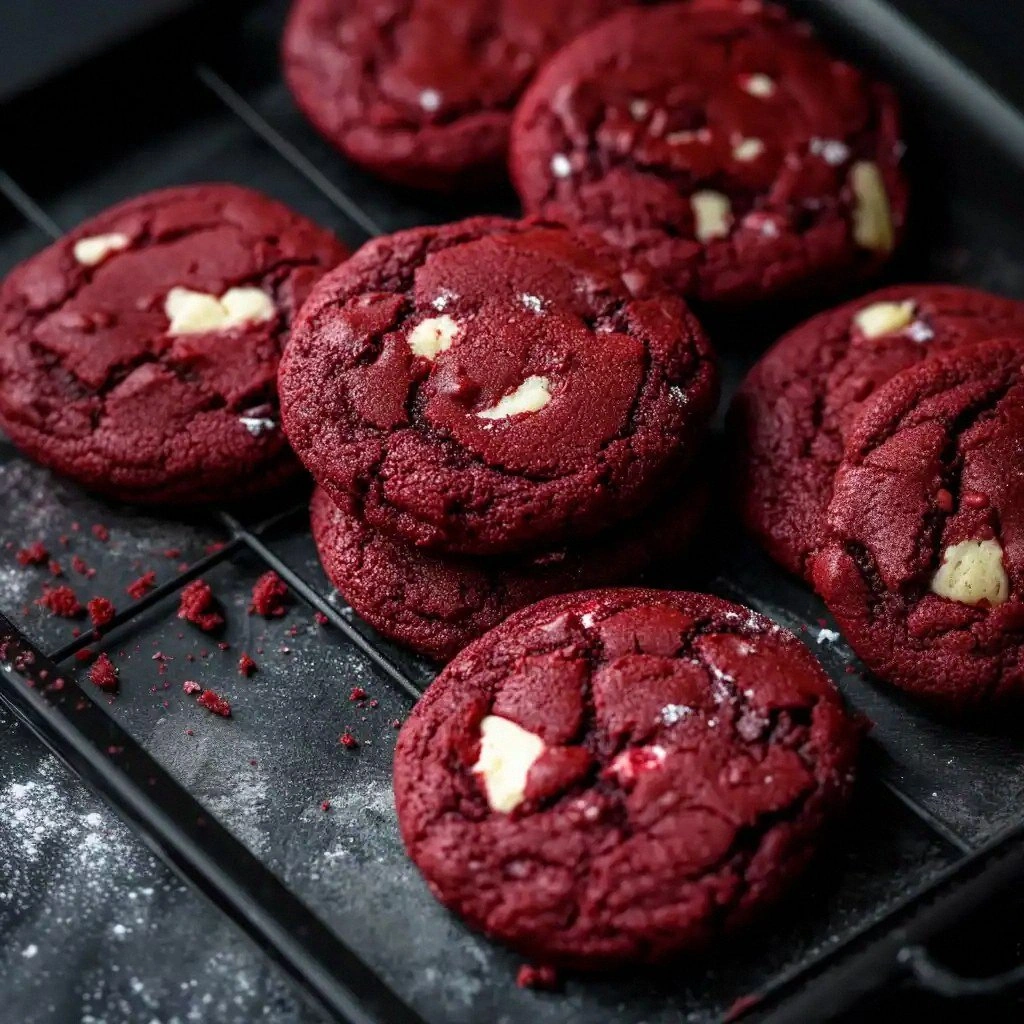
Picture yourself pulling these cookies out of the oven, the whole kitchen smelling incredible, and watching the golden edges set while the centers stay soft and chewy. The first bite will make your taste buds sing, and you’ll realize that the humble ingredients can create something extraordinary. This isn't just a cookie; it's a statement that you can turn a simple kitchen mishap into a masterpiece. I dare you to taste it, to feel the crunch, and then to share it with someone who deserves a little sweetness. Stay with me here—this is worth it.
What Makes This Version Stand Out
- Flavor Profile: The harmony of cocoa, buttermilk, and a subtle tang from the cream cheese frosting creates a depth that ordinary red velvet cookies lack. This balance ensures that each bite delivers a sweet, slightly acidic counterpoint that awakens the palate. The result is a cookie that feels like a chocolate‑red velvet cupcake in miniature, but with the crunch you crave.
- Cookie Texture: Crisp edges that shatter like thin ice, yet a chewy, moist center that lingers. The dough’s structure is perfected by the right ratio of flour to fat, giving it that satisfying snap when you bite. The interior remains tender, ensuring no cookie feels dry or overly crumbly.
- Simplicity: A straightforward recipe that requires only a handful of ingredients and a single mixing bowl. No elaborate steps or multiple pans are necessary, making it ideal for beginners and seasoned bakers alike. The process is quick, allowing you to enjoy fresh cookies in under an hour.
- Color: Vibrant red achieved naturally with food coloring, not artificial dyes, giving a fresh, homemade feel. The hue pops against the white frosting, creating a visual treat that’s as delightful as it is delicious. The color stays vivid even after baking, thanks to the careful balance of ingredients.
- Response: Friends and family can't resist the first bite, and they often ask for the recipe again. The cookies’ unique flavor profile makes them a conversation starter at gatherings. Their popularity is a testament to the recipe’s undeniable appeal.
- Ingredient Quality: Using real butter, unsweetened cocoa, and cream cheese ensures depth and richness. Each component is chosen for its ability to contribute to the overall flavor and texture. The result is a cookie that feels indulgent without being overly sweet.
- Method: Baking at a precise temperature for the perfect balance of crisp and chewy. The oven’s heat is calibrated to set the edges while preserving the interior’s moisture. This meticulous approach guarantees consistent results every time.
- Make-Ahead: These cookies freeze well and can be baked fresh on demand, making them ideal for parties. The dough holds its shape, and the frosting remains creamy after freezing. This flexibility makes the recipe a go-to for last‑minute celebrations.
Inside the Ingredient List
Before you even crack an egg, it pays to understand why each component matters. The ingredients in this recipe are carefully selected to create a balance of flavor, texture, and visual appeal. Skipping or substituting any of them will change the cookie’s character in ways that can be subtle or dramatic. Below, I break down the lineup into four groups, each with its own purpose and tips for swapping if you’re feeling adventurous.
The Flavor Base
All-purpose flour is the foundation that gives the cookie structure. Its protein content allows the dough to hold together while still yielding a tender crumb. If you’re looking for a gluten-free version, a blend of rice flour and potato starch can mimic the same texture, though the flavor will be slightly altered. For a healthier twist, replace half the flour with whole wheat, but expect a denser cookie.
Unsweetened cocoa powder adds depth and a subtle bitterness that balances the sugar. The amount of cocoa determines how chocolatey the cookie feels; if you prefer a milder taste, reduce the cocoa to a third of the original quantity. However, keep the ratio of cocoa to flour consistent to avoid a gummy texture. When choosing cocoa, opt for a fine grind to ensure it dissolves evenly.
Baking soda is the leavening agent that creates lift and a slightly airy interior. It reacts with the buttermilk to produce carbon dioxide, giving the cookie its characteristic rise. If you’re in a region with hard water, consider adding a pinch of baking powder to compensate. A small change can make a noticeable difference in texture.
The Texture Crew
Unsalted butter, softened, provides richness and helps achieve a tender crumb. Butter’s high fat content coats the flour proteins, preventing gluten formation that would otherwise make the cookie tough. For an even richer flavor, use European-style butter, which contains a higher percentage of milk solids.
Granulated sugar is the sweetener that caramelizes during baking, creating a golden crust. It also contributes to the cookie’s structure by absorbing moisture. If you’re aiming for a lower glycemic index, swap half the sugar for a natural sweetener like honey or maple syrup, but adjust the liquid slightly to compensate for the added moisture.
Large eggs bind the dough together and add moisture. The yolk’s fats help create a tender crumb, while the white’s proteins provide structure. For a vegan version, replace eggs with flaxseed meal or chia seeds mixed with water; the result will be slightly denser but still delicious.
The Unexpected Star
Buttermilk adds acidity that reacts with baking soda, creating lift and a moist interior. Its tangy flavor also balances the sweetness of the sugar. If you don’t have buttermilk, mix regular milk with a tablespoon of lemon juice or white vinegar; let it sit for five minutes to curdle slightly before using.
Red food coloring brings the signature hue that defines red velvet. While synthetic dyes are common, I prefer natural alternatives like beet juice or pomegranate powder, which also add a subtle fruity note. If you’re sensitive to dyes, you can reduce the amount by half, but the color will be less vibrant.
For the frosting, cream cheese provides a tangy counterpoint to the sweet cookie. Its high fat content gives the frosting a smooth, luxurious mouthfeel. If you’re allergic to dairy, a dairy-free cream cheese or a blend of coconut cream and lemon juice can mimic the same tang and texture.
The Final Flourish
Unsalted butter used in the frosting adds richness and helps the glaze set into a silky consistency. It also balances the cream cheese’s acidity, preventing the frosting from being too tart. A small amount of powdered sugar, sifted for smoothness, sweetens the glaze without making it overly sweet.
Vanilla extract is the flavor enhancer that ties all the ingredients together. It adds warmth and depth, preventing the cookie from tasting flat. If you prefer a nutty undertone, try almond extract in place of vanilla, but use half the amount to avoid overpowering the other flavors.
Finally, the second tablespoon of vanilla in the frosting brings a subtle sweetness that complements the cream cheese’s tang. This dual use of vanilla ensures that both the cookie and frosting have a cohesive flavor profile. If you’re experimenting, consider adding a pinch of sea salt to the frosting for a savory twist.
The Method — Step by Step
- Preheat your oven to 350°F (177°C) and line a baking sheet with parchment paper. The parchment prevents sticking and ensures even heat distribution. While the oven warms, gather all your ingredients so you can move swiftly through the process. A well‑heated oven is the secret to that perfect golden crust. If you’re using a convection oven, reduce the temperature by 25°F to avoid over‑browning.
- Whisk the flour, cocoa powder, baking soda, and salt in a large bowl. This dry mix ensures the leavening agent is evenly distributed throughout the batter. It also helps you avoid clumps when you later add the wet ingredients. A fine sieve can further smooth the mixture, but it’s optional. Once the dry mix is ready, set it aside for the next step.
- In a separate bowl, cream the softened butter and granulated sugar until light and fluffy. Use an electric mixer on medium speed for about three minutes; the mixture should double in volume. The creaming process incorporates air, which contributes to a lighter cookie. Be careful not to over‑mix, or the butter may become too warm and lose its structure. A clean, dry bowl will help maintain the right consistency.
- Beat in the eggs one at a time, followed by the vanilla extract. Each egg should be fully incorporated before adding the next to keep the batter smooth. The vanilla adds warmth that balances the chocolate and buttermilk. A splash of almond extract can give a nutty undertone if you’re feeling adventurous. Let the mixture sit for a minute to allow the flavors to meld before moving on.
- Combine the dry mixture with the wet mixture in two stages. First, stir in half of the dry blend, then add the remaining half. This gradual incorporation prevents lumps and ensures a smooth batter. The dough should be thick but scoopable; if it’s too sticky, add a tablespoon of flour. Once the batter is uniform, proceed to the next step.
- Fold in the buttermilk, red food coloring, and a pinch of salt. The buttermilk’s acidity reacts with baking soda, creating lift. The food coloring should be added gradually; it’s easier to add more than to remove excess color. The pinch of salt balances the sweetness and enhances the chocolate flavor. Keep the batter well mixed, but avoid over‑stirring to preserve air pockets.
- Scoop tablespoon‑sized balls of dough onto the prepared sheet. Space them about two inches apart to allow for spreading. The dough will flatten slightly during baking, creating a crisp edge. Use a cookie scoop for uniform size, which ensures even baking. If you’re making a large batch, you can double the sheet size to accommodate more cookies.
- Bake for 12–14 minutes, or until the edges are set and the centers still look slightly underdone. The cookies should rise a bit and then level out. Remove from the oven and let them cool on the sheet for five minutes before transferring to a wire rack. This cooling period allows the cookies to set fully without cracking. If you prefer a chewier center, pull them out a minute early.
- While the cookies cool, prepare the cream cheese frosting. Beat the cream cheese, unsalted butter, powdered sugar, and vanilla extract until silky smooth. The frosting should be thick enough to coat the cookies but still spreadable. If it’s too thick, add a teaspoon of milk to reach the desired consistency. Once ready, drizzle or pipe onto the cooled cookies and let set.
Once the frosting has set, the cookies are ready to be devoured or stored for later indulgence.
Insider Tricks for Flawless Results
The Temperature Rule Nobody Follows
Most bakers think a higher temperature means a crispier cookie, but it actually burns the edges before the center cooks. Stick to 350°F, but if your oven runs hot, adjust by 10–15°F down. A calibrated thermometer will help you maintain consistency. Remember, a slightly lower temperature yields a more even bake.
Why Your Nose Knows Best
Smell is a powerful indicator of doneness; a warm, buttery aroma signals readiness. When the cookies emit a faint scent of toasted sugar, they’re about to reach perfection. Trust your nose over the clock—if it smells right, they’re ready to cool. A quick sniff test can save you from over‑baking.
The 5‑Minute Rest That Changes Everything
Letting the cookies rest on the sheet for five minutes before moving them to a rack allows the structure to set. During this time, the moisture redistributes, preventing cracks. It also gives the frosting a chance to firm up slightly, making it easier to handle. Skipping this step can lead to a soggy center.
Using the Right Mixing Speed
When creaming butter and sugar, start on low speed to prevent flour from flying. Increase to medium once the mixture is light, then switch to high for the final mix. High speed can incorporate too much air, leading to a cakey texture. Find the sweet spot for your mixer to get the perfect crumb.
Storing the Dough
If you’re planning ahead, you can refrigerate the dough for up to 48 hours. The cold slows down the leavening reaction, so bake at 10°F higher to compensate. The dough will hold its shape, and the flavor will deepen. This is ideal for holiday parties where you need to prep in advance.
Frosting the Right Way
Always chill the frosting for at least 30 minutes before applying. A chilled glaze spreads more easily and sets faster, preventing it from running off the cookies. If the frosting is too soft, add a tablespoon of powdered sugar. Keep the frosting in a cool place until ready to use.
Creative Twists and Variations
This recipe is a playground. Here are some of my favorite ways to switch things up:
Chocolate‑Chip Red Velvet
Fold in a cup of semi‑sweet chocolate chips just before baking. The chips melt slightly, creating pockets of gooey chocolate. This variation is perfect for chocolate lovers and adds a textural contrast. The chips also enhance the chocolate flavor without overwhelming the red velvet base.
Almond‑Infused Cookies
Replace half the butter with almond butter for a nutty undertone. The almond butter also adds a subtle sweetness that pairs well with the tangy frosting. Toast the almond butter for a deeper flavor profile. Serve with a drizzle of honey for an extra layer of richness.
Minty Velvet
Add a teaspoon of peppermint extract to the batter for a refreshing twist. The mint pairs beautifully with the chocolatey base and creates a cooling aftertaste. Use a light green food coloring to hint at the mint theme. This version is great for summer gatherings.
Salted Caramel Swirl
Swirl a caramel sauce into the batter before baking. The caramel caramelizes, creating a sweet, buttery swirl throughout the cookie. Sprinkle sea salt on top before baking for a salty‑sweet contrast. This version is a hit at brunches and dessert tables.
Vegan Velvet
Swap butter for coconut oil and use a plant‑based milk. Replace eggs with flaxseed meal mixed with water to bind the dough. Use a dairy‑free cream cheese alternative for frosting. The result is a cookie that’s almost identical in flavor and texture, but free from animal products.
Spiced Velvet
Introduce a pinch of ground cinnamon and nutmeg to the batter. The spices add warmth and depth, especially in the fall season. Keep the spices subtle to avoid overpowering the chocolate. This version pairs well with a spiced latte or a cup of hot cocoa.
Storing and Bringing It Back to Life
Fridge Storage
Store cooled cookies in an airtight container at room temperature for up to five days. The cookies will stay moist and fresh if you keep them away from direct sunlight. If you notice the frosting starting to soften, place the container in the fridge for a few hours to firm it up again. For best results, add a slice of bread to the container; it absorbs excess moisture.
Freezer Friendly
Wrap each cookie individually in plastic wrap before placing them in a freezer bag. Freeze for up to three months. When ready to enjoy, let them thaw at room temperature for 15 minutes before reheating. The cookies will retain their texture and flavor, making them a convenient treat for busy days.
Best Reheating Method
Preheat your oven to 300°F (149°C) and place the cookies on a parchment‑lined sheet. Warm them for eight minutes, checking for a slight puff. The brief reheating restores the crisp edges while keeping the centers tender. Add a tiny splash of water to the baking sheet to create steam, which helps maintain moisture.