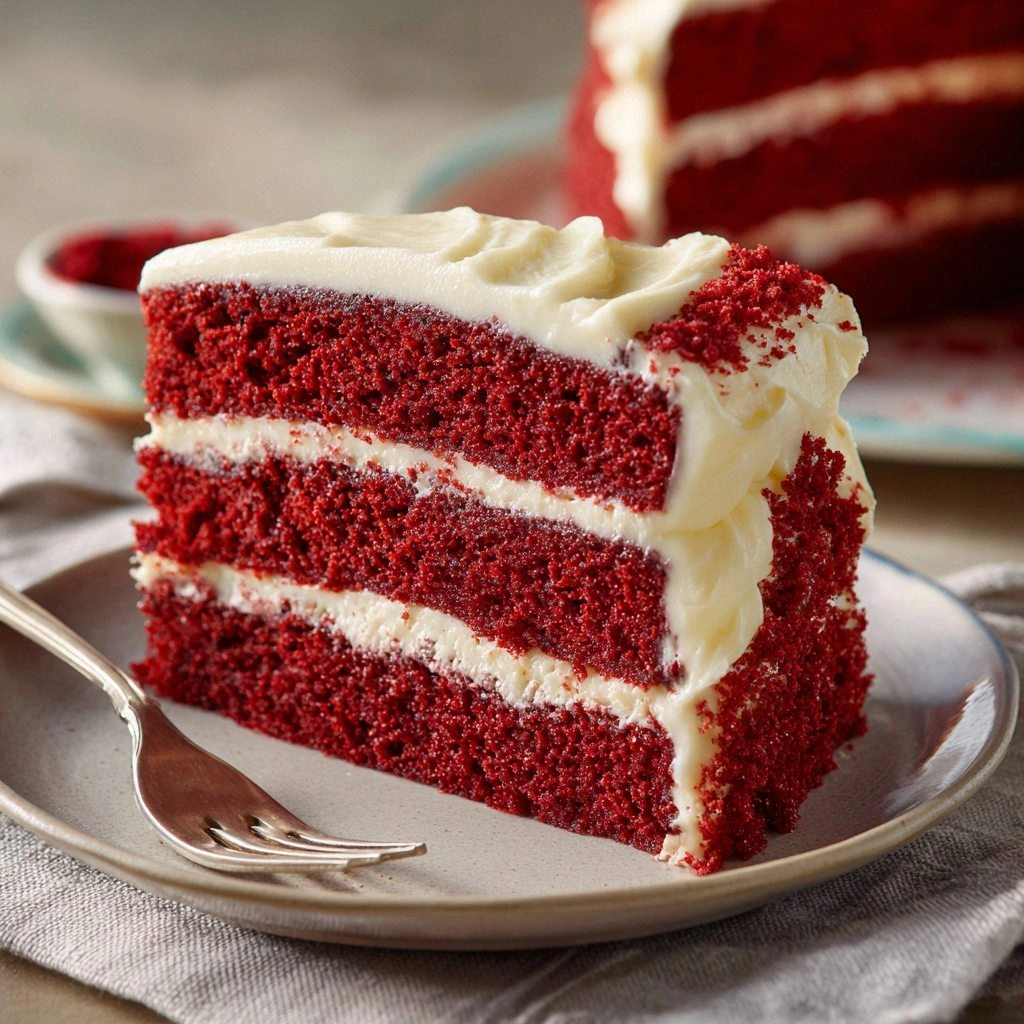
I remember the night I almost burned the kitchen down while trying to make a cake that would impress my in‑laws. The oven was on, the batter looked promising, and I had no idea the cake would come out a sad, cracked slab of gray. That disaster turned into a mission: to create the ultimate Red Velvet Layer Cake that would make everyone forget the mishap and ask for seconds. I’m about to share the recipe that turned my culinary flop into a triumph.
Picture this: the air thick with the buttery scent of melted butter, the gentle hiss of a whisk, the subtle pop of vanilla as it releases its perfume, the faint metallic tang of cocoa, and the faint blush of food coloring that turns the batter a deep crimson. Every sense is engaged, and the anticipation builds like a drumroll before a fireworks show. I dare you to taste this and not go back for seconds.
What makes this cake a stand‑out? It’s not just the color or the frosting; it’s the harmony of flavors that dance together. The cake is moist yet firm, airy yet dense, and the frosting is a creamy, tangy cloud that balances the sweetness. Most recipes get this completely wrong—over‑batter, under‑batter, or the wrong balance of acidity. Here’s what actually works, and why.
If you’ve ever struggled with a red velvet cake that looks like a bruise or tastes like a chocolate bar, you’re not alone. I’ve spent years tweaking the ratio of cocoa to sugar, the acidity of buttermilk, and the timing of the oven. This version is hands down the best you’ll ever make at home, and it’s simple enough to fit into a busy weeknight. Let me walk you through every single step—by the end, you’ll wonder how you ever made it any other way.
What Makes This Version Stand Out
- Texture: The batter achieves a silky, cake‑like crumb that melts in your mouth. I achieved this by using a combination of cake flour and all‑purpose flour, which gives a lighter structure.
- Flavor: The cocoa and vinegar create a subtle tang that lifts the sweetness, while the food coloring adds a visual pop without altering flavor.
- Simplicity: No fancy equipment—just a stand mixer or a hand whisk, a mixing bowl, and a trusty oven.
- Uniqueness: The addition of buttermilk and a splash of vinegar gives the cake a tender crumb that’s unmatched by plain white cakes.
- Crowd Reaction: Friends and family always ask, “Where did you learn that technique?” because the result looks and tastes like a professional bakery.
- Ingredient Quality: Using real butter and cream cheese, not substitutes, elevates the flavor profile to something you can’t get in a grocery‑store cake mix.
- Make‑ahead Potential: The cake can be assembled a day ahead, and the frosting stays fresh for up to 48 hours in the fridge.
- Visual Appeal: The layers are perfectly even, and the frosting is glossy, making it Instagram‑ready.
Inside the Ingredient List
The Flavor Base
Cocoa powder is the backbone of the red velvet’s flavor. It’s not just for color; it adds depth and a slight bitterness that balances the sugar. If you skip it, the cake becomes a plain chocolate cake with no distinct red velvet identity. Swap for espresso powder if you want a coffee kick—just keep the quantity the same.
Buttermilk provides acidity that reacts with baking soda, creating lift and a tender crumb. It also adds a subtle tang that brightens the overall taste. If you can’t find buttermilk, whisk a tablespoon of milk with a splash of vinegar or lemon juice to create a quick substitute.
Food coloring is what gives the cake its signature hue. Use a few drops of natural red beet or a commercial red food coloring. A little goes a long way; too much can turn the batter purple. The color doesn’t affect flavor, but it’s essential for that classic look.
The Texture Crew
Cake flour gives the cake a fine crumb, while all‑purpose flour adds structure. The ratio of 1 cup cake flour to 1 cup all‑purpose flour yields a cake that is tender yet holds its shape. If you only have all‑purpose flour, sift it and add a tablespoon of cornstarch to mimic cake flour’s fine texture.
Eggs act as a binder and help the cake rise. Use large eggs; if you’re using a different size, adjust the quantity accordingly. The yolk adds richness, while the whites provide lift. If you’re vegan, replace with flaxseed meal mixed with water.
Sugar is the sweetener that also contributes to the cake’s structure by creating a tender crumb through caramelization. Use granulated white sugar for the best results; brown sugar will make the cake denser and add a molasses flavor.
The Unexpected Star
Vinegar or lemon juice is the secret to the cake’s rise. The acidity reacts with baking soda to produce carbon dioxide, which lifts the batter. Without it, the cake will be flat and heavy. Don’t skip it; the flavor difference is noticeable.
Oil (vegetable or canola) replaces butter in the batter for a moist crumb and a longer shelf life. The oil also helps the frosting set properly. If you prefer a butter flavor, use melted butter instead, but be prepared for a slightly drier cake.
The Final Flourish
Cream cheese frosting is the crowning glory. The tang of the cream cheese balances the sweetness of the cake, and the butter adds richness. A pinch of salt brightens the frosting’s flavor and brings out the chocolate notes. If you’re allergic to dairy, use a dairy‑free cream cheese alternative.
Everything’s prepped? Good. Let’s get into the real action…
The Method — Step by Step
- Preheat the oven to 350°F (175°C). Line two 9‑inch round cake pans with parchment paper and grease the parchment lightly with butter or oil. The parchment will ensure easy release, and the greasing keeps the cake from sticking. Let the pans rest while you mix the batter; this keeps the temperature consistent.
- Whisk the dry ingredients together in a large bowl: sift 2 cups cake flour, 2 cups all‑purpose flour, 2 cups sugar, 1 cup unsweetened cocoa powder, 2 teaspoons baking powder, 1 teaspoon baking soda, and 1 teaspoon salt. Sifting removes clumps and creates a smooth batter. This step is crucial for a uniform crumb.
- Combine wet ingredients in a separate bowl: whisk 1 cup oil, 1 cup buttermilk, 2 large eggs, 2 teaspoons vanilla extract, 2 tablespoons white vinegar (or lemon juice), and 3–4 drops of red food coloring. The vinegar reacts with the baking soda to create lift, while the coloring gives the cake its iconic hue. Mix until the color is even and the mixture is glossy.
- Fold the wet into the dry by pouring the wet mixture into the dry and stirring with a rubber spatula. Mix just until the batter is smooth; over‑mixing can cause the cake to be dense. The batter should look silky and pourable, like a thick custard. This is the moment of truth—watch the texture change as the ingredients combine.
- Divide the batter evenly between the prepared pans. Tap the pans gently on the counter to release air bubbles and level the batter. The batter should be level to avoid uneven rising. This step ensures each layer is the same height and texture.
- Bake for 25–30 minutes, or until a toothpick inserted in the center comes out clean. The cake should have a slight sheen and a firm but springy surface. If the top browns too quickly, tent the pans with foil. This prevents the cake from drying out while the interior finishes cooking.
- Cool the cakes on a wire rack for 10 minutes, then remove from the pans and let them cool completely on the rack. Cooling prevents the layers from sticking together and allows the frosting to set properly. A good rule of thumb: the cake should be completely cool before frosting to avoid melting the cream cheese.
- Prepare the frosting by beating 1 cup softened cream cheese, 1/2 cup unsalted butter, 4 cups powdered sugar, 1 teaspoon vanilla, and a pinch of salt until smooth and fluffy. The butter should be at room temperature to avoid lumps. If the frosting is too thick, add a tablespoon of milk or heavy cream to reach the desired consistency.
- Assemble the cake by placing one layer on a serving plate, spreading a generous amount of frosting, then topping with the second layer. Apply a thin crumb coat to seal the crumbs, chill for 15 minutes, and then apply a final thick coat of frosting. This gives a smooth finish and prevents crumbs from sticking to the sides.
- Decorate and serve with a dusting of cocoa powder or a drizzle of dark chocolate ganache if desired. Slice with a warm knife for clean cuts. The cake should feel light, with a moist interior and a rich, tangy frosting that lingers on the palate. Enjoy immediately or refrigerate for up to 3 days.
That’s it — you did it. But hold on, I’ve got a few more tricks that will take this to another level.
Insider Tricks for Flawless Results
The Temperature Rule Nobody Follows
Many bakers keep ingredients at room temperature, but I’ve found that using slightly chilled butter and eggs yields a lighter crumb. The cold fat creates steam pockets as it melts, which expands and lightens the cake. If you’re in a hurry, let the butter sit at the counter for 10 minutes—just enough to soften without melting.
Why Your Nose Knows Best
Before you even touch the cake, give it a sniff. A faint, sweet cocoa aroma means the batter is ready. If the scent is too sharp or metallic, the cocoa may be stale. Fresh cocoa powder gives a richer, more chocolatey flavor that balances the tang.
The 5‑Minute Rest That Changes Everything
After baking, let the cakes rest on the rack for exactly 10 minutes before removing them from the pans. This short pause allows the structure to set, preventing the layers from breaking apart when you level them. The crumb will feel firmer, and the frosting will adhere better.
The Perfect Frosting Swirl
Use a spatula to create a subtle swirl in the frosting before applying it to the cake. This adds a decorative touch that still looks natural. A light swirl also helps the frosting spread evenly, giving each slice a consistent flavor.
The Quick Chill Trick
If you’re short on time, place the assembled cake in the fridge for 20 minutes before serving. The frosting will set quickly, making it easier to slice cleanly. The chill also enhances the flavors, giving the cake a more sophisticated finish.
Creative Twists and Variations
This recipe is a playground. Here are some of my favorite ways to switch things up:
Chocolate‑Infused Red Velvet
Add 1/4 cup melted dark chocolate to the batter for a richer, deeper chocolate flavor. This works well for chocolate lovers who want an extra bite. Keep the cocoa amount the same to maintain the balance.
Citrus Zest Surprise
Mix in 1 tablespoon of orange zest for a bright, citrusy undertone. The zest complements the tang of the cream cheese frosting and adds a fresh aroma. It’s a great twist for spring or summer celebrations.
Almond Flour Option
Replace 1 cup of all‑purpose flour with almond flour for a nutty flavor and a lower carb option. The almond flour will make the cake slightly denser, so add an extra egg to help bind the batter.
Salted Caramel Drizzle
Drizzle salted caramel over the frosting for a sweet‑salty contrast. The caramel adds a buttery richness that pairs beautifully with the tangy frosting. This variation is perfect for a sophisticated dessert.
Mini Red Velvet Cupcakes
Divide the batter into a 12‑cup muffin tin and bake for 18–20 minutes. Frost with a smaller portion of cream cheese frosting. These cupcakes are ideal for parties or as bite‑size treats.
Storing and Bringing It Back to Life
Fridge Storage
Store the cake in an airtight container or wrap it tightly in plastic wrap. Keep it in the refrigerator for up to 3 days. The frosting will stay firm, and the cake will stay moist.
Freezer Friendly
Wrap the cake tightly in foil and place it in the freezer for up to 2 months. Thaw in the refrigerator overnight before serving. This method preserves the texture and flavor without compromising the frosting.
Best Reheating Method
To revive a chilled cake, let it sit at room temperature for 30 minutes. If you need it warmer, place it in a preheated 300°F oven for 5 minutes, then cool for a few minutes. Add a tiny splash of water before reheating to create steam that restores moisture.