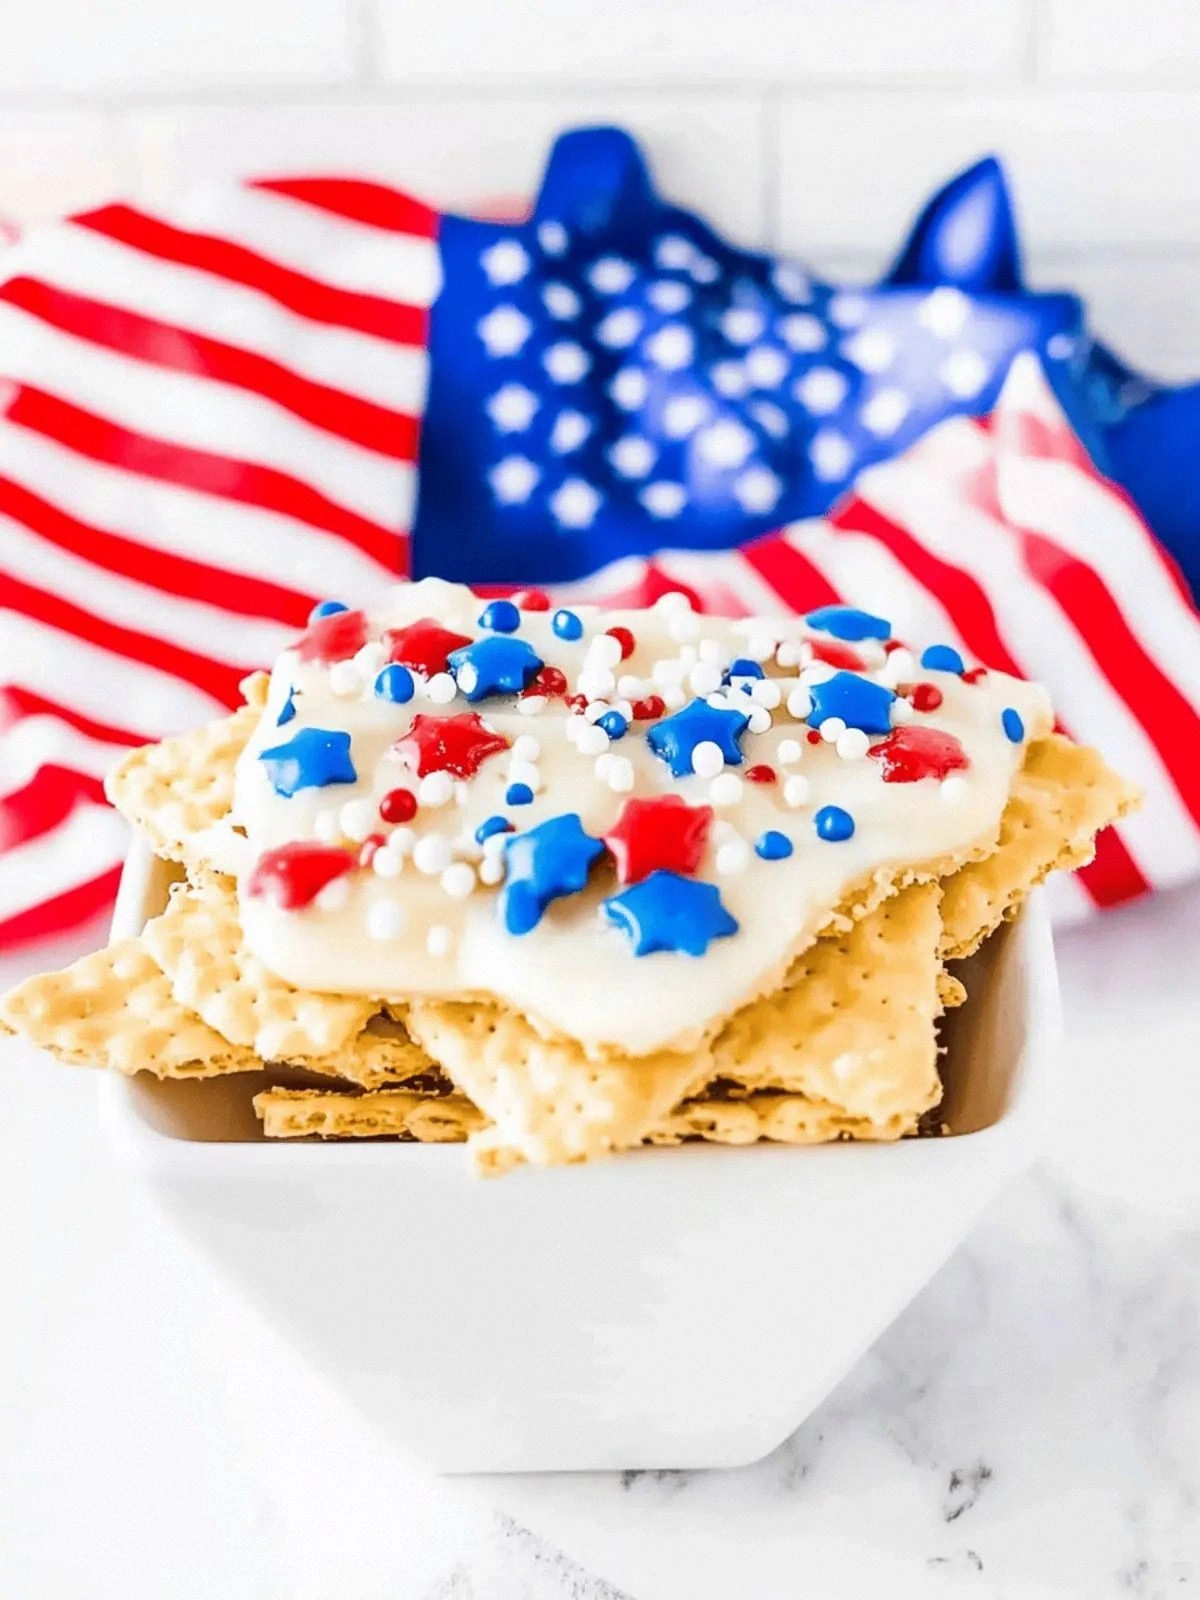
Red White & Blue Saltine Crack
I was staring at a box of plain saltine crackers in my kitchen, feeling the familiar tug of that mid‑afternoon craving for something sweet, salty, and utterly satisfying. The idea struck me like a lightning bolt: why not turn those humble crackers into a festive, toffee‑laden, crunchy delight that screams patriotism? I grabbed my skillet, set the stove to medium, and let the butter begin its slow, buttery symphony. The moment the butter melted, the sweet scent of brown sugar began to mingle, creating an aroma that felt like a summer picnic in a glass jar. This isn’t just a snack; it’s a declaration that the ordinary can become extraordinary.
Picture the first bite: a crisp crackle that shatters like thin ice, followed by a buttery caramel rush that coats your tongue like velvet. The white chocolate chips melt into a glossy sheen, while the red and blue M&Ms add a pop of color and crunch that feels like a confetti explosion. The sprinkles, with their playful sparkle, add a final layer of texture that makes each mouthful a multi‑sensory experience. It’s a dish that balances sweet, salty, and crunchy in perfect harmony, a little edible fireworks show that can’t be ignored. I dare you to taste this and not go back for seconds.
What makes this version stand out from every other saltine‑based treat out there? First, it’s the bold use of color—red, white, and blue—to create a patriotic aesthetic that turns a simple snack into a conversation piece. Second, the buttery toffee base is achieved through a meticulous caramelization process that yields a deep, complex flavor profile. Third, the addition of white chocolate chips adds a silky contrast that balances the caramel’s richness. Fourth, the M&Ms and sprinkles are layered strategically to provide distinct crunches without overpowering the base. Fifth, the recipe is designed to be made in one pot, minimizing cleanup while maximizing flavor. Finally, the result is a crunchy, chewy, and sweet snack that’s perfect for parties, holidays, or a cozy night in. This is hands down the best version you'll ever make at home.
And that’s not all—there’s a secret technique that will elevate the flavor to another level, one that I only discovered after a few trial runs. I’ll be honest—I ate half the batch before anyone else got a taste, and the kitchen smelled like a caramel‑butter dream for hours. If you've ever struggled with uneven caramelization, you're not alone, and I've got the fix. Stay with me here—this is worth it. Let me walk you through every single step—by the end, you'll wonder how you ever made it any other way.
What Makes This Version Stand Out
- Color: The strategic use of red, white, and blue not only appeals visually but also evokes a sense of celebration. The colors pop against the golden caramel base, making the snack a centerpiece at any gathering.
- Texture: Combining crisp crackers, chewy caramel, and crunchy M&Ms creates a multi‑layered mouthfeel that keeps the palate engaged. Each bite delivers a satisfying crackle followed by a melt‑in‑your‑mouth finish.
- Simplicity: With only six ingredients, this recipe is accessible to even the most novice cooks. The single‑pot method saves time and reduces cleanup.
- Flavor Depth: Caramelized butter and brown sugar form a rich base, while white chocolate chips provide a subtle sweetness that balances the saltiness of the crackers.
- Crowd Appeal: The festive colors and indulgent flavors make this snack a hit at family gatherings, tailgates, or movie nights.
- Make‑Ahead Potential: Once the base is set, the snack can be stored in an airtight container for up to a week, making it ideal for parties that require advance prep.
Alright, let's break down exactly what goes into this masterpiece...
Inside the Ingredient List
The Flavor Base
Salted butter is the backbone of this snack. It melts smoothly and infuses the crackers with a rich, savory undertone that balances the sweetness of brown sugar. If you skip the butter, the final product will lack depth and will feel flat. For a healthier twist, you can use clarified butter, but be prepared for a slightly different texture.
The Sweet Core
Brown sugar is the star of the show, caramelizing to create a deep amber hue and a complex, molasses‑like flavor. The sugar’s granularity helps it melt evenly, preventing gritty patches. If you prefer a lighter caramel, try using light brown sugar or a mixture of white and brown sugar.
The Unexpected Star
White chocolate chips add a silky, sweet finish that cuts through the caramel’s richness. They also melt into a glossy glaze that coats the crackers, giving them a shiny, irresistible appearance. If you’re allergic to dairy, you can substitute with dairy‑free white chocolate or white chocolate‑flavored chips.
The Final Flourish
Red and blue M&Ms and sprinkles are more than just decorative; they add crunch and a pop of color that turns the snack into a visual spectacle. The M&Ms also provide a burst of chocolate flavor that pairs perfectly with the caramel. If you’re looking for a gluten‑free version, opt for gluten‑free M&Ms and sprinkles that use alternative grains.
Everything's prepped? Good. Let's get into the real action...
The Method — Step by Step
- Heat a 10‑inch skillet over medium heat and add the salted butter. Let it melt completely, watching for the foamy surface that signals readiness. As the butter turns golden, the aroma will shift from plain to buttery sweet, a clear sign that the base is forming. Keep an eye on the butter; if it starts to brown too quickly, reduce the heat.
- Pour in the brown sugar, stirring constantly so it dissolves into the butter. The mixture should begin to bubble gently; this is the caramelization stage. If the sugar clumps, lower the heat and stir more slowly. This step is crucial for that deep amber flavor.
- Add the saltine crackers, tossing them in the caramel until each piece is coated. The crackers will sizzle as they hit the hot mixture, releasing a faint crunch that hints at the final texture. Stir for about 30 seconds, just enough to coat them without overcooking. This is the moment of truth.
- Reduce the heat to low and pour in the white chocolate chips, stirring until they melt into a glossy glaze. The chocolate should coat the crackers without forming clumps. This step adds a silky finish that balances the caramel’s intensity. If the chocolate starts to thicken, add a splash of milk to thin it out.
- Sprinkle the red and blue M&Ms over the mixture, letting them melt slightly into the caramel for a burst of chocolatey crunch. Then add the sprinkles, ensuring an even distribution across the surface. The M&Ms will soften, creating a chewy center, while the sprinkles provide a crisp finish. Watch the mixture; if it becomes too thick, lower the heat.
- Remove the skillet from the heat and pour the mixture onto a parchment‑lined baking sheet. Spread it out evenly, aiming for a thickness of about 1/4 inch. The thickness will dictate how crunchy the final product becomes; thinner layers yield a crispier texture.
- Let the mixture cool at room temperature for 10 minutes, then transfer it to the refrigerator for 30 minutes to set fully. The cooling phase allows the caramel to firm up and the chocolate to solidify, creating that perfect snap when you break it. If you’re in a hurry, a quick 5‑minute chill in a plastic bag works as well.
- Once set, cut the slab into bite‑sized squares using a sharp knife. The cutting should be clean; a dull blade will crush the delicate layers. This step ensures each piece is uniform, making for an even eating experience.
- Serve immediately or store in an airtight container for up to a week. The crunchy edges will stay crisp if stored in a dry place. If you notice any softening, re‑chill the snack for a few minutes to restore the snap.
That's it — you did it. But hold on, I've got a few more tricks that'll take this to another level...
Insider Tricks for Flawless Results
The Temperature Rule Nobody Follows
Caramelization is all about precise heat control. If the skillet is too hot, the sugar will burn, giving a bitter edge; too cool, and it will stay syrupy. I use a thermometer to keep the mixture between 320°F and 350°F. A simple trick is to sprinkle a drop of water; if it sizzles instantly, you’re good.
Why Your Nose Knows Best
Before you even taste, smell the caramel. A rich, buttery aroma with a hint of toasted sugar signals that you’re on the right track. If it smells burnt, pull the pan off the heat immediately. Your nose is the best judge of caramel perfection.
The 5‑Minute Rest That Changes Everything
After the initial cooling, let the slab rest for an extra five minutes before cutting. This short rest allows the caramel to set firmly, ensuring each bite has that satisfying snap. Skipping it can result in uneven textures.
Use a Cooling Rack for Even Texture
Placing the parchment sheet on a cooling rack lets air circulate around the slab, preventing a soggy bottom. The result is a uniformly crisp surface that’s a pleasure to bite into. If you don’t have a rack, a clean plate works, but the texture may be slightly uneven.
Freeze for Longer Shelf Life
If you need to store the snack for more than a week, freeze it in a single layer on a parchment sheet. Once frozen, transfer to a zip‑lock bag for up to three months. Thaw at room temperature for 30 minutes before serving to regain crispness.
Creative Twists and Variations
This recipe is a playground. Here are some of my favorite ways to switch things up:
Chocolate‑Covered Crunch
Dip the finished squares in melted dark chocolate for an extra layer of richness. Let the chocolate set on parchment before serving. The dark chocolate adds depth and a slightly bitter counterpoint to the sweetness.
Spiced Caramel Explosion
Add a pinch of cayenne pepper or a dash of cinnamon to the caramel stage. The spice introduces warmth and complexity, turning the snack into a spicy‑sweet treat. It’s perfect for those who like a bit of heat.
Nutty Variation
Toss in chopped pecans or walnuts before adding the chocolate chips. The nuts add crunch and a buttery flavor that complements the caramel. For a vegan version, use plant‑based nuts.
Minty Fresh
Replace the white chocolate chips with white chocolate chips infused with mint extract. The mint gives a refreshing aftertaste that pairs well with the caramel base. It’s a delightful twist for summer gatherings.
Salted Caramel Drizzle
Drizzle a thin layer of salted caramel sauce over the cooled slab before cutting. The caramel adds a glossy sheen and an extra sweet‑salty bite. It also helps the snack hold together better.
Vegan Version
Use dairy‑free butter and vegan white chocolate chips. Swap the regular M&Ms for vegan versions made with non‑dairy chocolate. The result is a plant‑based treat that still delivers on flavor and texture.
Storing and Bringing It Back to Life
Fridge Storage
Keep the snack in an airtight container at room temperature for up to one week. The airtight seal prevents moisture from softening the caramel. If you notice any softening, re‑chill the snack for 10 minutes before serving.
Freezer Friendly
Wrap the slab in parchment paper and place it on a baking sheet. Freeze until solid, then transfer to a zip‑lock bag. Store for up to three months. Thaw at room temperature for 30 minutes before cutting.
Best Reheating Method
To restore crispness, place the squares in a preheated oven at 300°F for 5 minutes. The heat will re‑crisp the edges without melting the caramel. Add a tiny splash of water before reheating to create steam that helps the surface stay crisp.